
How I Built a Quilt Display Cabinet for My Sewing Room
If you make quilts long enough, eventually you run into a very practical problem:
When purchasing through links on this site, I may earn an affiliate commission at no cost to you.
Where do you put all of them?
That was exactly the problem I was trying to solve when I designed the quilt cabinet in my sewing room.
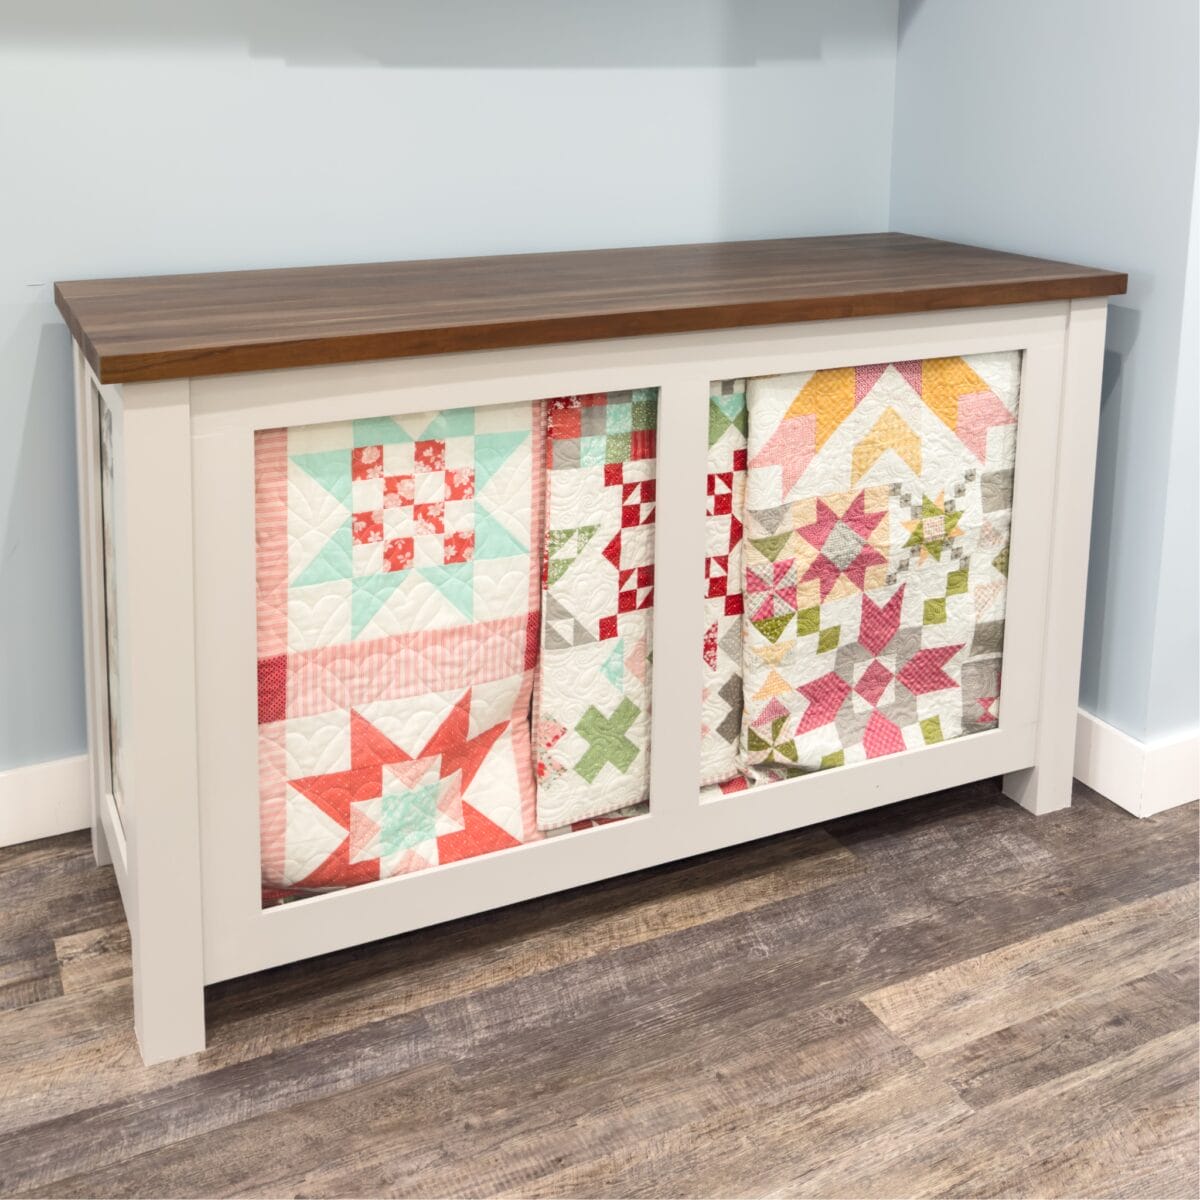
I had a long wall available, but there was a mini split mounted above it, which ruled out adding a tall cabinet. I needed something approximately counter height that could hold quite a few quilts without simply stacking them on shelves.
Since I’ve built quite a bit of furniture over the years, I decided to sketch out something myself.
And the quilt cabinet was born.
I Wanted to See the Quilts, Not Just Store Them
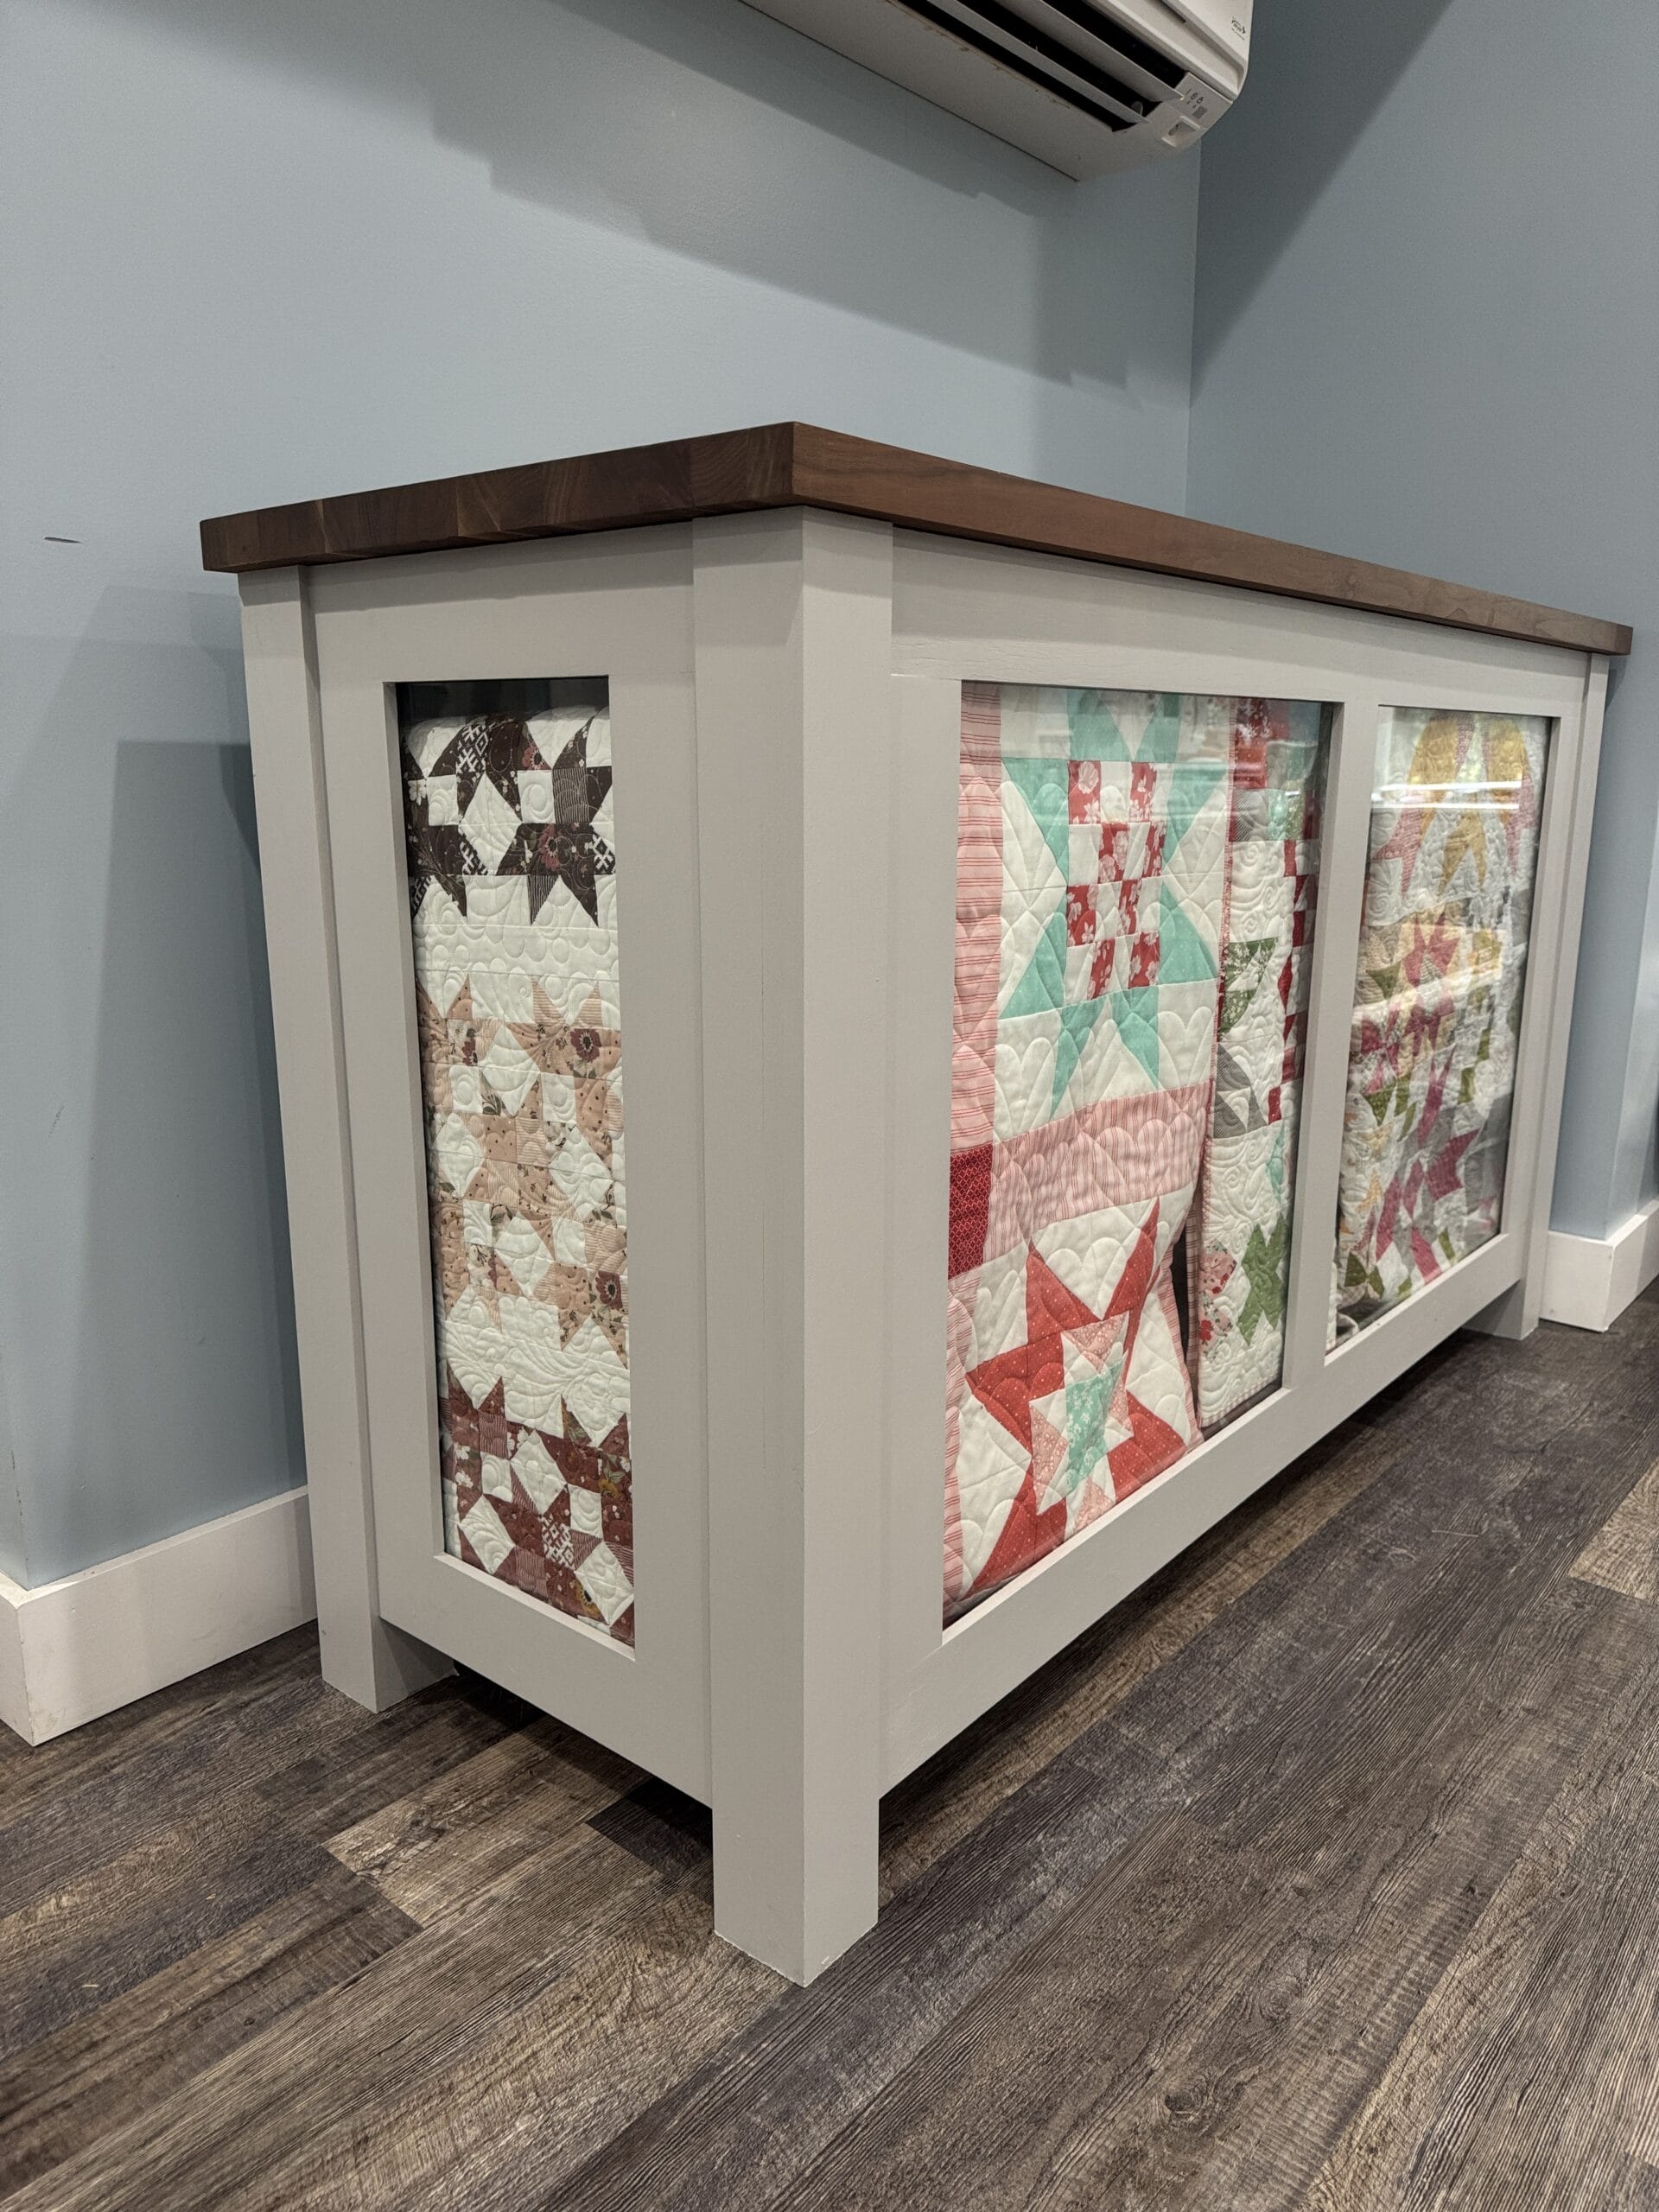
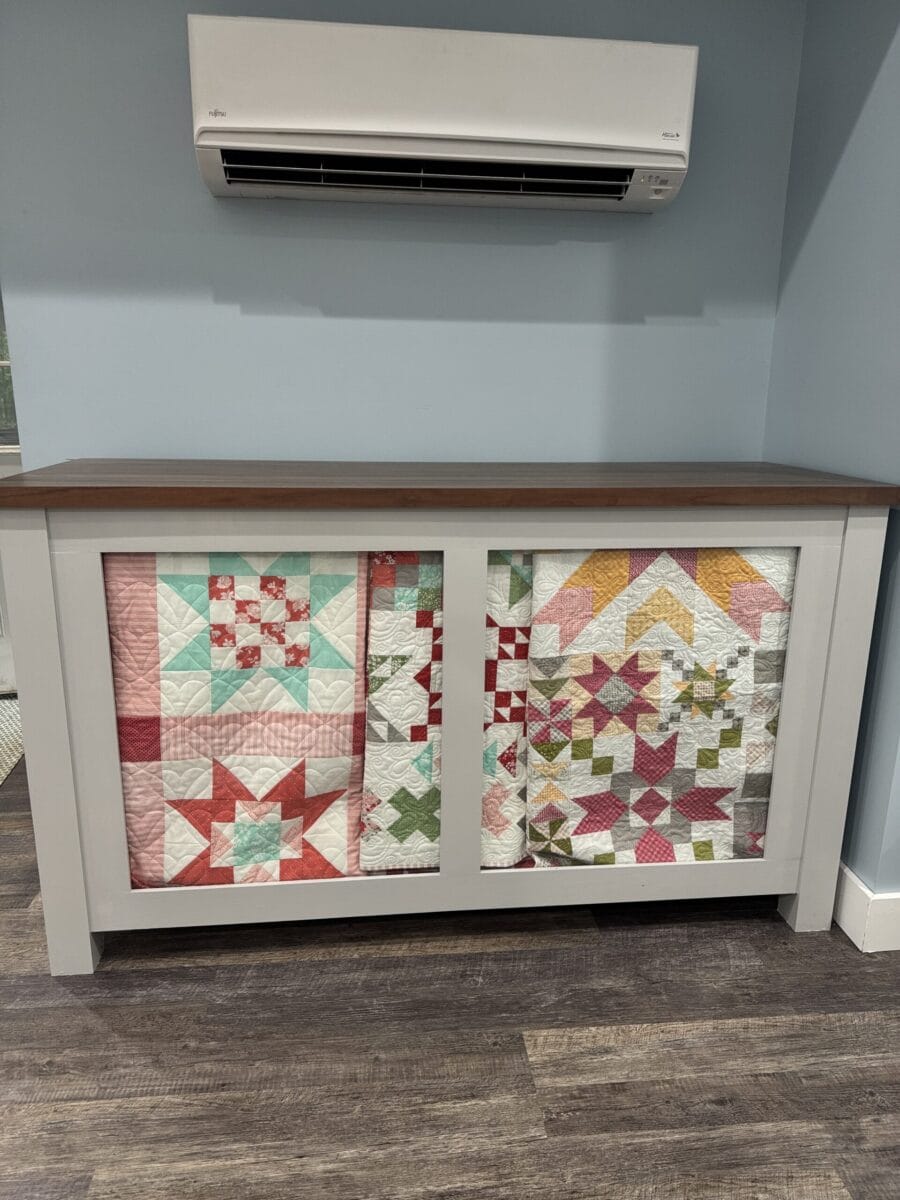
My biggest goal was to create storage that actually displayed the quilts.
I’ve seen cabinets where quilts are folded and stacked on shelves, and while that certainly works for storage, you usually only see a small folded edge of each quilt.
I wanted something different.
My original idea was to drape the quilts over rods running the opposite direction, so you’d see the edges of several quilts. Once I started building, though, I changed my mind.
I turned the rods so they ran lengthwise through the cabinet instead. That allowed me to position the quilts so much more of the actual fabric and patchwork would show through the front.
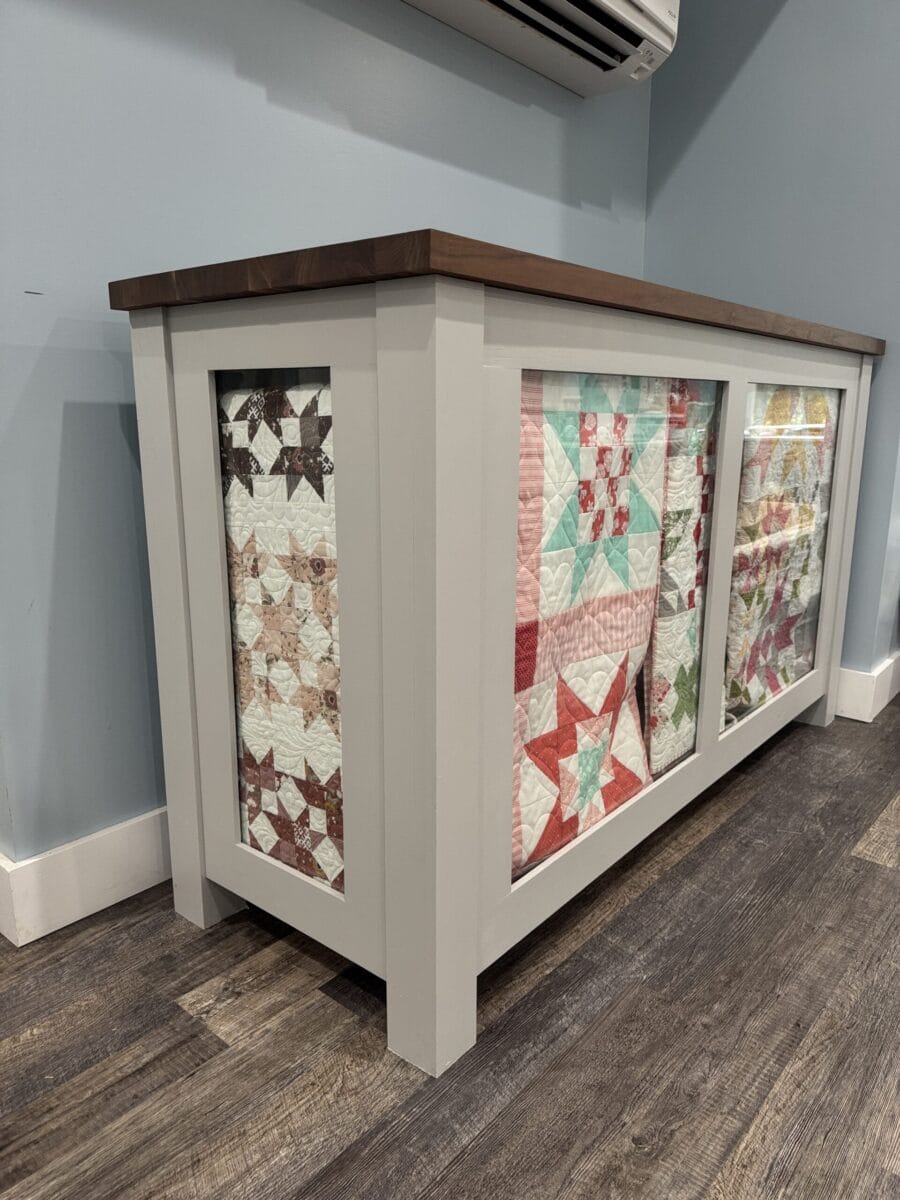
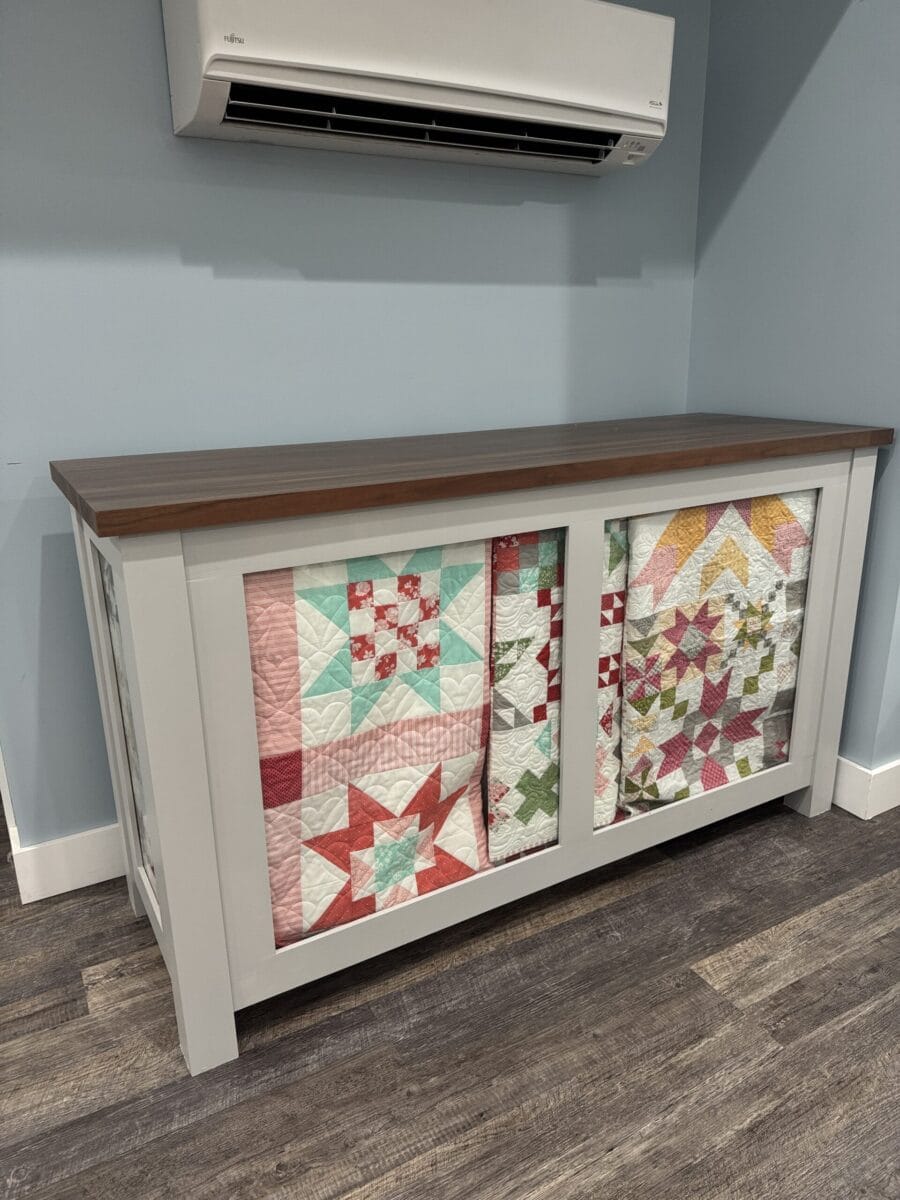
I added glass panels across the front and on both ends so the quilts could be seen from multiple directions.
It turned the cabinet into both quilt storage and quilt display.
Designed Specifically for My Sewing Room
The cabinet is approximately 72″ wide × 42″ high × 25″ deep.
Those dimensions weren’t random.
Six feet fit the wall I had available, and the depth lined up nicely with the approximately 25-inch depth of a standard countertop.
Instead of adding doors to the front, I decided to access the quilts through the top. The entire countertop is hinged and lifts open.
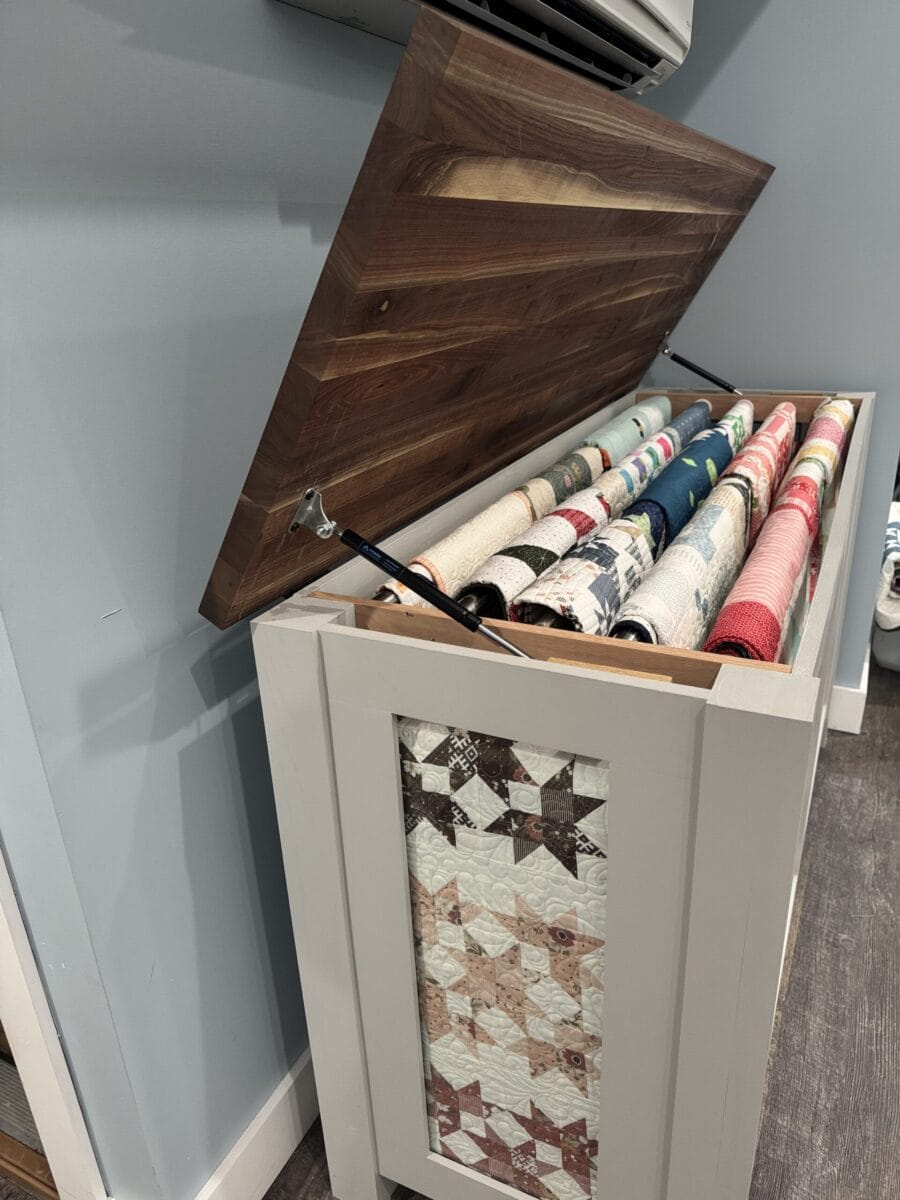
That also meant I could put a solid countertop on the cabinet and use it as an additional work surface when it was closed.
For mine, I chose a walnut butcher block countertop, which is beautiful—and very heavy!
Hydraulic lift hardware helps raise the top and hold it safely in the open position while I’m accessing the quilts.
How Many Quilts Does It Hold?
Quite a few!
There are five long rods inside the cabinet, and the amount you can store really depends on the sizes and weights of your quilts and how you fold them.
Several quilts can fit across an individual rod, and there is enough depth within the cabinet that quilts can also be layered on the rods when needed.
For display purposes, you can rotate which quilts are positioned toward the glass.
If the front and both ends of the cabinet are visible, you could easily feature four, five or six quilts at once depending on how they’re folded, while keeping additional quilts stored behind them.
That’s one of my favorite things about the cabinet. I can change the quilts I’m displaying without having to find another place to store everything that isn’t currently featured.
What I Used to Build My Quilt Cabinet
I built the cabinet primarily from red oak, which gave me a sturdy hardwood without making the lumber cost unreasonable.
I primed the finished cabinet and painted it with General Finishes Milk Paint in Seagull Gray, then topped it with the walnut butcher block.
I’ve now been using the cabinet for about three years, and overall, the design has worked extremely well.
One lesson I did learn was not to underestimate the weight of that butcher block top. My original piano hinge wasn’t sturdy enough, so good-quality, heavy-duty hardware is important.
Is This a Beginner Woodworking Project?
I wouldn’t consider this a first woodworking project.
The cabinet requires accurately breaking down sheet goods, keeping a large piece of furniture square, routing rabbets for the inset glass and making some more detailed cuts around the cabinet framing.
The hydraulic lift hardware also took some careful figuring to get the placement and lifting pressure correct for the heavy countertop.
For my build, I used tools including a table saw or track saw, miter saw, router, Kreg jig, drill and sander along with basic hand tools.
If you’re already comfortable building furniture and using those tools, though, it’s a very doable project.
Turning My Cabinet Into Woodworking Plans
After I shared my finished quilt cabinet on social media, I started getting a lot of questions about it.
One question came up over and over:
Do you have plans for this?
At the time, I didn’t.
I had my original sketches and measurements from figuring everything out as I built it, but nothing I could simply hand to someone else.
So I went back and turned my build into a complete set of downloadable woodworking plans.
The PDF includes the lumber and materials list, cutting measurements and diagrams, step-by-step assembly instructions, glass installation, quilt rod placement and measurements, hinged countertop and hydraulic lift installation, plus notes and tips based on building my original cabinet.
The plans are designed around the approximately 72″ × 42″ × 25″ cabinet I built, although an experienced woodworker could choose different materials or finishes to make it fit their own sewing space.
Three Years Later…
This is still one of my favorite pieces of furniture in my sewing room.
It solved the practical problem I started with—I needed somewhere to put a lot of quilts—but I especially love that they became part of the room instead of simply being stored away.
I can change which quilts are visible, enjoy fabrics and quilts I’ve made over the years, and still use the top of the cabinet as functional space in my sewing room.
And that’s much better than a pile of quilts hidden in a closet.
If you’d like to build your own, the complete Quilt Display Cabinet woodworking plans are available as an instant-download PDF in the Treeline Quilting shop.