How to Nest Seams Properly (And Why It Changes Everything)
If your intersections don’t line up…
If your points drift…
If your blocks measure correctly but still look slightly off…
When purchasing through links on this site, I may earn an affiliate commission at no cost to you.
The problem might not be your cutting.
It might be your seam nesting.
Nesting seams is one of the simplest accuracy tools in quilting — and one of the most powerful. When done correctly, it helps intersections lock together cleanly and keeps your block structure square and stable.
Let’s break down exactly what it is and how to do it correctly every time.
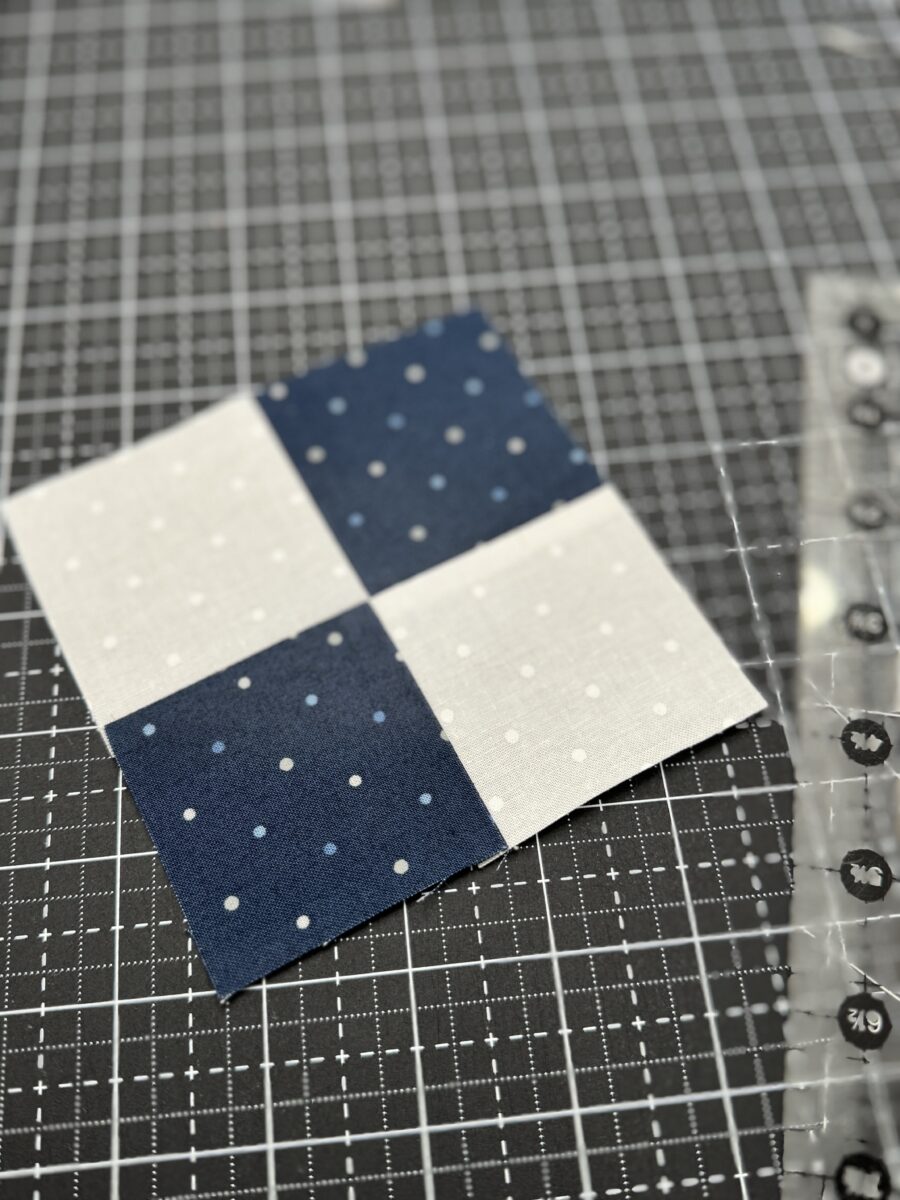
What Does It Mean to Nest Seams?
Nesting seams happens when two seam allowances are pressed in opposite directions so that when the units are placed right sides together, the seam allowances “butt” against each other instead of stacking.
Instead of creating a bulky lump, they interlock.
Properly Nested Seams:
This is especially important in blocks like four patch, nine patch, stars, and anything with intersecting seams.
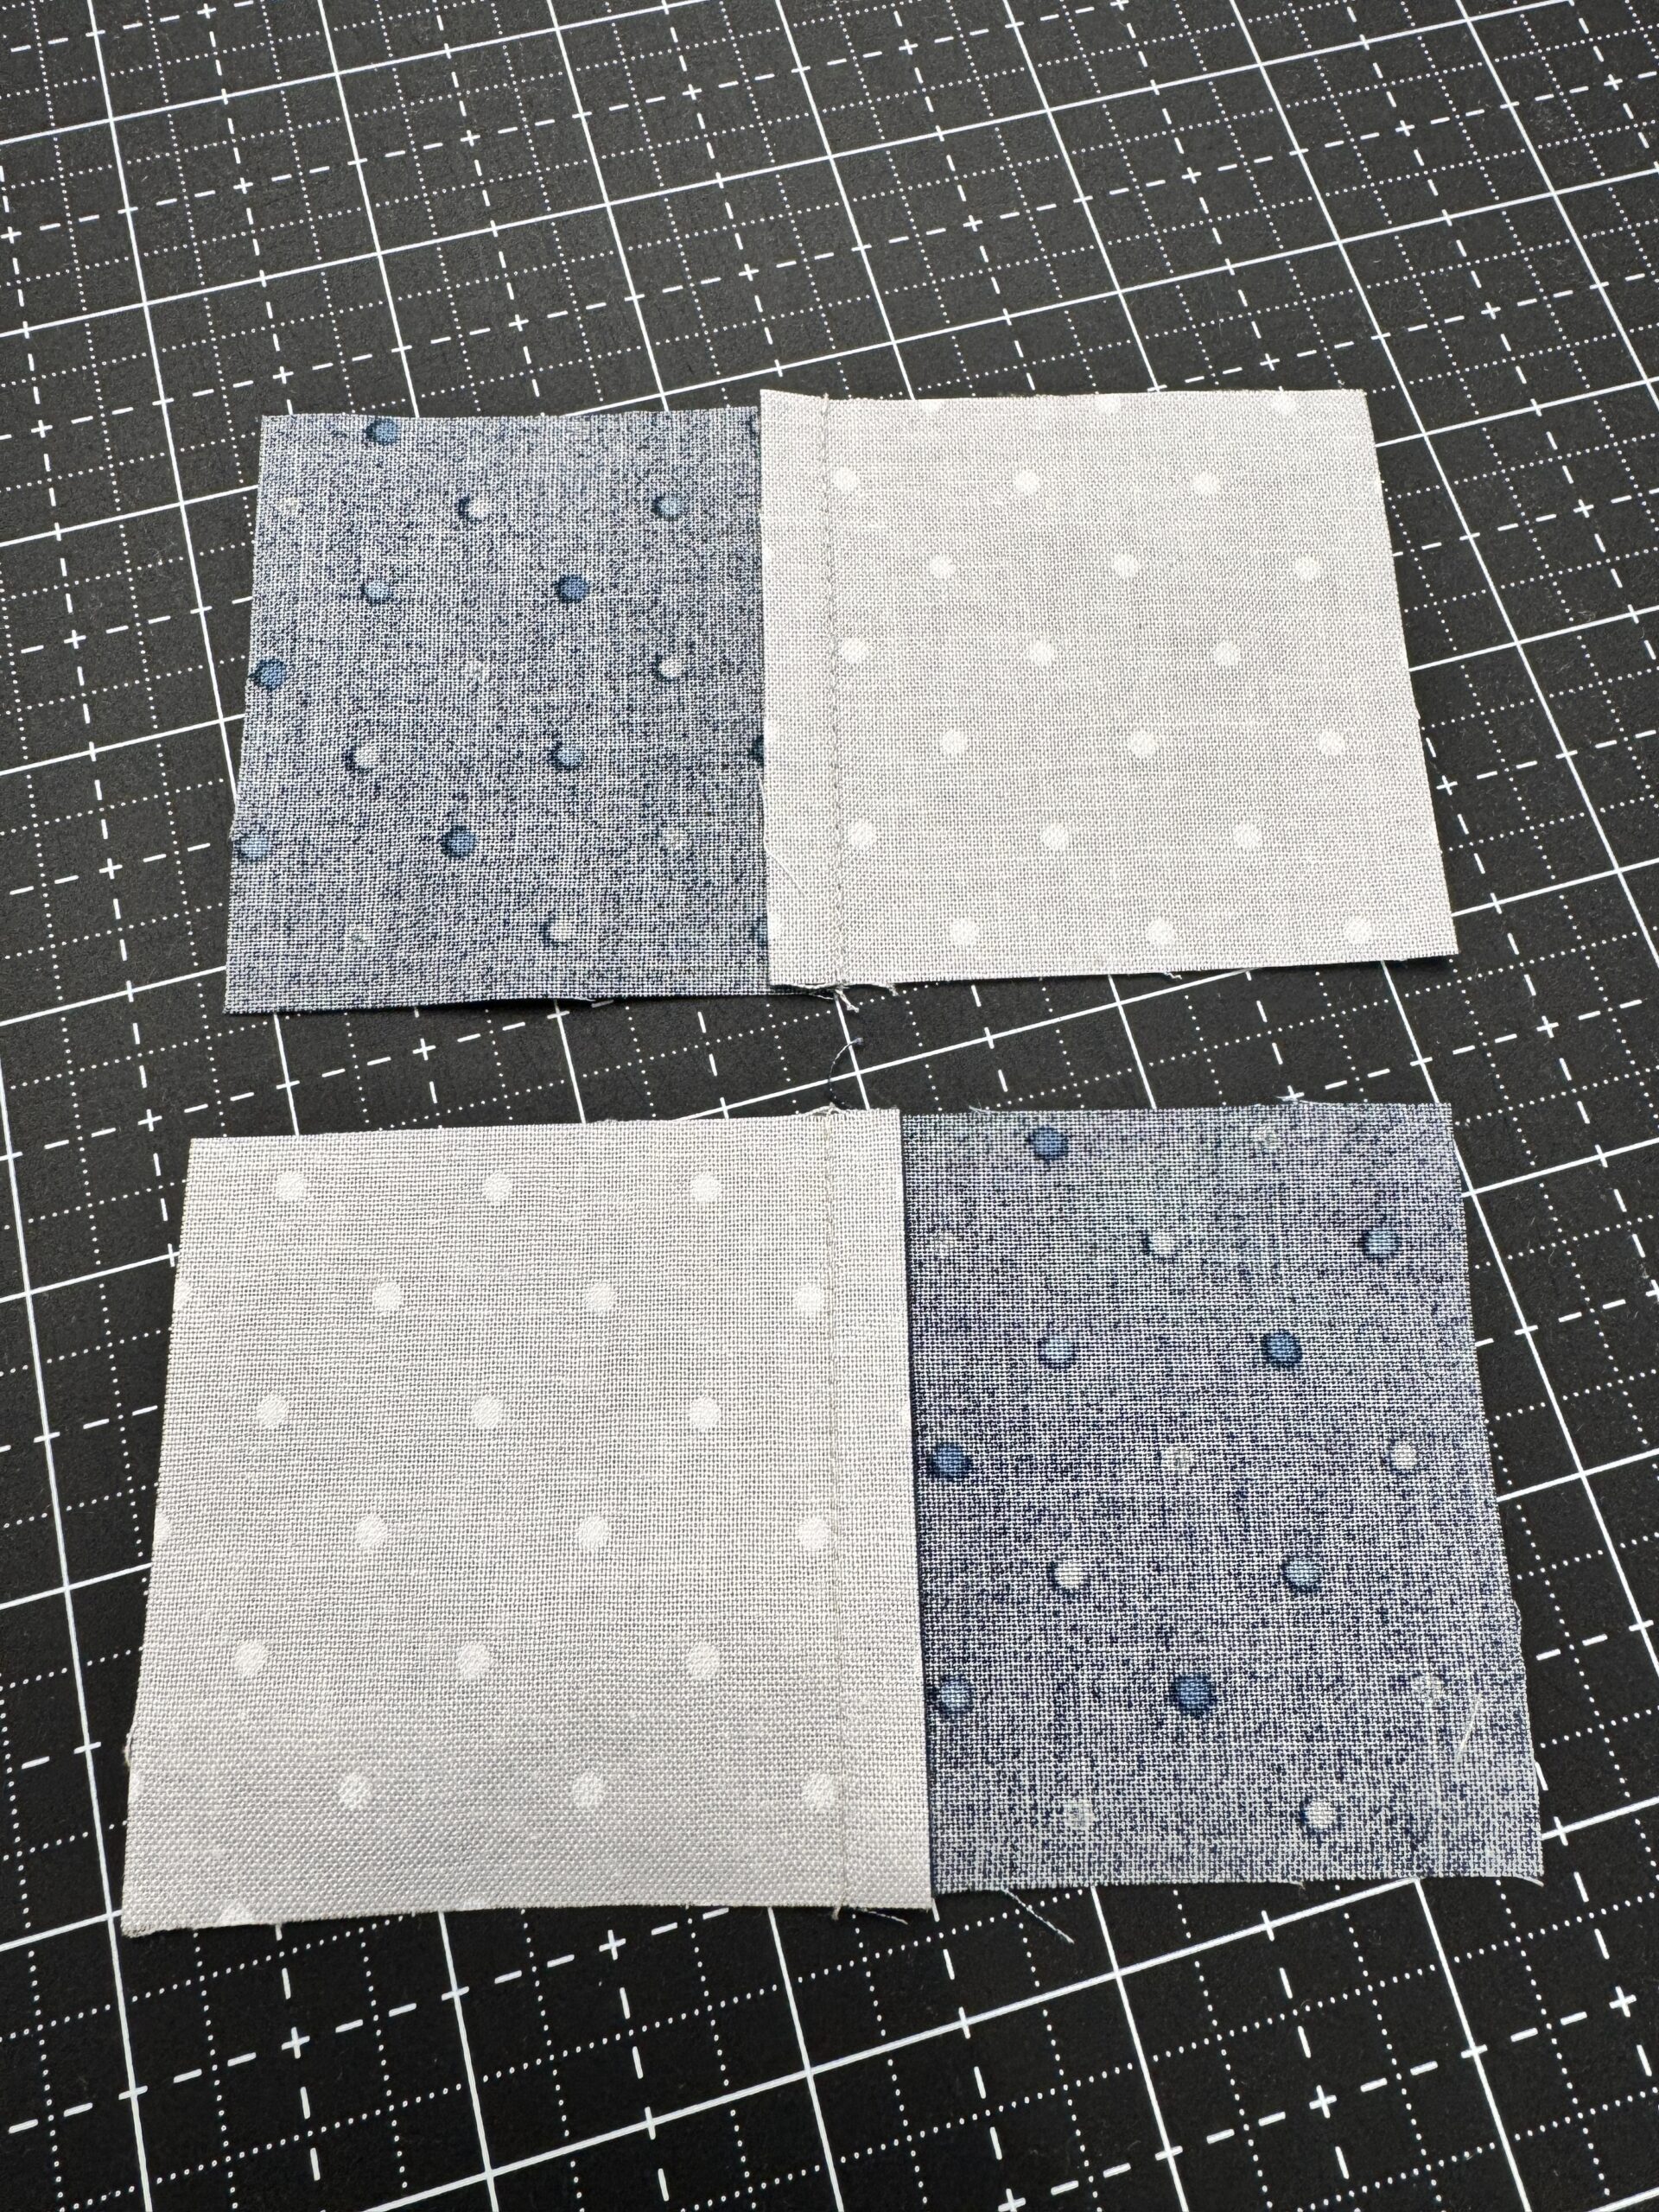
Why Opposite Pressing Matters
If both seam allowances are pressed in the same direction, they stack on top of each other. That creates extra thickness and makes it easier for fabric to slide out of alignment as it feeds through the machine.
When pressed in opposite directions, the seam allowances create a small ridge on each unit. When those ridges meet, they naturally “lock” together. That lock is what holds your intersection in place.
Pressing direction is not random. It is strategic.
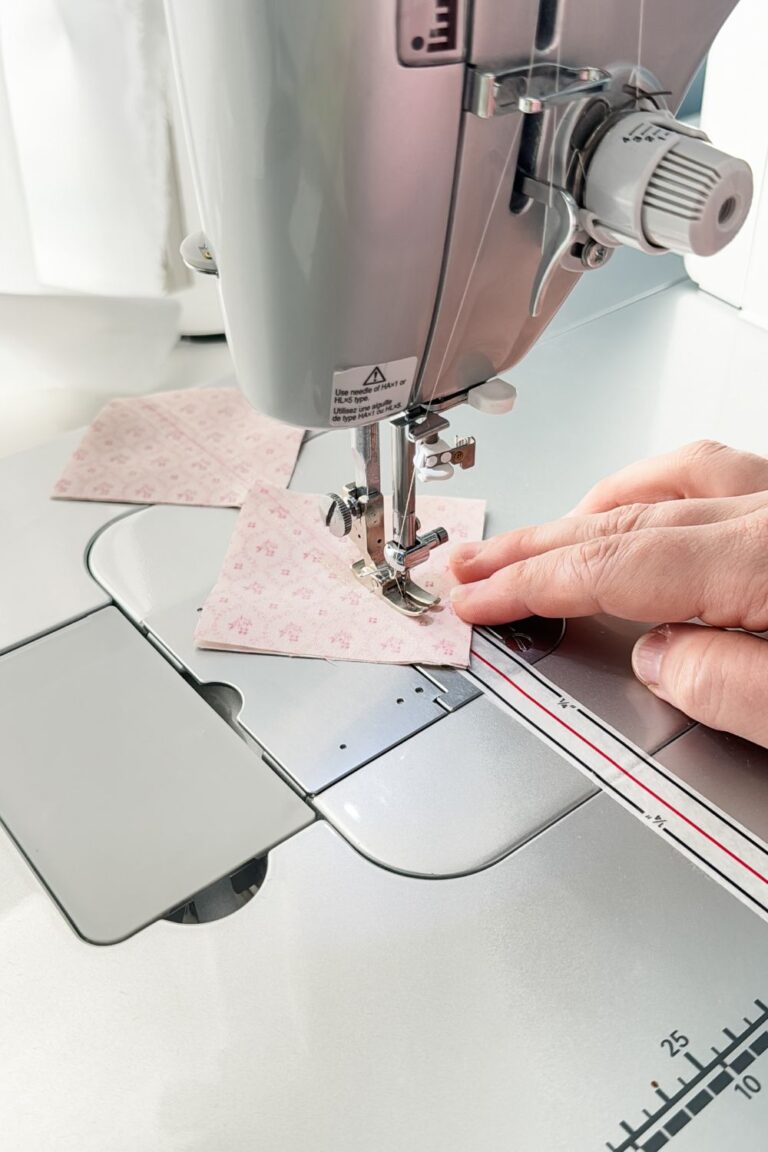
Step-by-Step: How to Nest Seams Properly
Step-By-Step
How to Nest Seams Properly
First, press your seams intentionally. If you are making a four patch, press one row to the right and the other row to the left. Plan this as you sew.
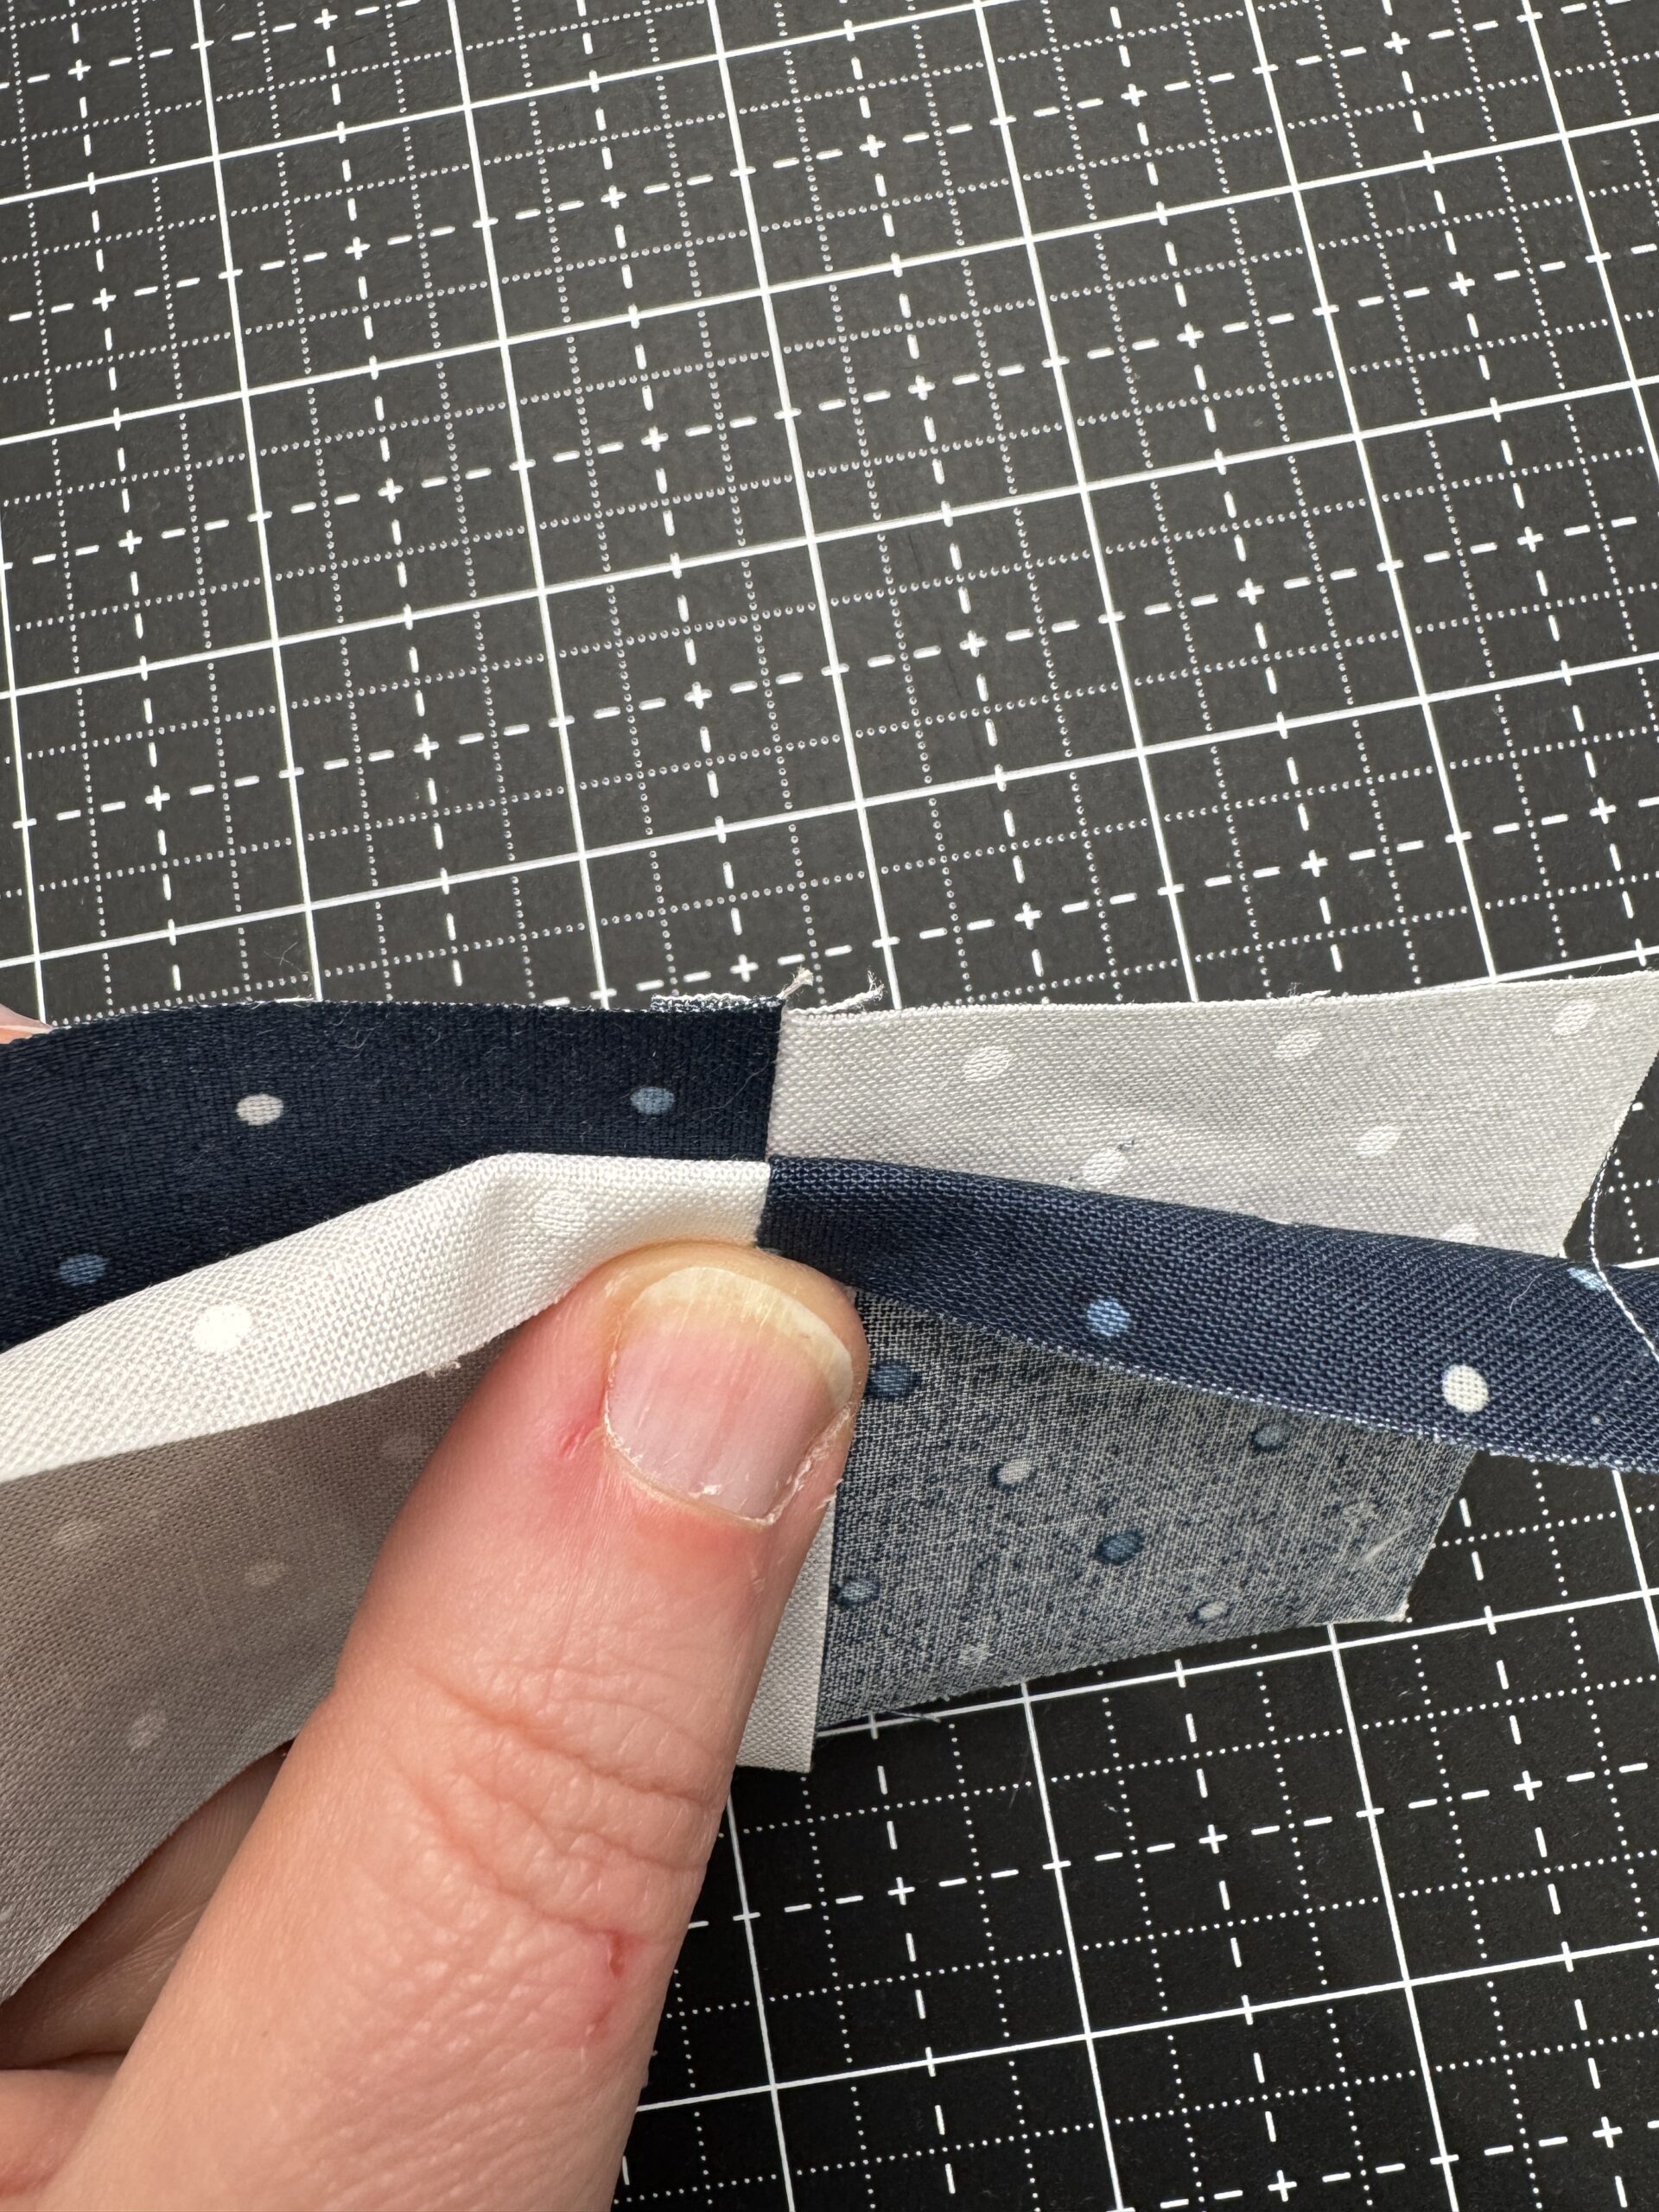
Place the units right sides together.
Slide the seam allowances toward each other until you feel them lock. You should feel a slight bump where they meet — that’s normal. They should sit snugly, not overlap.
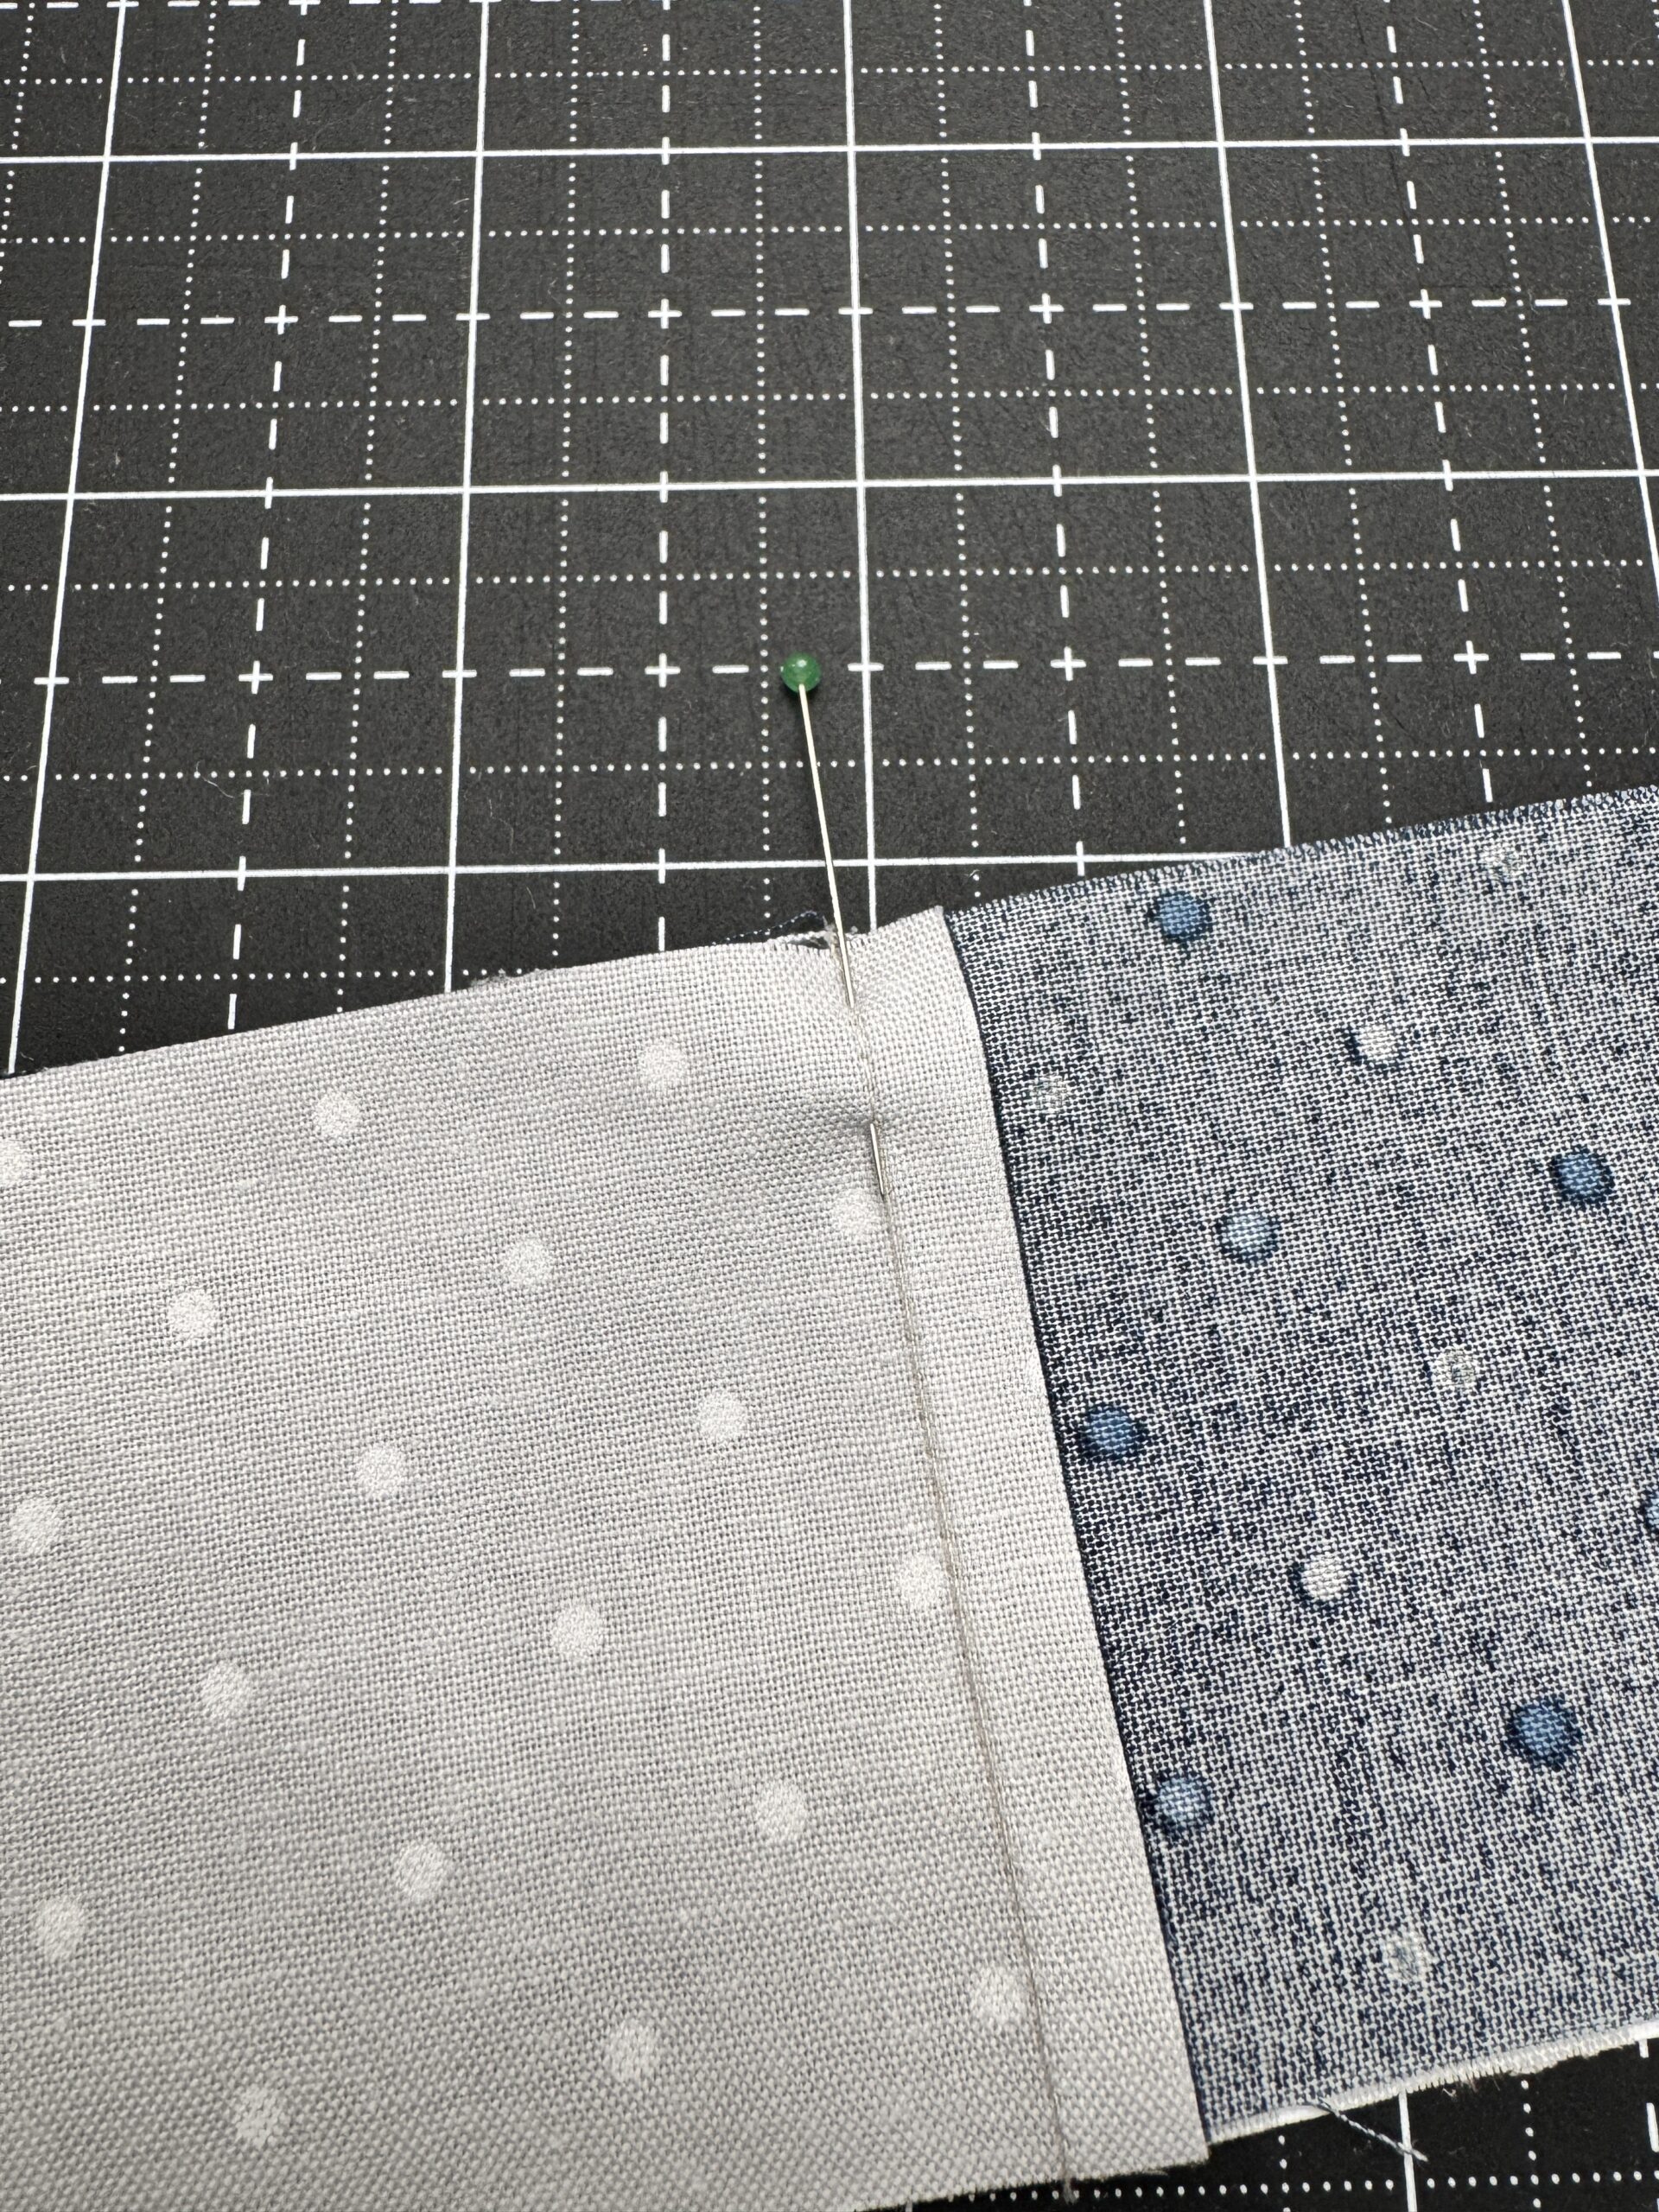
Pin directly through the intersection if needed. Insert the pin straight down through the exact seam line on the top piece and check that it exits through the seam line on the bottom piece.
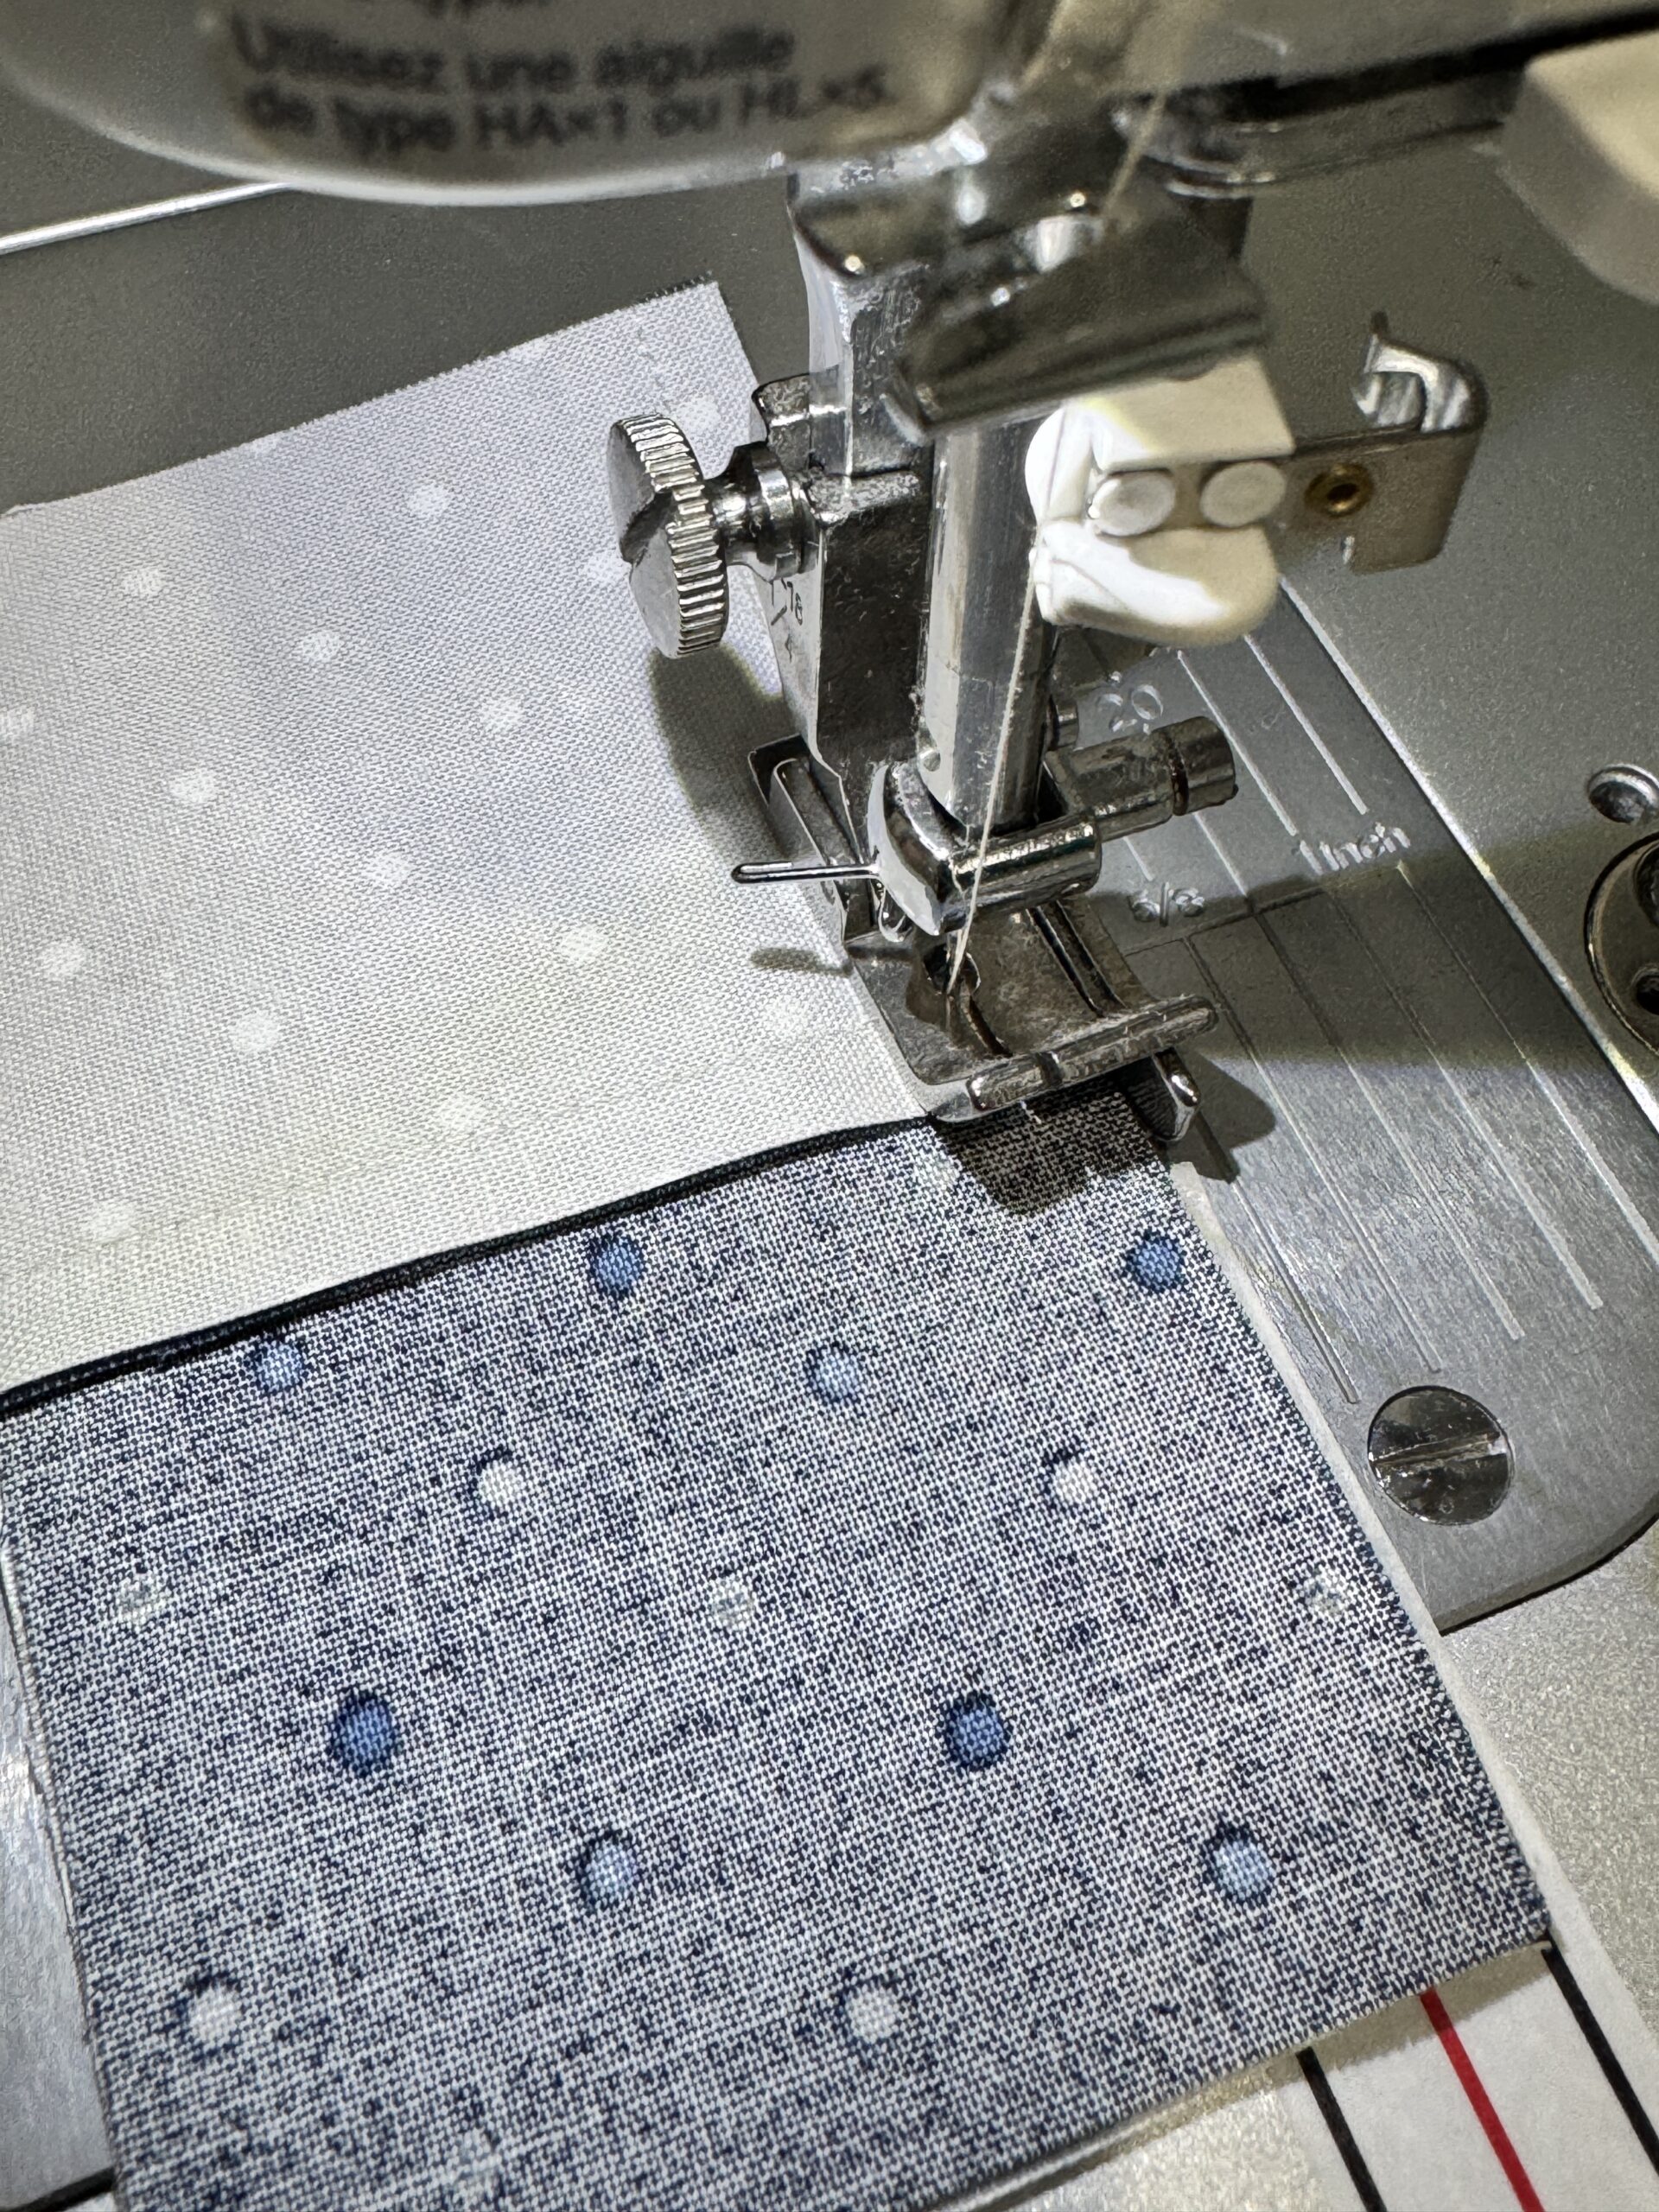
Sew slowly over the intersection. Do not pull. Let the feed dogs do the work.
Press the final seam flat first to set it, then press to one side or open, depending on the block.
Common Nesting Mistakes
Pressing both seams the same direction. This removes the locking benefit.
Not fully pressing seams before joining units. Half-pressed seams won’t nest properly.
Forcing the fabric. If you have to tug hard to make seams meet, something is off. They should slide into place naturally.
Sewing too fast through intersections. Speed increases shifting.
When You Should Not Nest
There are times when pressing seams open makes more sense, especially in very bulky intersections or when longarming dense quilting.
For most piecing — especially beginner and intermediate blocks — nesting is your accuracy friend.
If you’re struggling with lining up intersections, this is one of the first things I recommend checking.
Final Thoughts on Nesting Seams
Nesting seams is not about perfection.
It’s about control.
When your seam allowances are working with you instead of against you, accuracy becomes much more consistent. And consistent accuracy is what makes quilting feel easier and more enjoyable.
If your intersections have been fighting you lately, try adjusting your pressing direction on your next block and see what changes.
It’s a small shift that makes a big difference.