Why Your Quilt Points Don’t Match (And How to Fix It)
There are few things more frustrating than when your quilt points don’t match. You cut carefully, you sew slowly, you press everything flat… and somehow the points are still just a little off.
When purchasing through links on this site, I may earn an affiliate commission at no cost to you.
If this happens to you, you’re not alone. Point alignment is one of the most common quilting struggles, especially as blocks become more detailed or include triangles and angled seams. The good news is that points not matching is almost never random. There are a few very specific reasons it happens, and once you understand them, it becomes much easier to fix.
Points not matching is one of the most common quilting frustrations — and it’s usually fixable.
This post is part of my Quilting Foundations series, where we focus on the small skills that quietly make quilting feel easier and more predictable.
What Quilters Mean When They Say “Points Don’t Match”
When points don’t match, it usually means triangle tips or seam intersections aren’t landing exactly where the pattern expects them to. Sometimes the point misses by just a thread or two. Other times it’s noticeably off, clipped, or completely hidden inside the seam.
What’s important to know is that this usually isn’t caused by one single mistake. Point issues are often the result of several small things stacking together earlier in the process.
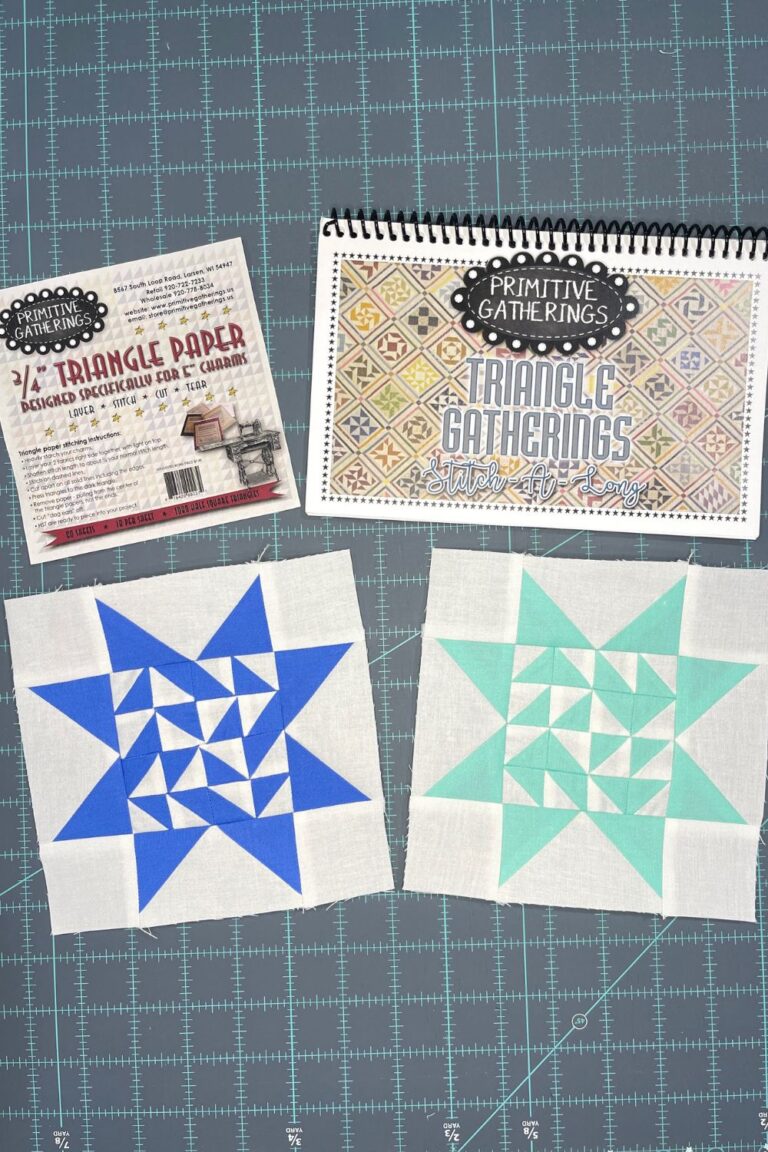
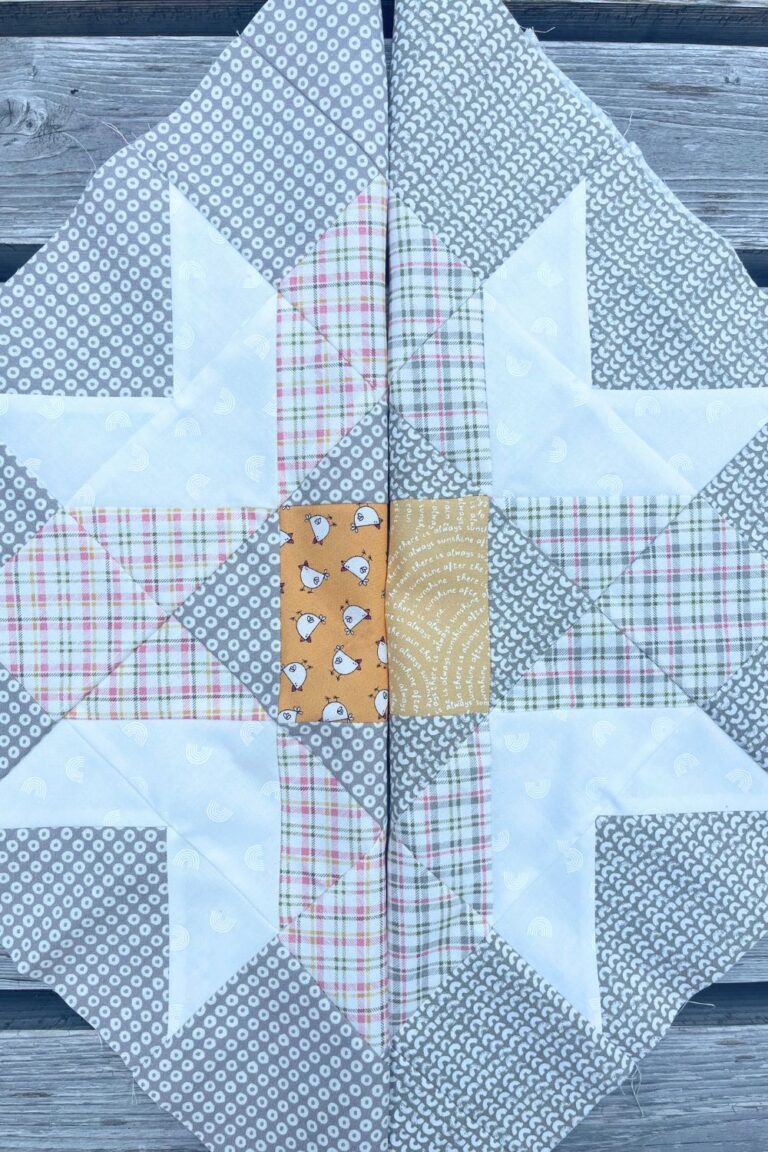
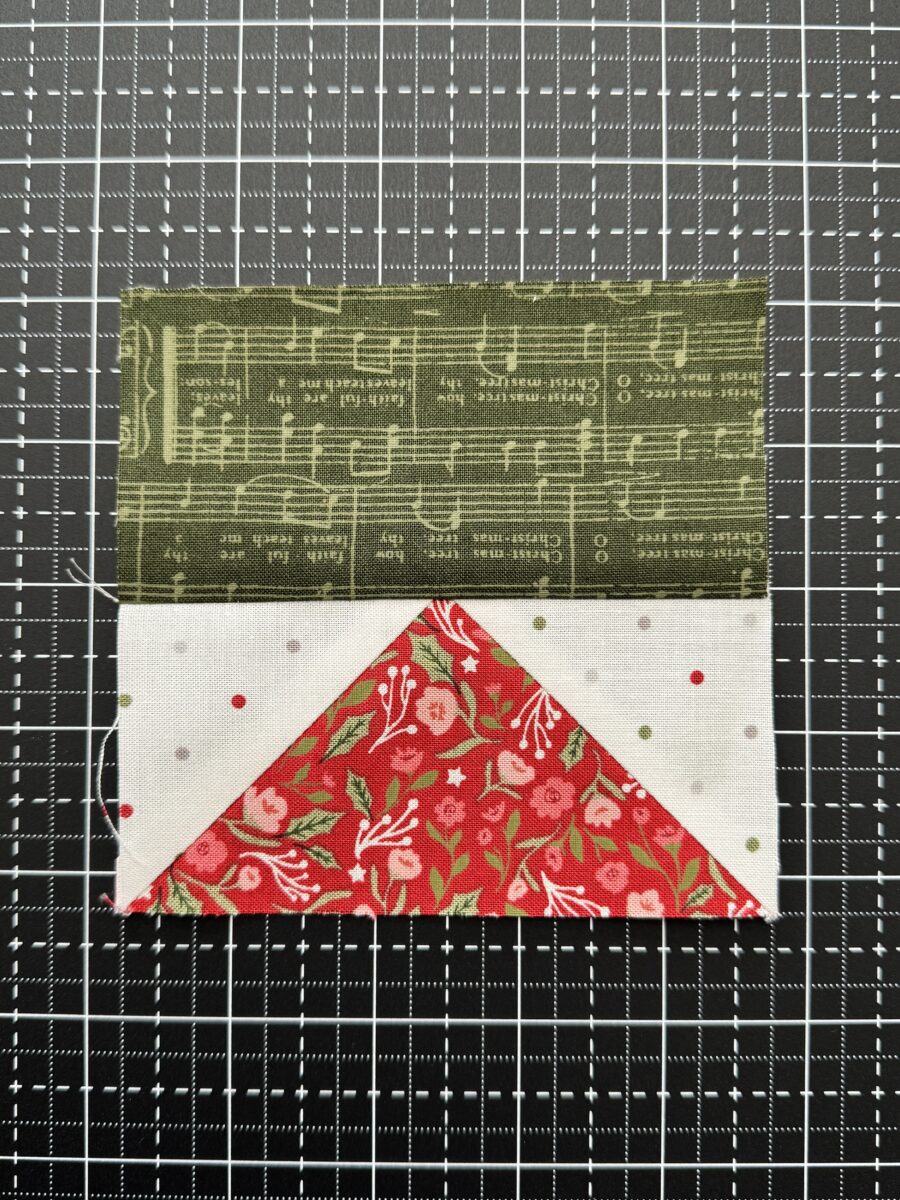
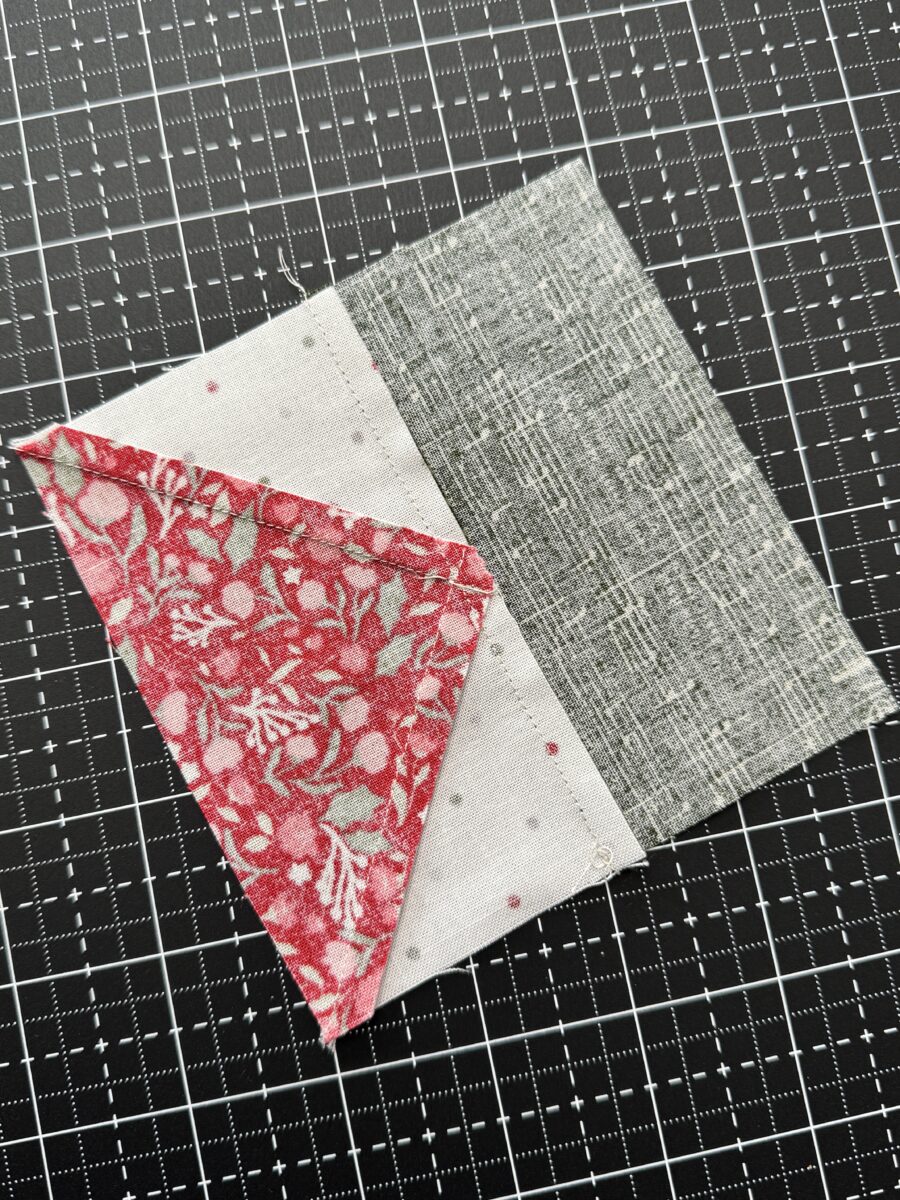
In the images below, you can see the one on the left has lost its point of the flying geese (goose?) in the seam allowance. The one on the right is perfectly kissing the point.

Start by Checking Block Size
The most common reason points don’t match is inaccurate block size.
If a block is even slightly too big or too small, the seams won’t land where they should when blocks are joined together. This is why accurate seam allowance and trimming blocks to size before assembly matter so much.
Before assuming anything else is wrong, take a moment to measure your blocks. If they aren’t all measuring the same unfinished size, that alone can explain why points aren’t lining up.
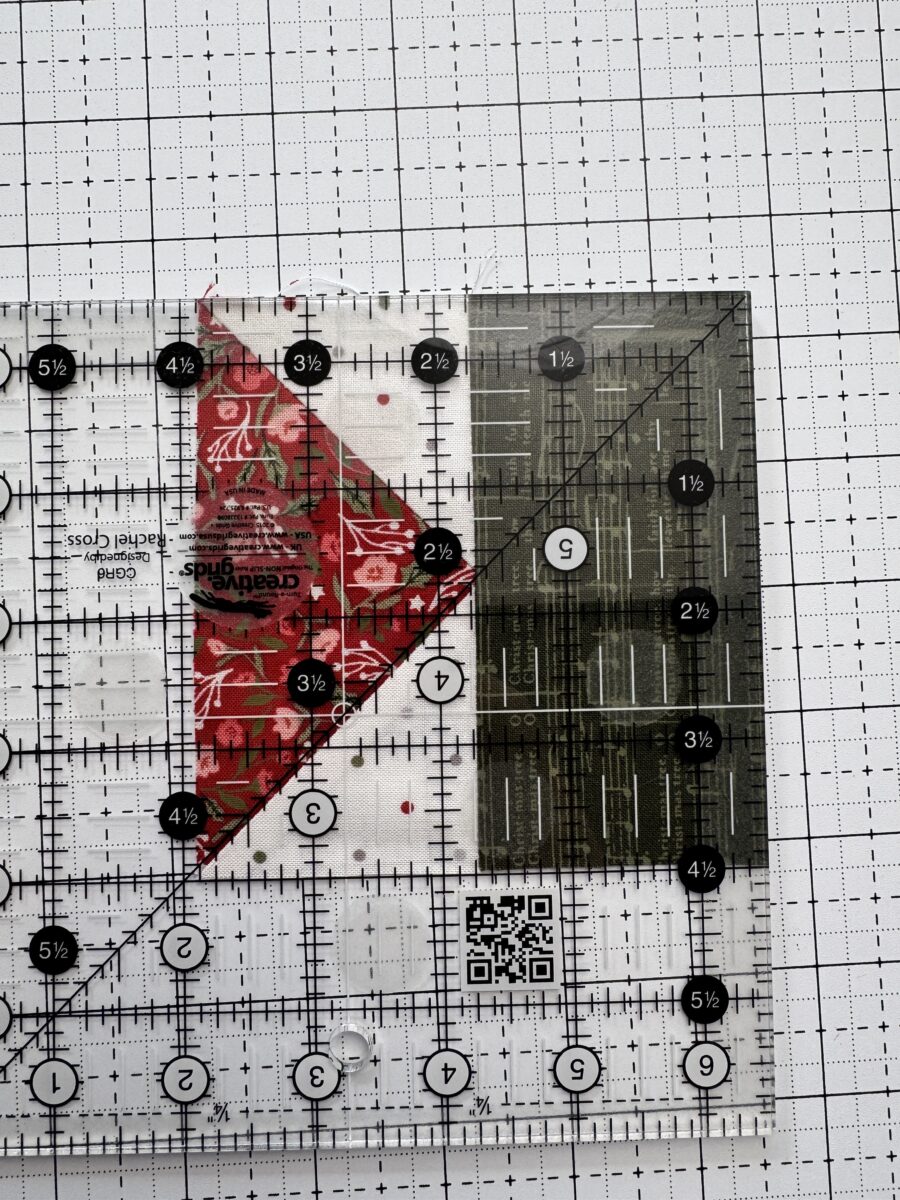
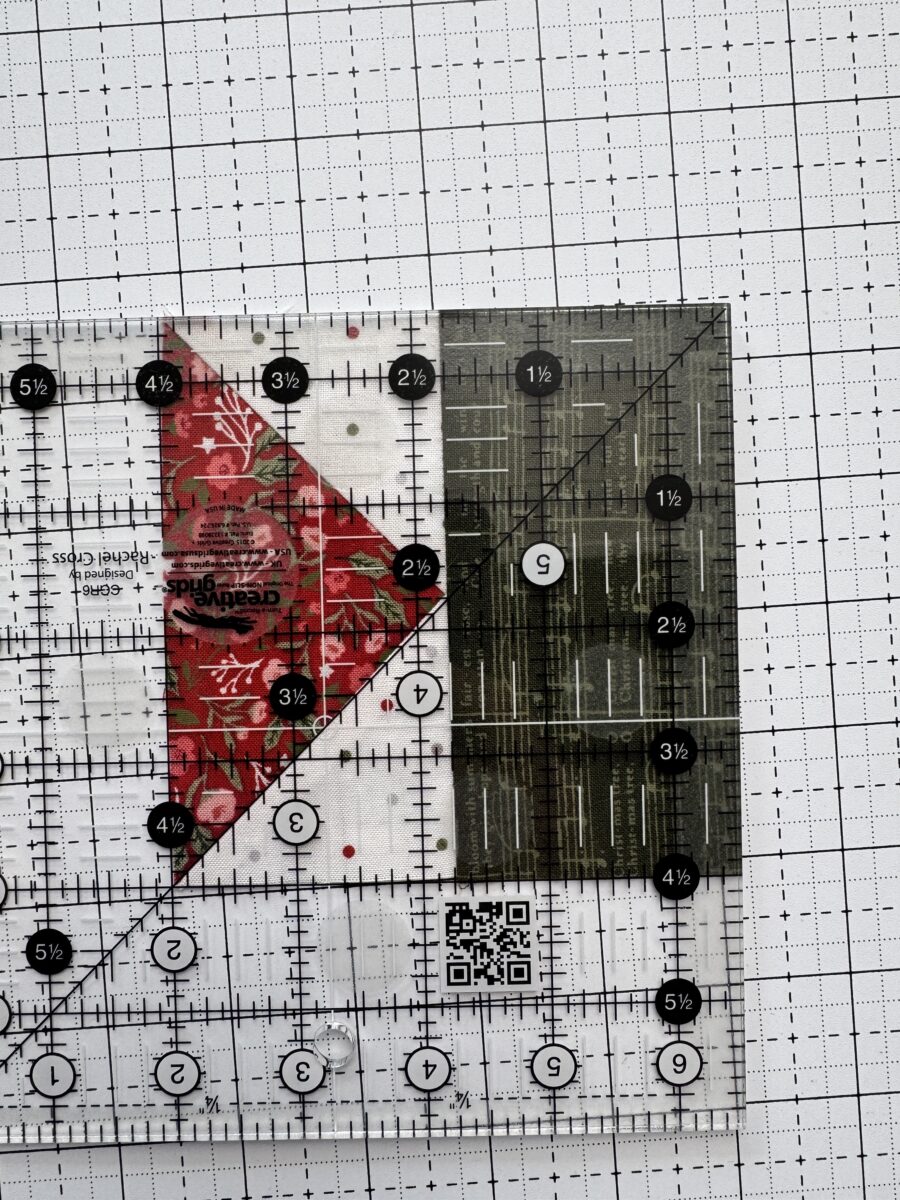
In the example below, the blocks should measure 4.5″ square. You a see that the left image falls short by 1/8″ which accounts for the lost point of the flying geese unit.
Seam Allowance Plays a Bigger Role Than You Think
Even tiny differences in seam allowance can shift points off center.
A seam that’s just a hair wider or narrower than intended may not look like much on its own, but when multiple seams stack together, that difference adds up. By the time you reach a point where seams need to meet, the alignment can be noticeably off.
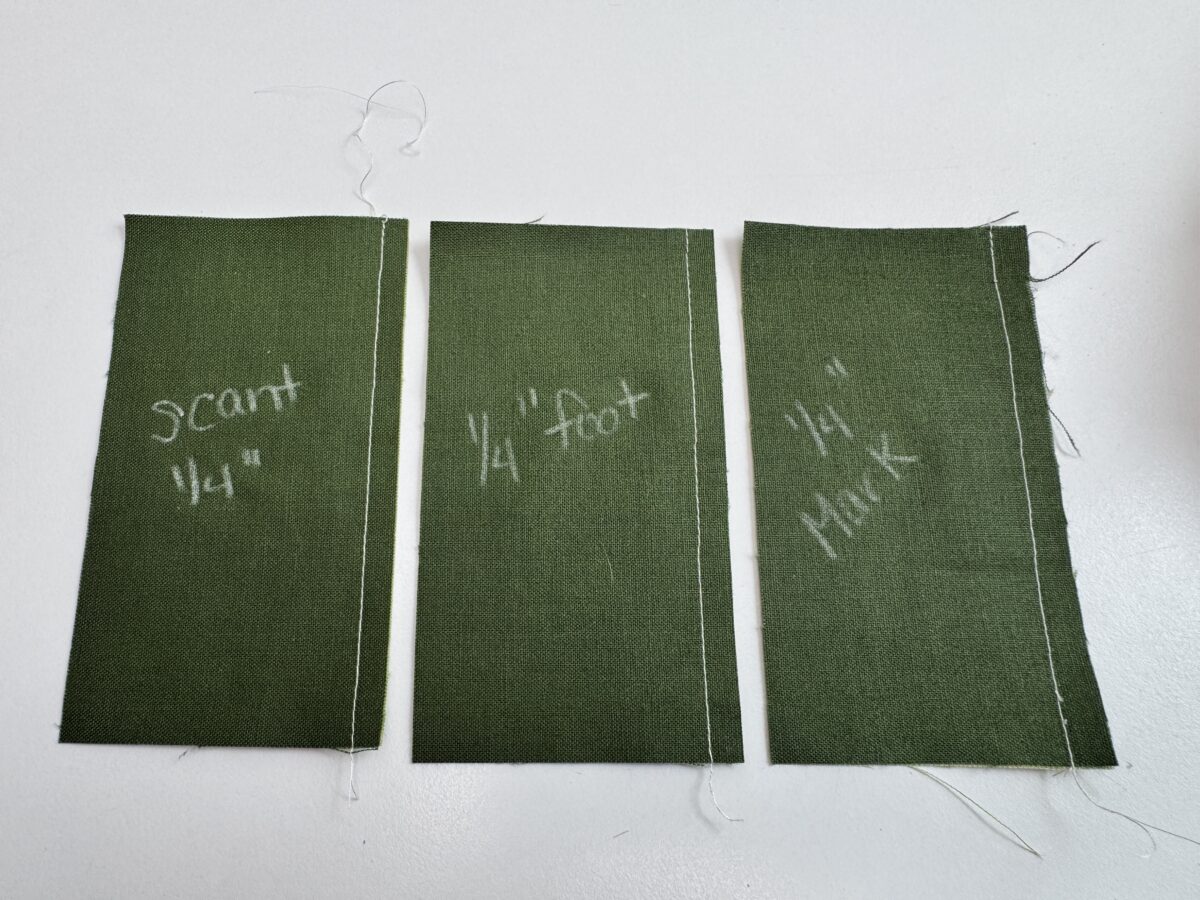
If points are consistently missing in the same way across multiple blocks, it’s worth testing your seam allowance and making sure your 1/4″ seam is truly accurate for your machine.
Pressing Can Help or Hurt Point Alignment
How seams are pressed has a direct impact on how points line up.
Poorly pressed seams can cause fabric to roll or twist slightly, which shifts seam intersections. Pressing seams flat and consistently helps everything nest and align more easily when blocks are joined.
Taking the time to press carefully between steps often fixes point issues without changing anything else.
Patterns often times include pressing directions. Experience will also help guide you over time to know when to press in one direction or when to press seams open. If a lot of points are meeting in a block, it might be wise to take a little extra time and press all of your seams open to reduce bulk. I do recommend shortening stitch length a bit if you are pressing seams open for added strength.
Nested Seams Make Matching Points Easier
When seams are pressed in opposite directions, they can “lock” together as you sew. This is called nesting seams, and it’s one of the simplest ways to improve point accuracy.
If seams are pressed in the same direction or left bulky, they tend to slide past each other instead of meeting cleanly. Paying attention to pressing direction can make a noticeable difference, especially at intersections.
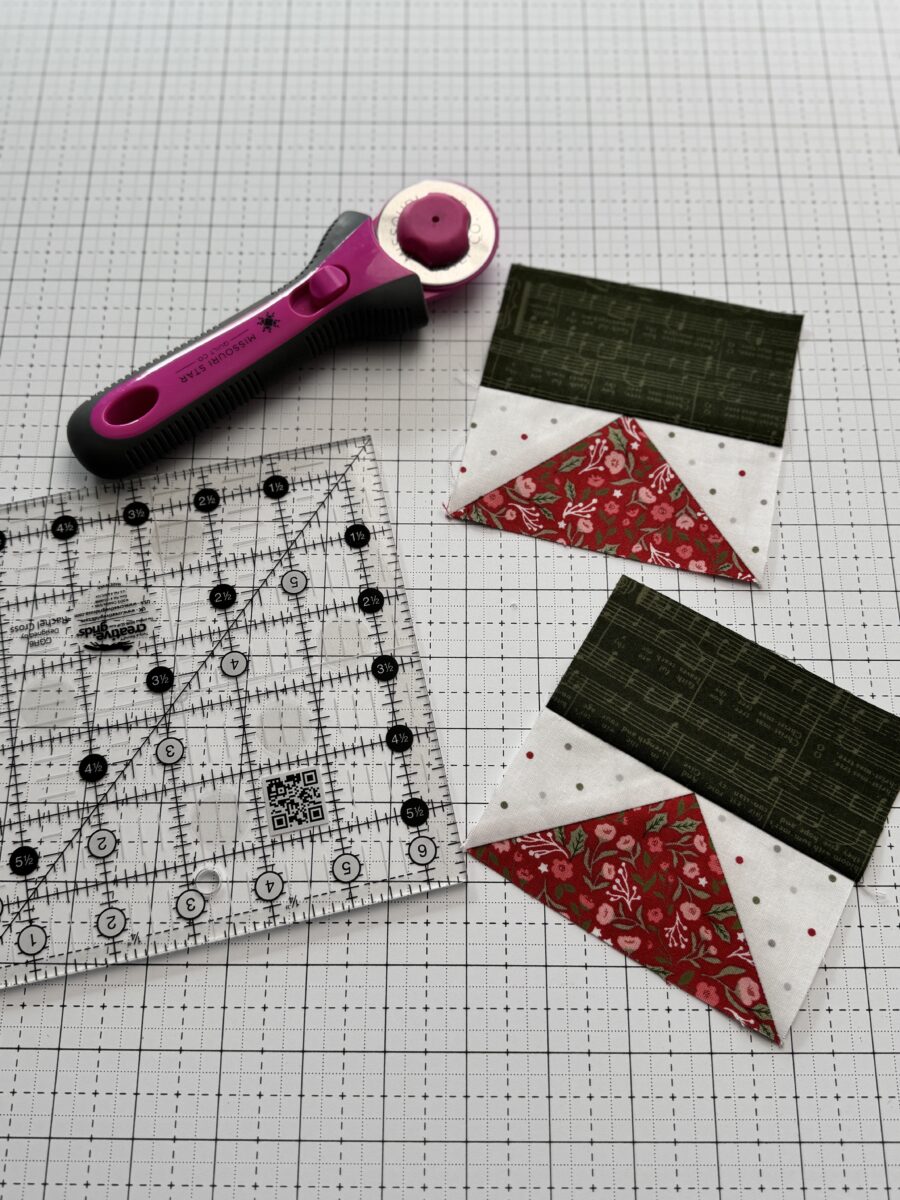
In the image below, you can see how I nested the seams of two half square triangle units to lock them together before sewing along the seam.
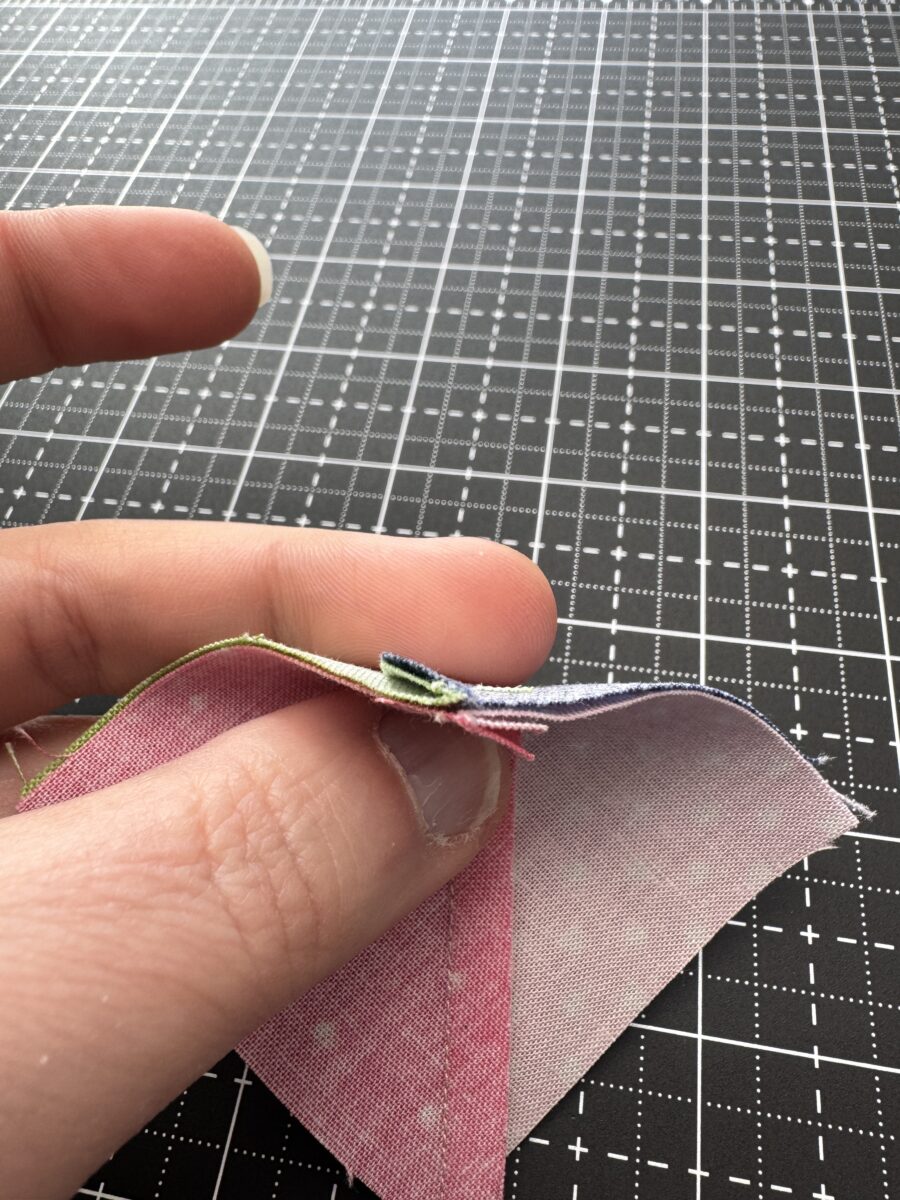
Nested seams help seams meet instead of sliding past each other.
Pinning at the Point Matters
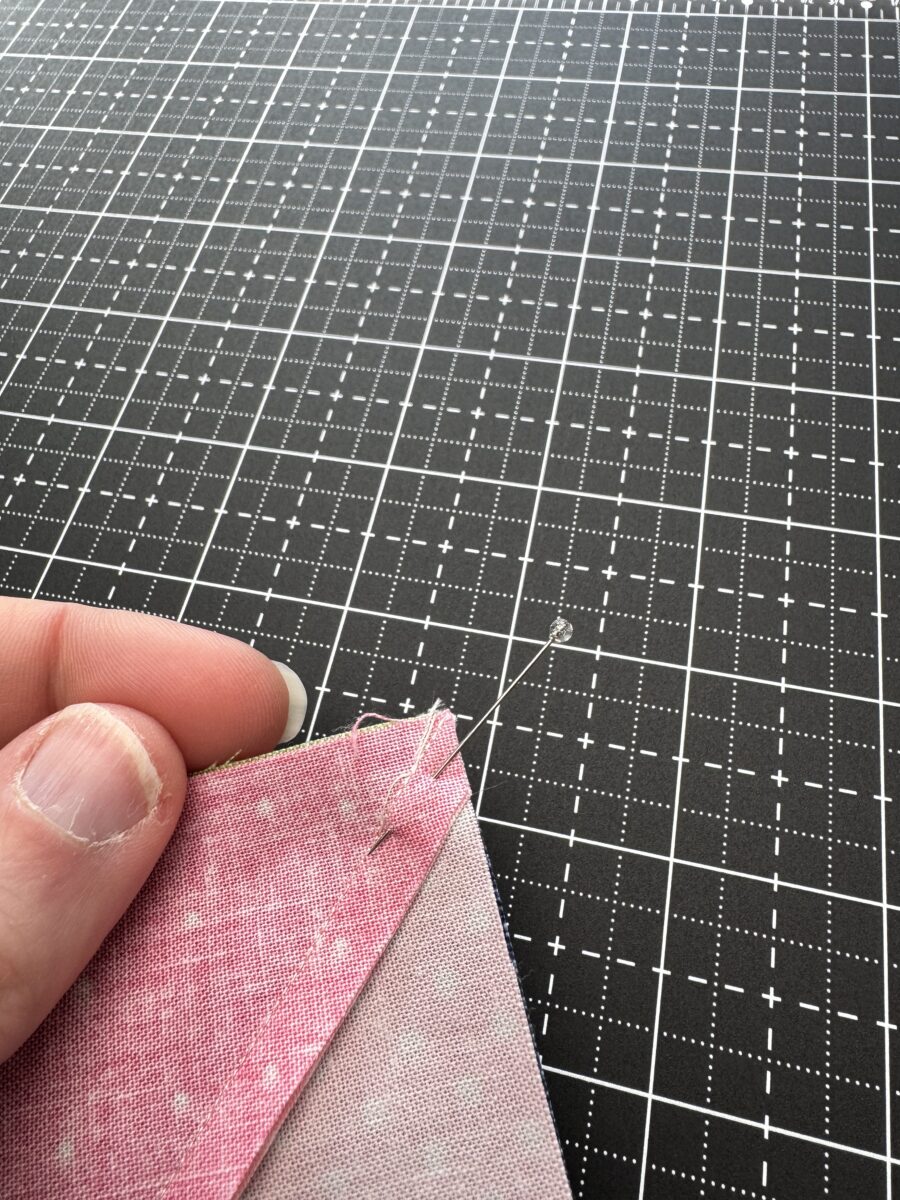
Pins aren’t just about holding fabric in place — they’re about controlling where seams meet.
Placing a pin directly through the seam intersection or triangle point, rather than a few inches away, helps keep that exact spot aligned as it feeds through the machine. For tricky points, adding a second pin just before the seam can add extra stability.
This is especially helpful when working with small pieces or bias edges.
Slow Down as You Sew Through the Intersection
Speed matters when sewing through points.
Sewing more slowly as you approach a seam intersection gives you time to keep layers aligned and prevents the fabric from shifting at the last moment. A steady pace often produces better results than trying to rush through detailed areas.
When Points Are Still a Little Off
Even experienced quilters don’t hit every point perfectly.
If a point is slightly off but the block still measures correctly, it’s often best to leave it alone. Small imperfections usually disappear once the quilt is quilted and used. Chasing perfection by repeatedly unpicking can sometimes do more harm than good.
Perfect points are nice — but finished quilts matter more.
Final Thoughts for When Your Quilt Points Don’t Match
Points not matching isn’t a failure — it’s feedback.
It’s a sign to slow down, check block size, pay attention to seam allowance, and press with intention. As these habits improve, point alignment naturally improves too. Over time you’ll have fewer instances of quilt points that don’t match.
With time and practice, matching points becomes more consistent and far less stressful. And even when they’re not perfect, remember that quilts are meant to be loved, used, and enjoyed — not inspected with a ruler.