

Mastering the Nine Patch Quilt Block: A Beginner’s Guide
The Nine Patch quilt block is one of the very first blocks many quilters learn, and for good reason. It’s simple, recognizable, and incredibly versatile. But even though it’s considered a beginner block, it teaches some of the most important foundational skills in quilting.
When purchasing through links on this site, I may earn an affiliate commission at no cost to you.
If you can make a Nine Patch accurately, you’re building habits that will carry into every other block you sew.
Let’s walk through it step by step.
What is a Nine Patch Quilt Block?
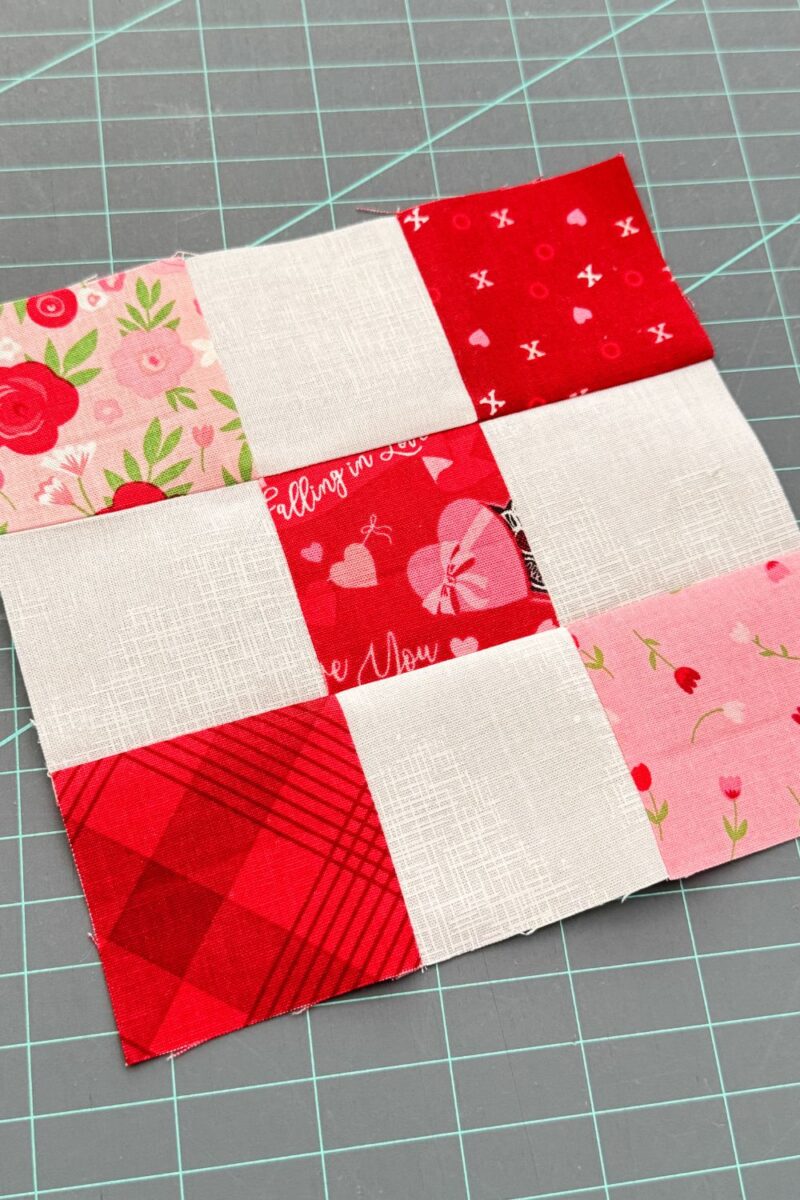
A Nine Patch block is made from nine equal squares arranged in three rows of three. That’s where the name comes from — nine patches sewn together to create a 3 × 3 grid.
Because it’s built on such a clean grid, it’s a wonderful way to understand how quilt blocks are structured. Many more advanced blocks are based on this same concept of dividing space evenly and sewing units together with consistent seam allowances.
The finished size of your block depends on the size of the squares you start with. For example, if you cut 3½” squares, they will finish at 3″ once sewn, giving you a 9″ finished block. If you start with 4½” squares, you’ll end up with a 12″ finished block.
It’s simple math — but it’s important math.
Materials Needed
You don’t need anything complicated for this block. Just your basic quilting supplies:
Accuracy matters far more than specialty tools here.
Step-by-Step Guide to Making a Nine Patch Quilt Block
Step 1: Cutting Your Fabric
Start by cutting nine equal squares.
This is one of those blocks where cutting accuracy really shows. If your squares are off even slightly, your finished block size will reflect it. Take a moment to square up your fabric, use a sharp blade, and double check your measurements before cutting multiple pieces.
Most commonly, quilters use 3½” squares for a 9″ finished block, but you can size this up or down depending on your project.
Step 2: Arrange Your Layout
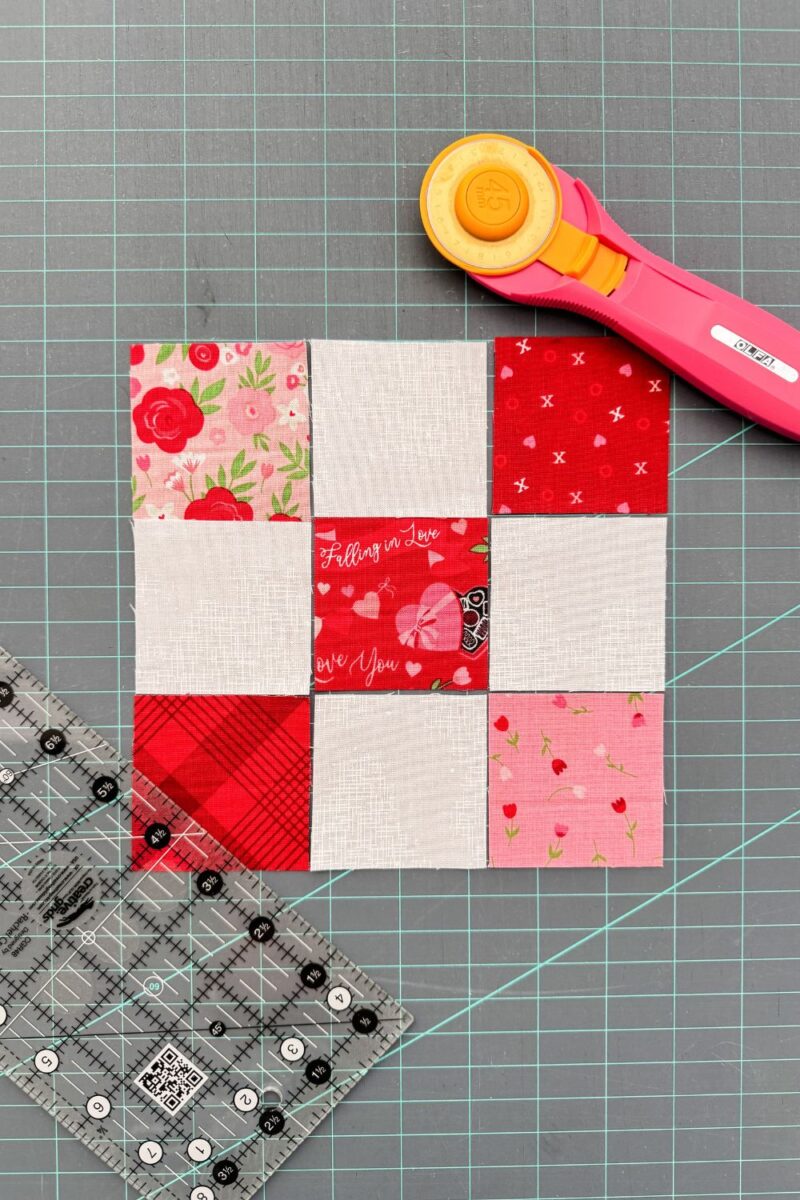
Lay your squares out in a 3 × 3 grid before you sew anything together.
If you’re using two fabrics, alternate them to create a checkerboard effect. Contrast is what makes this block visually strong. A clear light and dark difference will make the design pop, while closer values will create a softer look.
There’s no wrong choice — just be intentional with it.
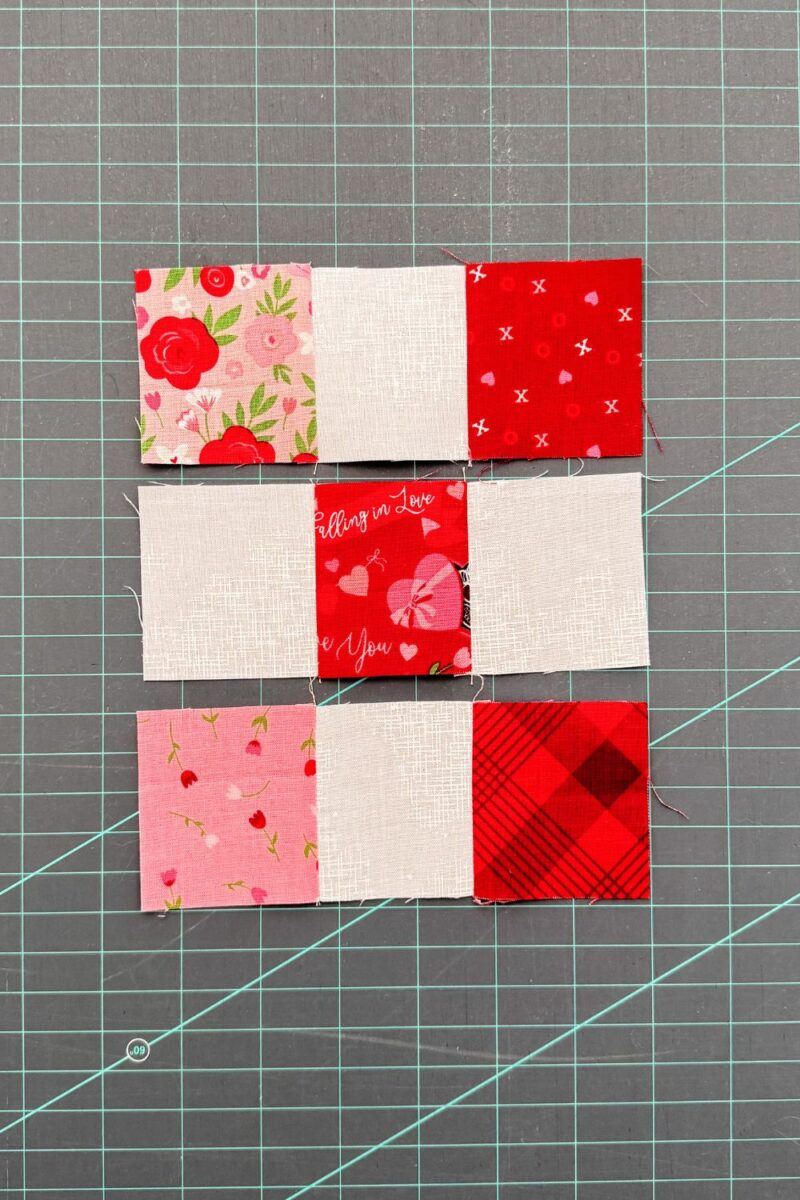
Step 3: Sew the Rows
Sew the squares together into three separate rows using a consistent ¼” seam allowance.
Pressing matters here. I like to press the seams toward the darker fabric. Not only does that help hide the seam allowance behind the darker print, but it also naturally alternates the seam direction from row to row, which allows the seams to nest beautifully when you join them in the next step.
Taking the extra second to press carefully makes a noticeable difference in how flat your block finishes.
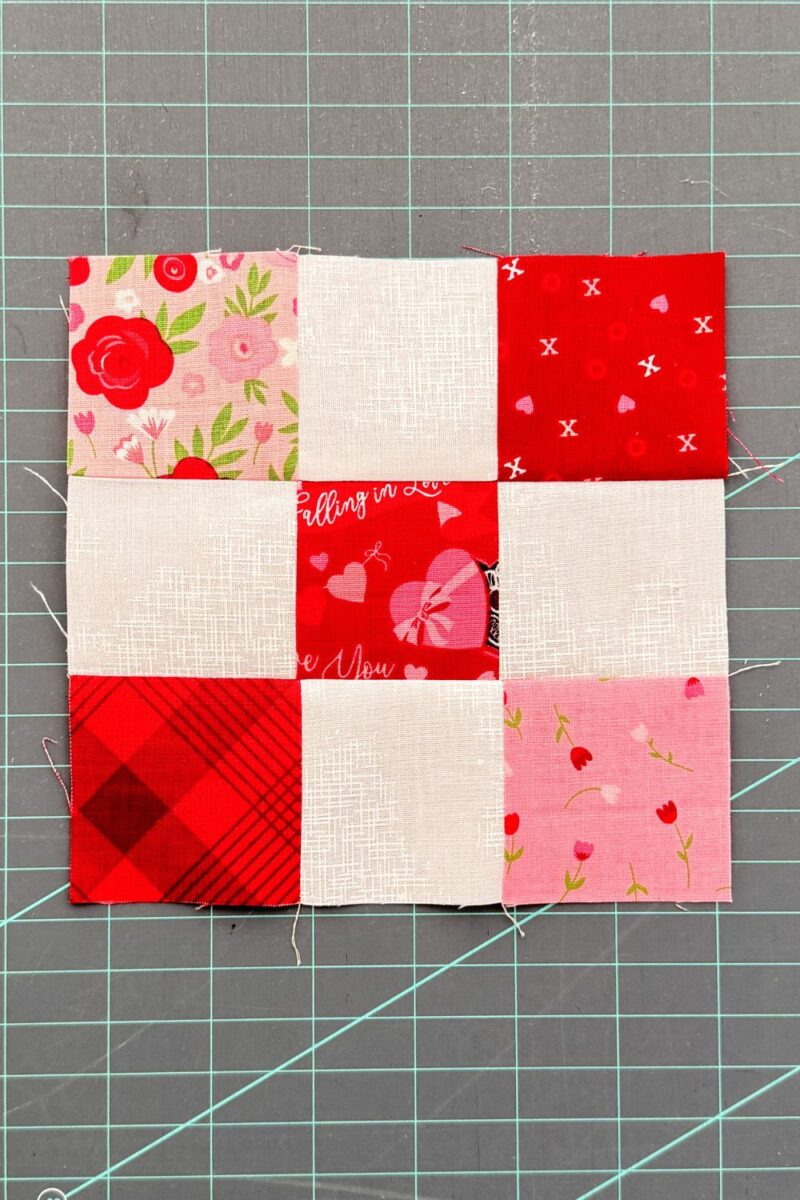
Step 4: Join the Rows
Place your rows right sides together and match the seam intersections. If you pressed in alternating directions, you should feel those seams “lock” together.
Sew the rows together and give the block a final press.
Before moving on, measure your block. A Nine Patch that is intended to finish at 9″ should measure 9½” unfinished. Checking your measurement now saves frustration later when assembling a quilt top.
Design Variations for the Nine Patch Quilt Block
One of the reasons the Nine Patch has remained so popular is how easily it can be transformed.
A scrappy version uses nine different prints and is perfect for using up leftovers.
A Disappearing Nine Patch starts with a traditional Nine Patch block, then cuts it into four sections and rearranges them to create a completely different look.
You can also scale it down and build smaller Nine Patch units inside a larger block for more intricate designs.
We’ll explore some of those variations in upcoming posts as this block series continues.
Nine Patch Printable Cutting Chart
If you’d like a quick reference to keep near your cutting table, I’ve created a printable Nine Patch size chart that breaks down the math for you. It shows common cut square sizes along with the finished square size and both the unfinished and finished block sizes, so you can easily resize your Nine Patch blocks without having to stop and calculate everything yourself.
Why the Nine Patch Is Worth Mastering
Even though this block is simple, it quietly teaches essential skills: accurate cutting, consistent seam allowances, thoughtful pressing, nesting seams, and measuring your finished work.
Those are the same skills you’ll rely on in blocks like Sawtooth Star, Ohio Star, and Churn Dash later in this series.
The Nine Patch may look basic, but it builds confidence in a way that few other beginner blocks do. And once you’re comfortable with it, the design possibilities really open up.

One Comment
Comments are closed.