
How to Make a Friendship Star Quilt Block
The Friendship Star quilt block is one of those traditional quilt blocks that looks like it has a lot going on but is surprisingly simple to make. If you’re comfortable making half-square triangles, you already have almost everything you need to put this block together.
When purchasing through links on this site, I may earn an affiliate commission at no cost to you.
Made from just nine units, the Friendship Star combines four half-square triangles with simple squares to create a star that appears to spin around the center of the block.
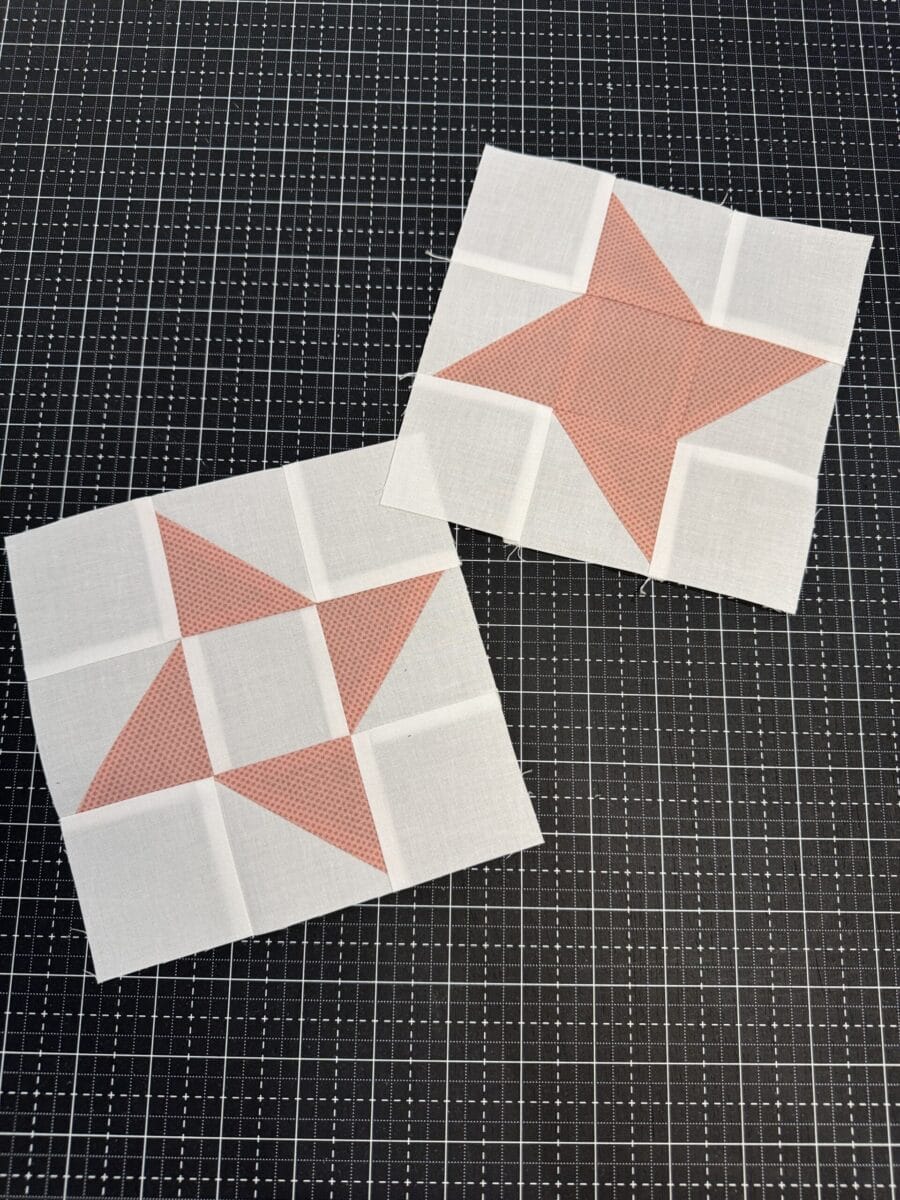
It’s a great block for beginners who are ready to move beyond basic patchwork, and it’s also a useful way to practice making accurate half-square triangles and matching points.
In this tutorial, I’ll walk you through how the Friendship Star is constructed, how to arrange your pieces correctly, and a few things to watch for when piecing your block.
What Is a Friendship Star Quilt Block?
A traditional Friendship Star is a nine-patch style quilt block made from:
- Four half-square triangle units
- Four background squares
- One center square
Once they’re arranged in a 3 x 3 grid, the half-square triangles create the four points of the star.
It’s a simple construction, but the placement of those half-square triangles is what gives the Friendship Star its distinctive spinning appearance.
This is also one of the reasons I like teaching the Friendship Star after learning how to make half-square triangles. There really isn’t a new complicated technique to learn. You’re simply taking a unit you already know how to make and arranging it in a different way.
Fabric Selection for a Friendship Star
You only need two fabrics to make a basic Friendship Star quilt block: a background fabric and a star fabric.
High contrast between the two fabrics will make the star shape easiest to see.
You can absolutely make the block scrappy, though. Try using four different fabrics for the star points with one coordinating fabric in the center. Or use scraps from the same color family for a more controlled scrappy look.
That’s part of what makes traditional quilt blocks so useful. Once you understand how the block is constructed, changing the fabric can make the same block look completely different.
Cutting for the Friendship Star Quilt Block
For your Friendship Star, you’ll need pieces for the four half-square triangles, four background squares and one center square.
| Finished Friendship Star | Background squares (4 – fabric A) | Star center square (1 – fabric B) | Background HST squares (2 – fabric A) | Star fabric HST squares (2 – fabric B) | Trim completed HSTs (4) |
| 6″ | 2½” square | 2½” square | 3″ square | 3″ square | 2½” square |
| 9″ | 3½” square | 3½” square | 4″ square | 4″ square | 3½” square |
| 12″ | 4½” square | 4½” square | 5″ square | 5″ square | 4½” square |
Want a printable version?
Sign up for email list below and get a printable PDF Friendship Star chart and instructions.
Before cutting, I recommend starching your fabric.
If you’ve read many of my quilt block tutorials, you probably knew that was coming.
Starching before cutting gives the fabric a little more stability, which is especially helpful when working with half-square triangles. Once a square is cut diagonally, you’re working with bias edges that can stretch and distort more easily.
A little extra stability makes accurate cutting and piecing much easier.
Step 1: Make the Half-Square Triangles
The Friendship Star uses four half-square triangle units, or HSTs.
If you’re new to making HSTs, these are simply squares made from two triangles of different fabrics.
For this block, pair your background fabric with your star fabric.
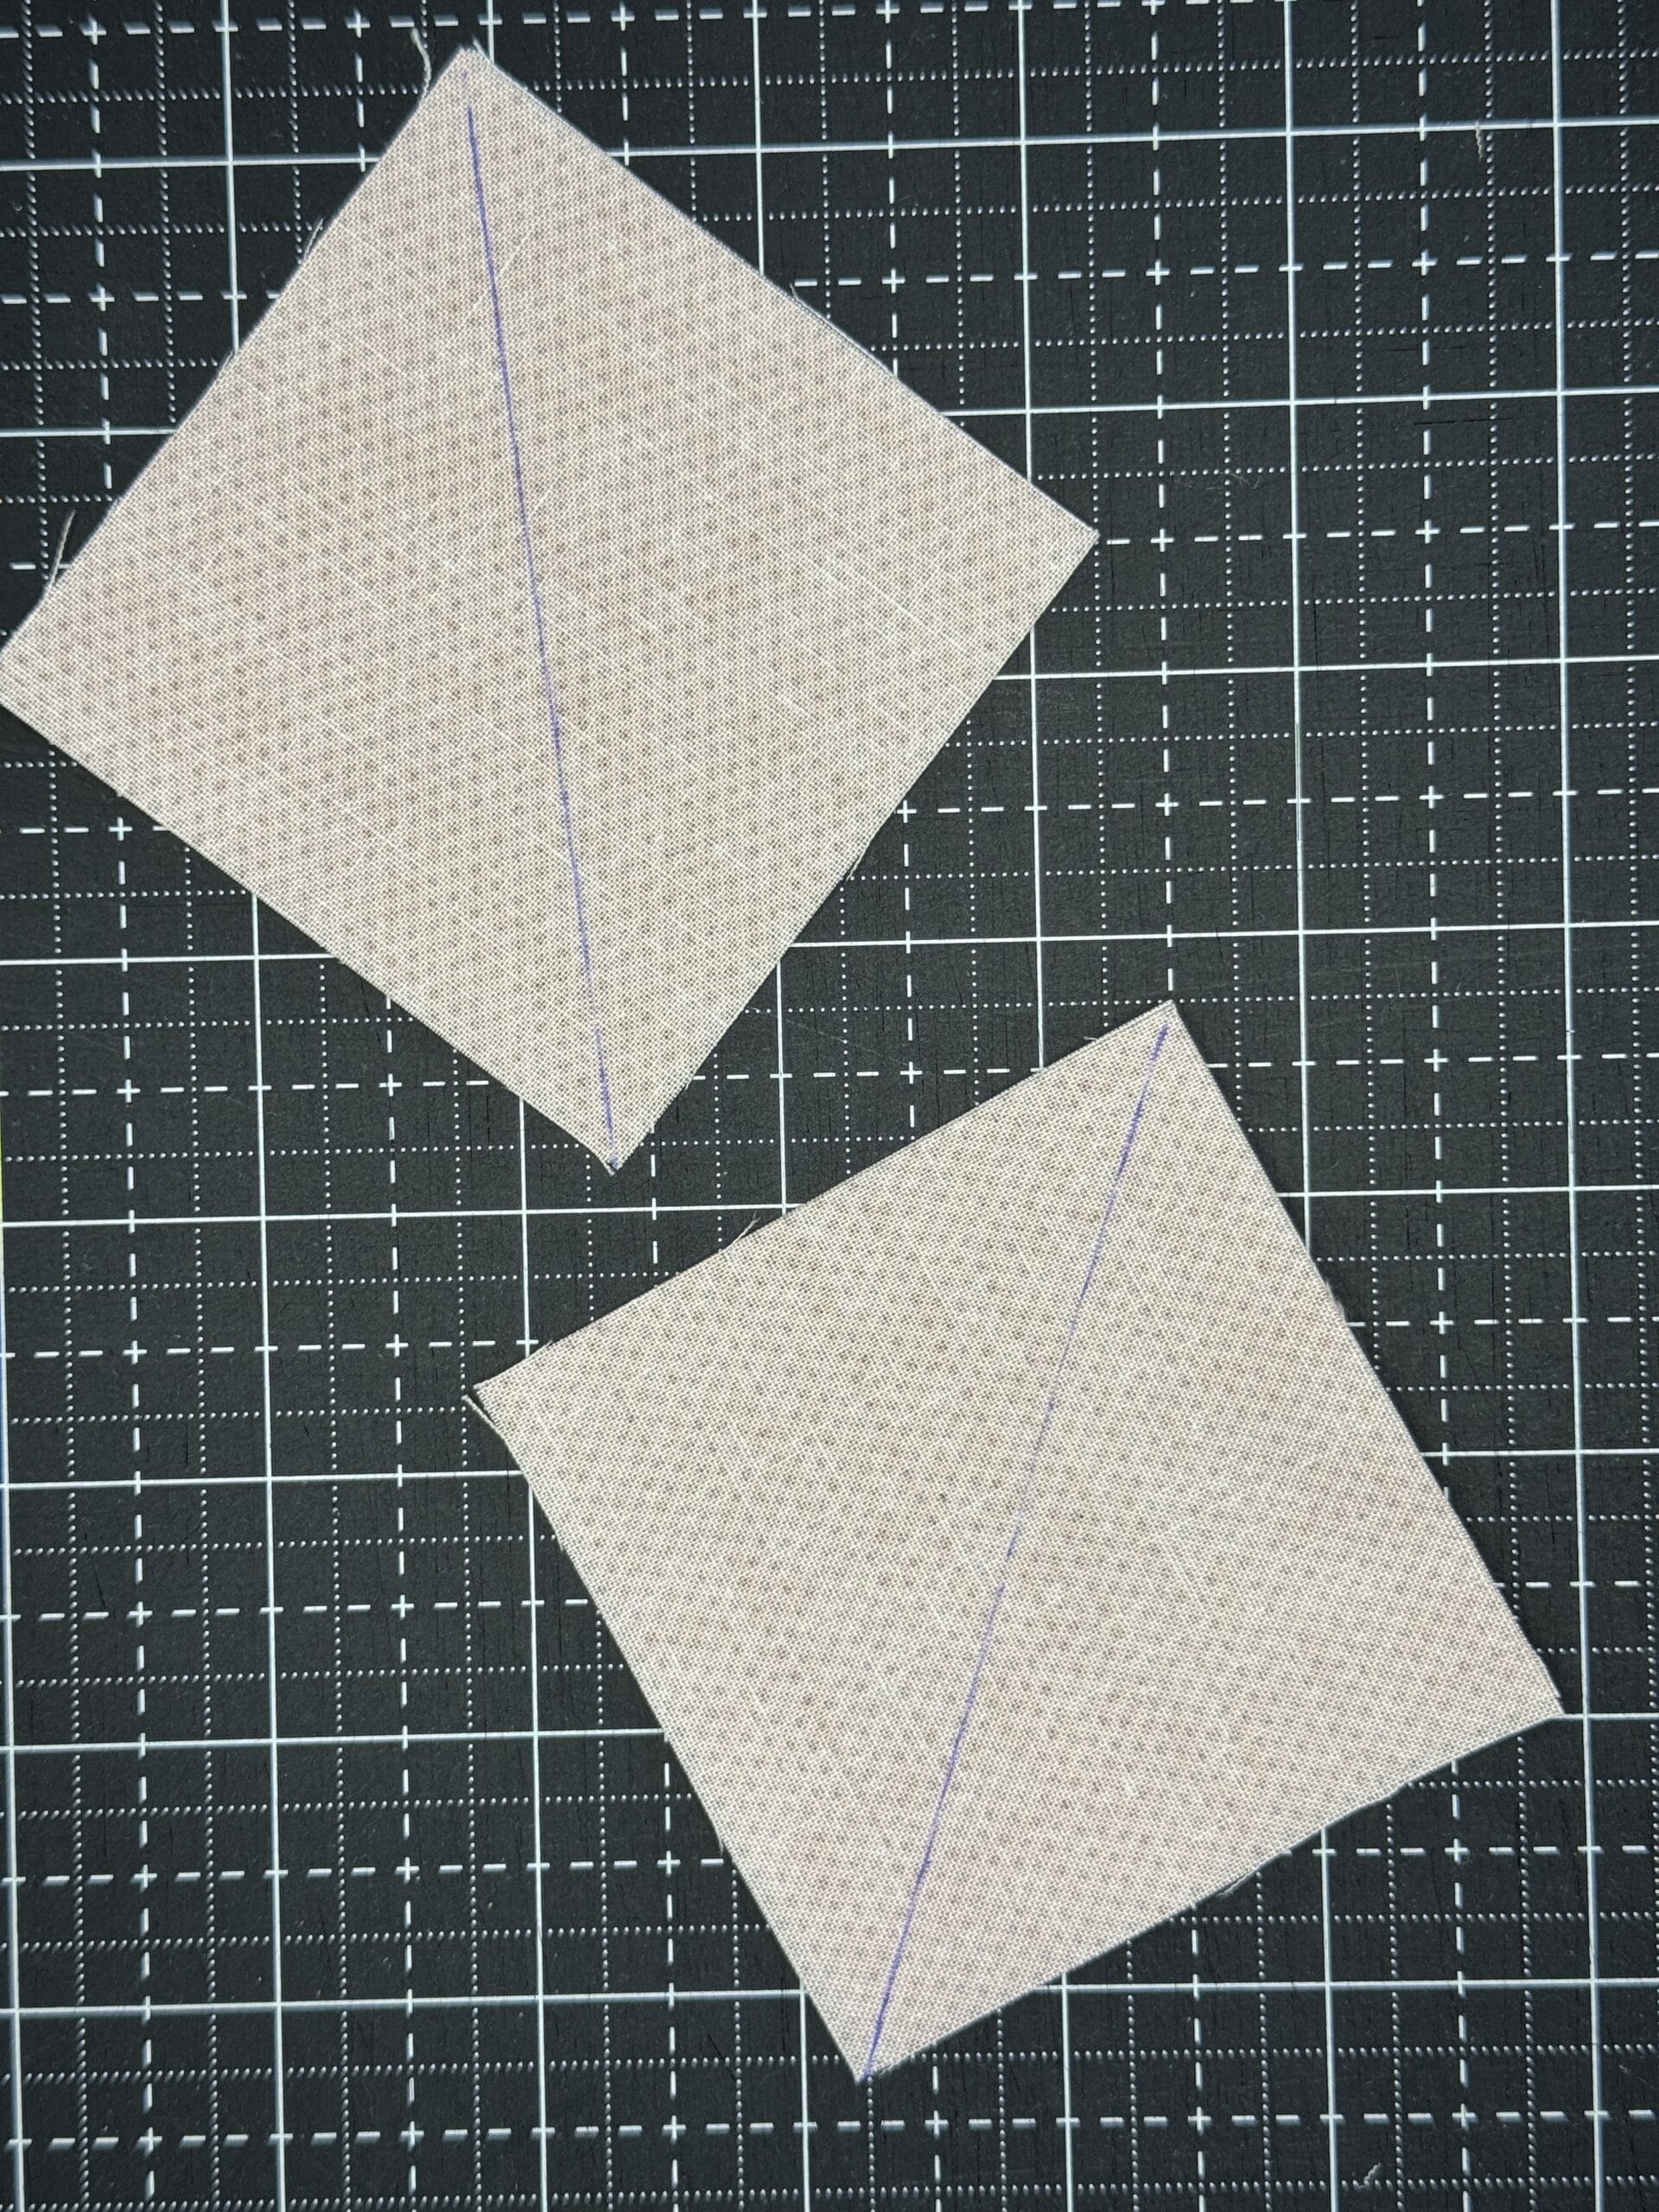
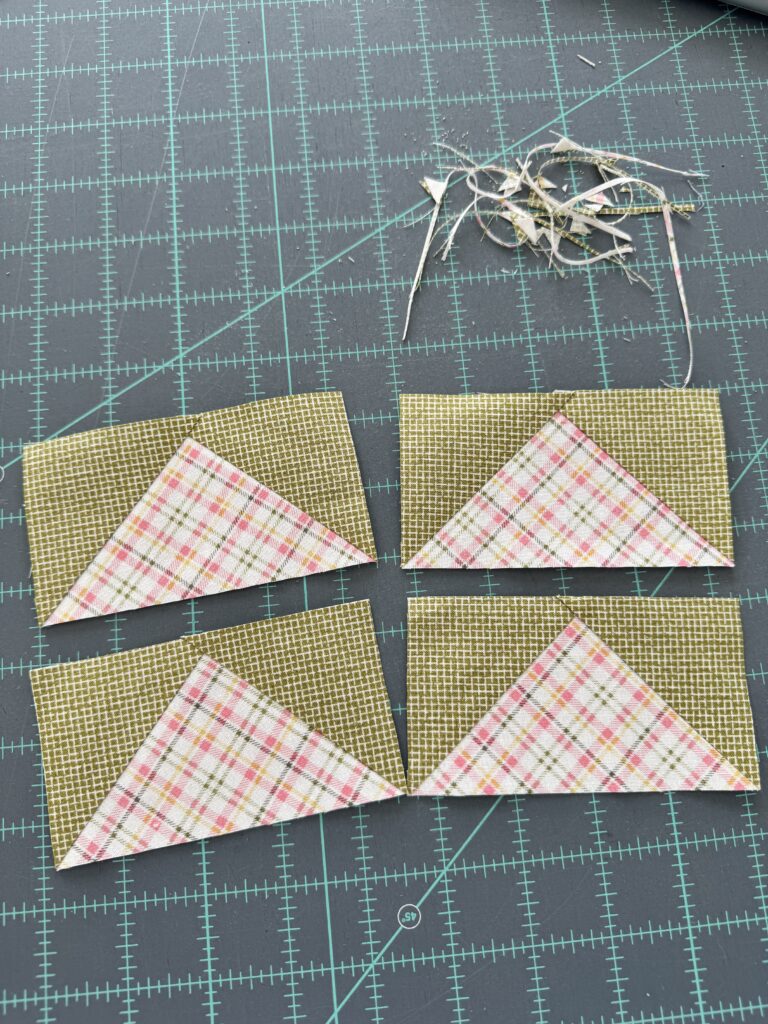
Place background and star fabric squares for the HSTs right sides together and draw a diagonal line.
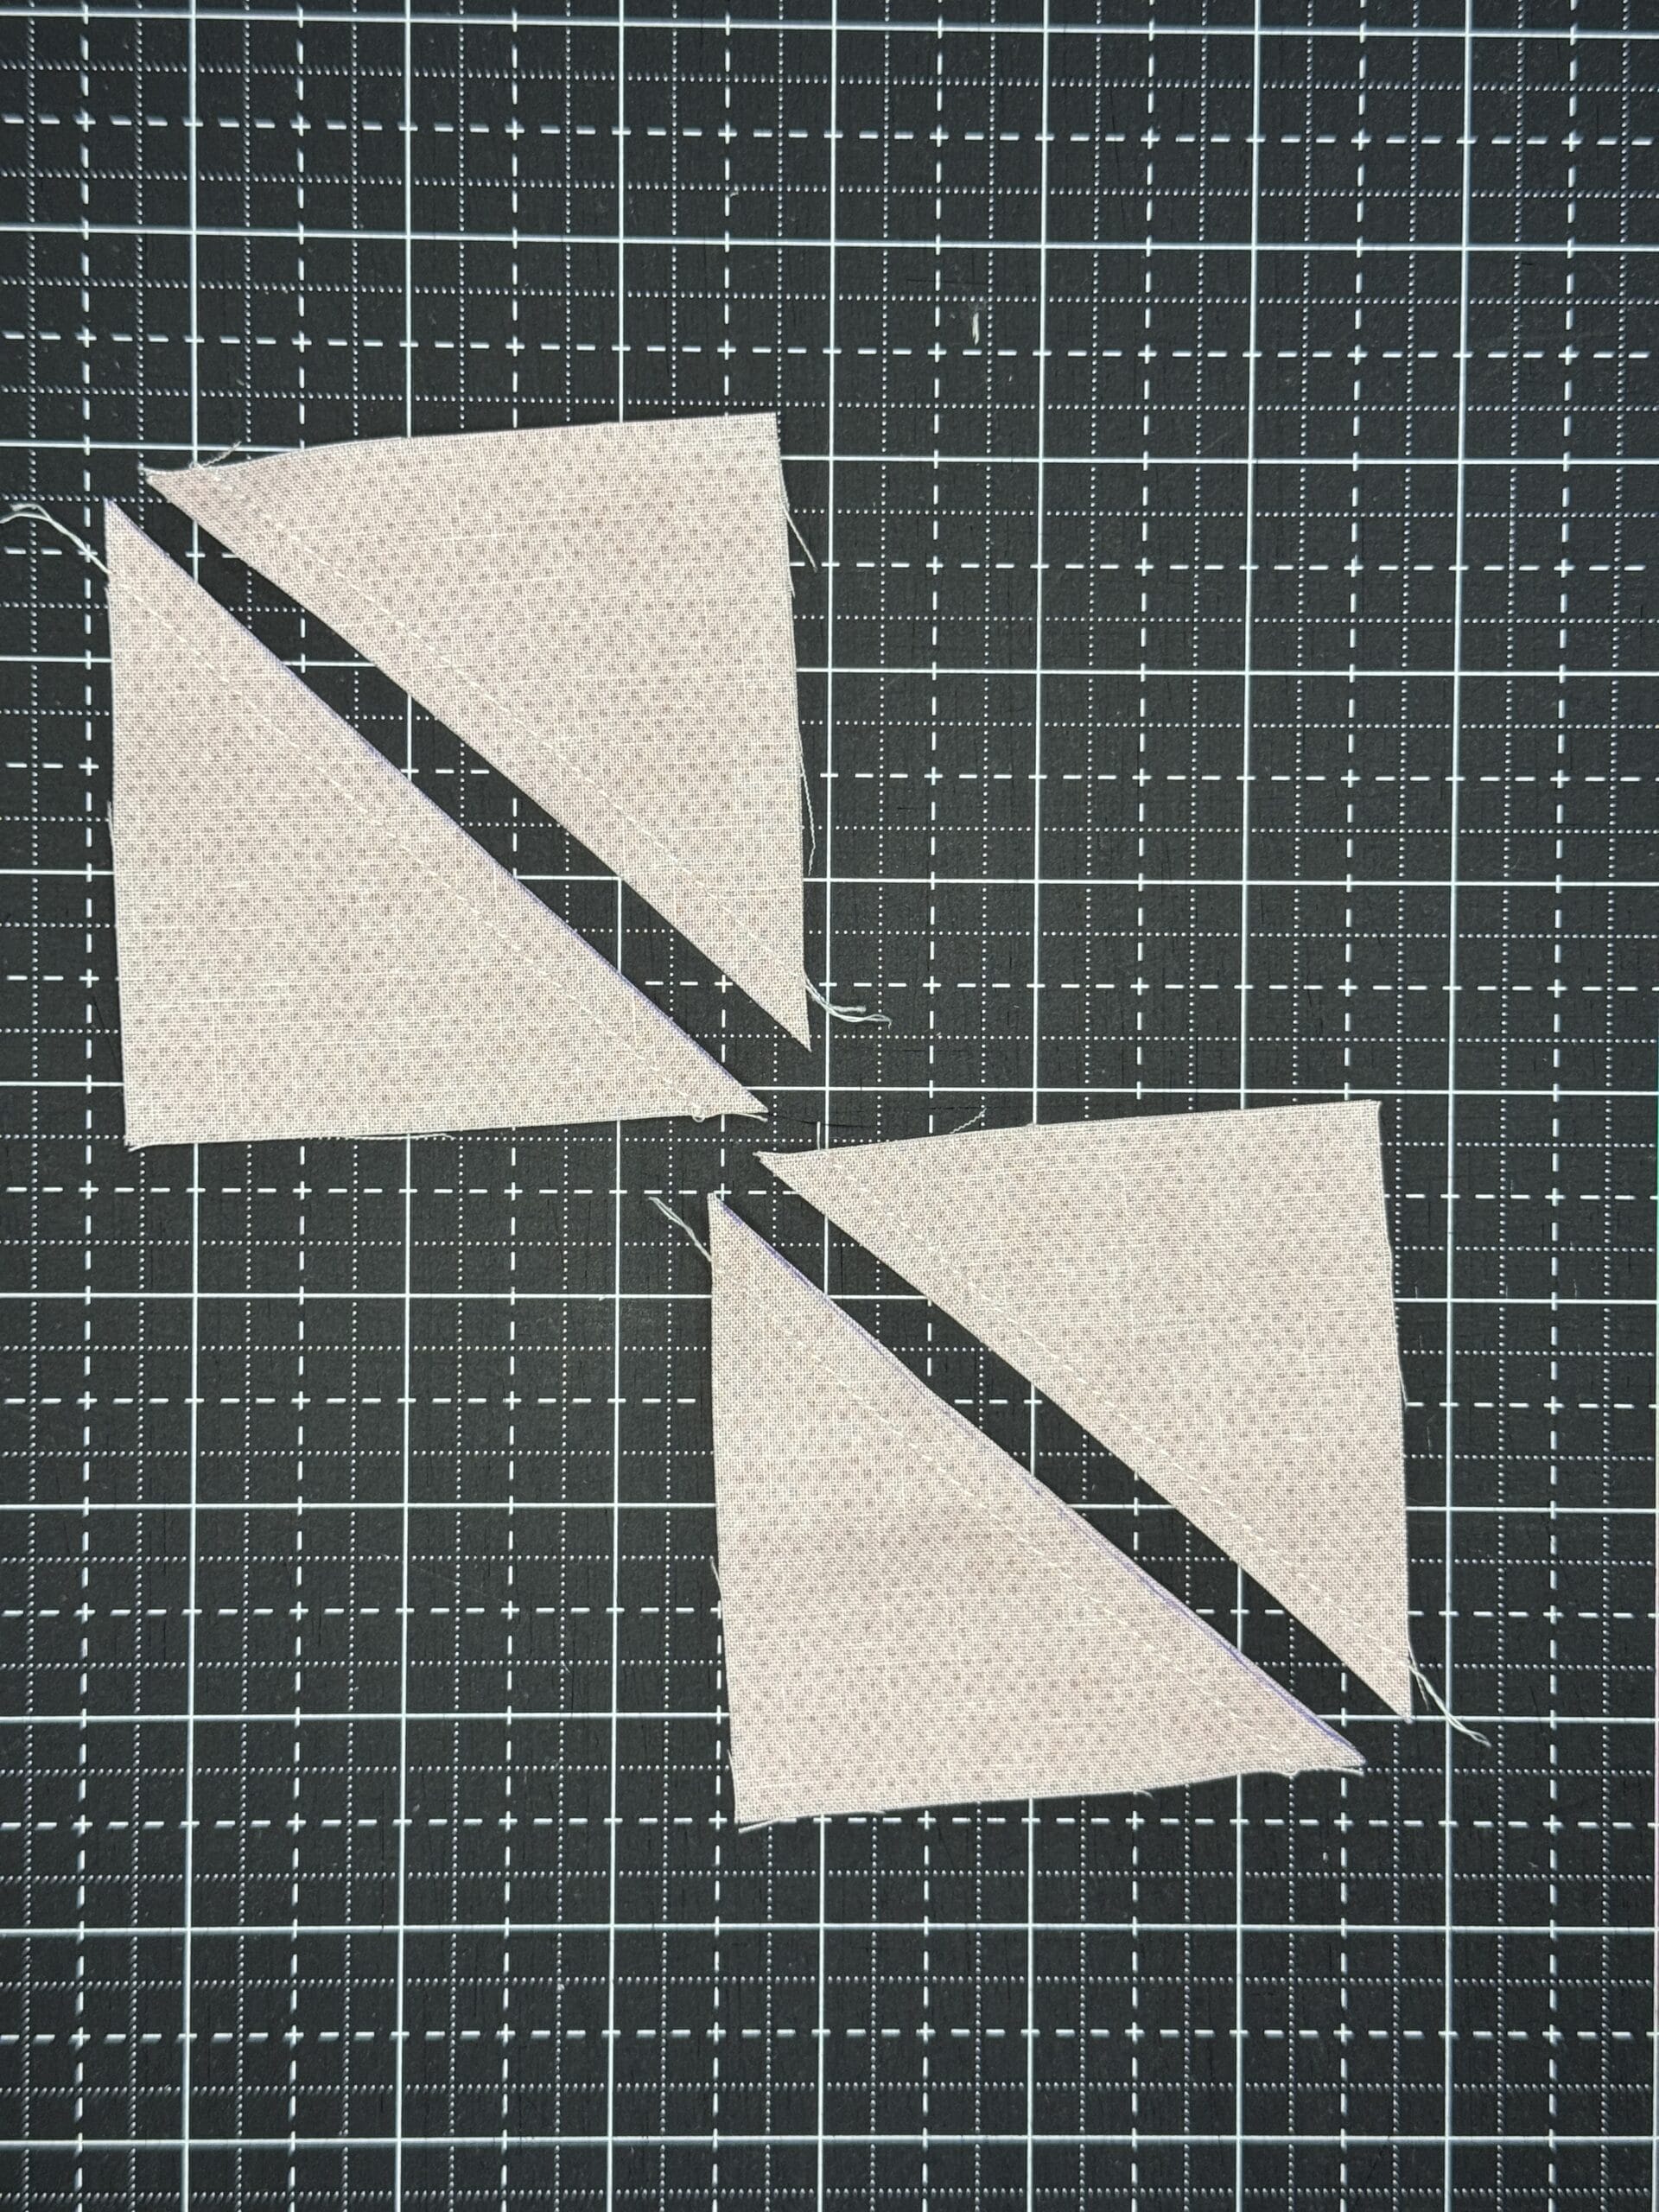
Sew 1/4″ away from both sides of the line and cut on diagonal line to separate
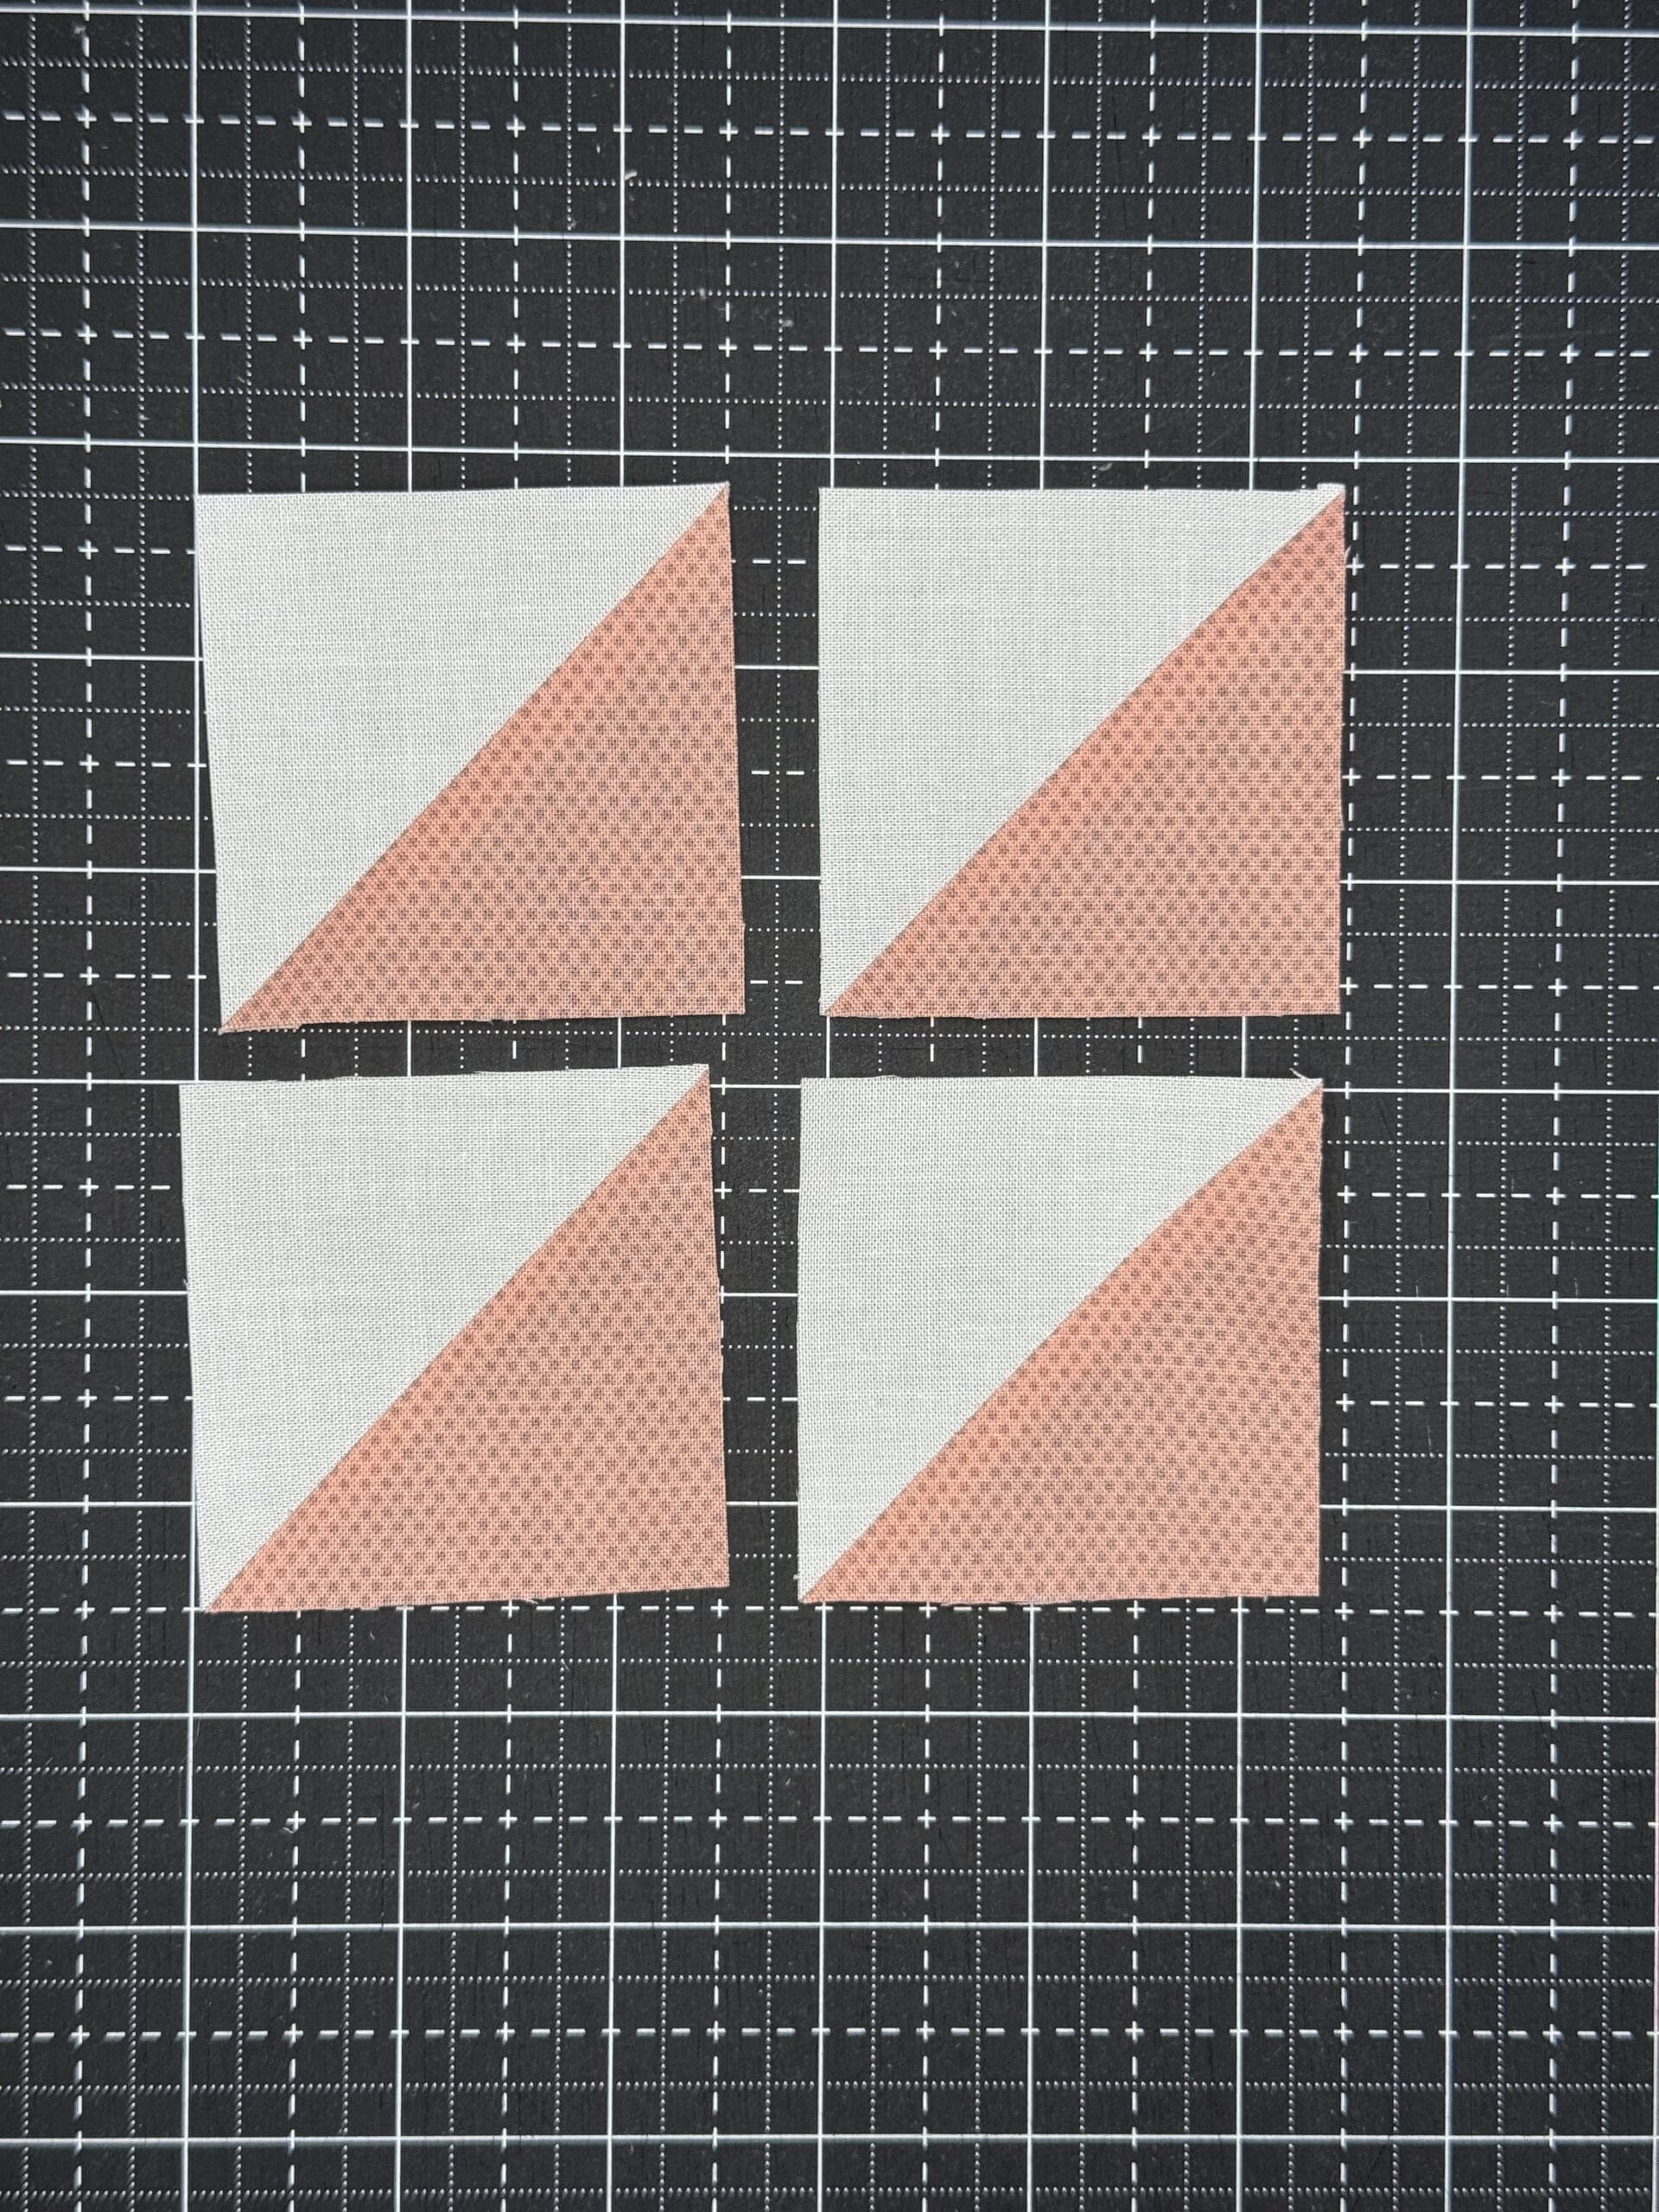
Press block according to directions and trim to finished size.
Using your preferred half-square triangle method, make four matching HST units.
I typically like to make my HSTs slightly oversized with the two at a time method and trim them down to the exact unfinished size needed for the block. That gives you a little wiggle room during construction and makes it much easier to end up with accurate units.
Before moving on, make sure all four HSTs are the same size.
Those few extra seconds spent trimming can make a big difference when you start assembling the block.
Step 2: Lay Out the Friendship Star
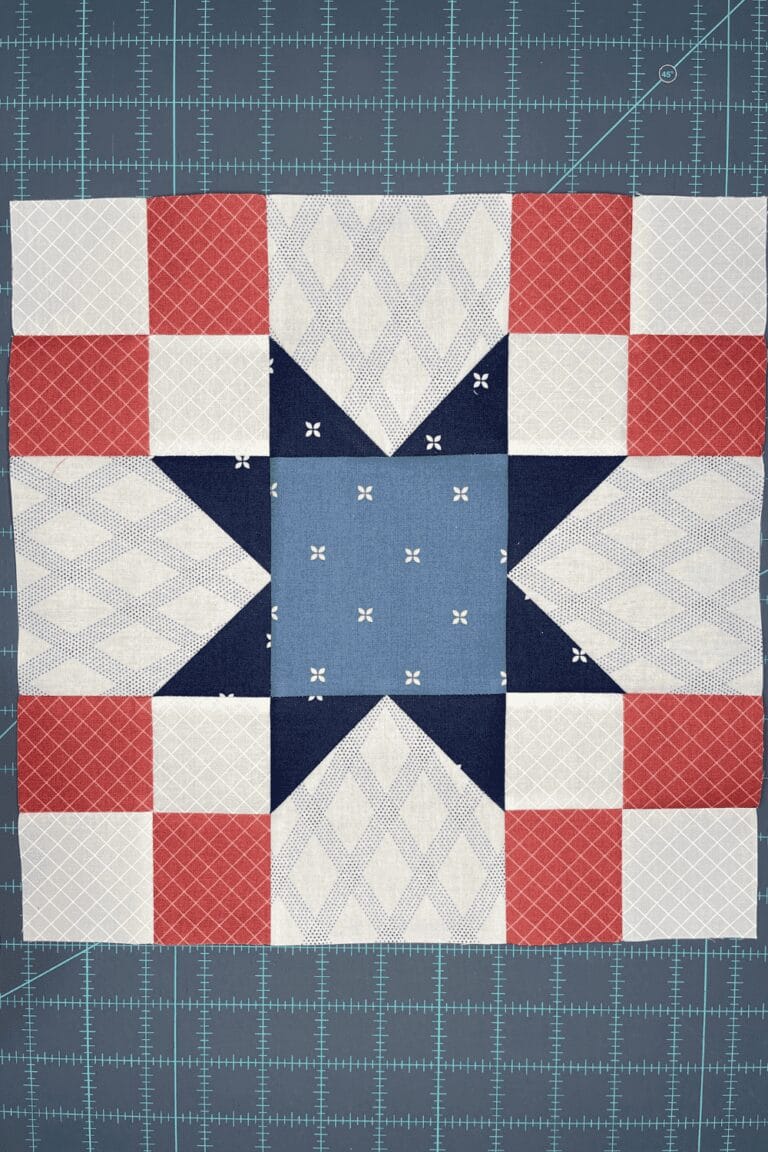
Once your half-square triangles are finished, arrange all nine units into a 3 x 3 grid.
You’ll have your center square in the middle, background squares in the four corners and your HSTs centered along each side.
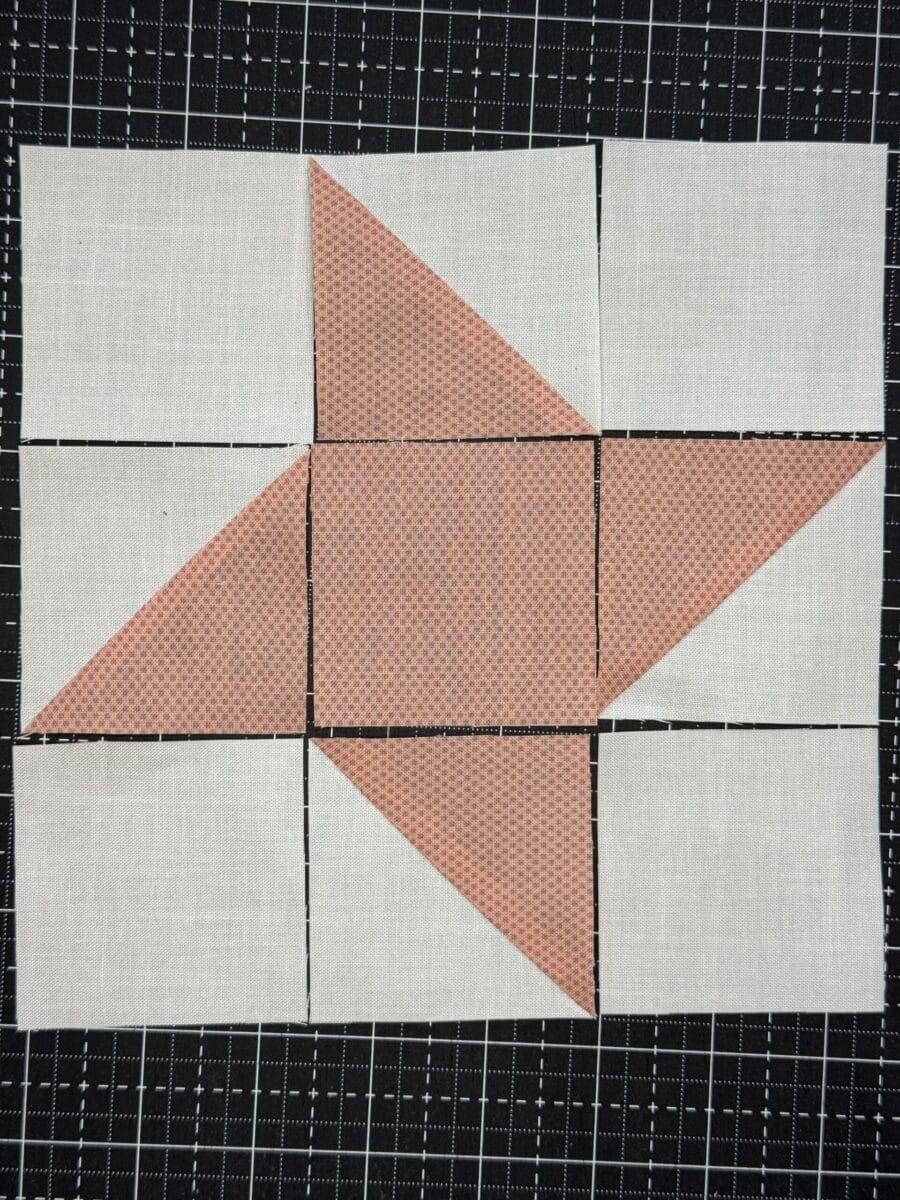
This is the point where you want to stop and look at the block before sewing anything together.
The orientation of the HSTs matters.
All four triangles need to turn in the same direction around the center square to create the spinning Friendship Star shape.
It’s very easy to rotate one HST the wrong way—especially once you start picking up pieces to sew.
If it helps, take a quick photo of your layout before you begin piecing. Then you have something to reference if you’re not sure which direction a unit should face.
Step 3: Sew the Rows Together
Once you’re happy with your layout, sew the units together to create three rows.
Use an accurate 1/4″ seam allowance throughout the block.
After sewing each row, press your seams.
If possible, press the seams in alternating directions from one row to the next. This allows the seams to nest when you join the rows together, which can help you match those intersections more accurately.
You can also press seams open if that’s your preferred method. The important thing is keeping the block flat and avoiding unnecessary distortion as you work.
Step 4: Assemble the Friendship Star Block
Now sew the three rows together.
If you’ve pressed the seams in opposite directions, nest the seams at each intersection and pin or clip them in place before sewing.
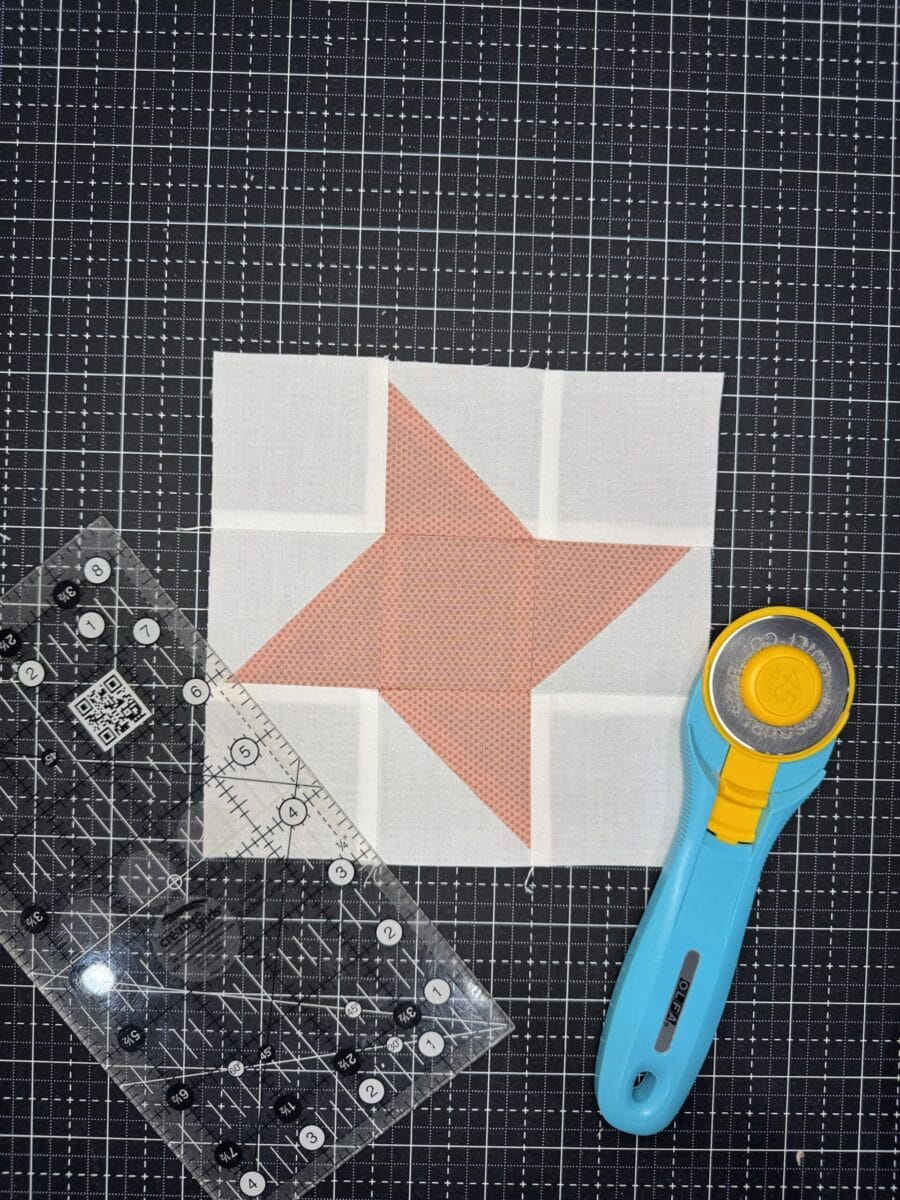
Pay particular attention to the points where the HSTs meet the center square.
You don’t need absolute perfection, but accurate HSTs and a consistent seam allowance should give you nice, crisp points without much fuss.
Press the completed block one final time.
Your Friendship Star is finished!
Tips for an Accurate Friendship Star Quilt Block
Tips for an Accurate Friendship Star Quilt Block
The Friendship Star is a fairly forgiving block, but a few small things will make construction much easier.
Start with accurate HSTs.
If your half-square triangles aren’t square or aren’t all the same size, those small differences will show up when you assemble the block.
Watch your HST orientation.
Before sewing each row, compare it to your original layout. It’s much easier to rotate a unit before sewing than it is to find the seam ripper afterward.
Use a consistent 1/4″ seam allowance.
Nine-patch style blocks depend on those units fitting together accurately.
Don’t stretch the bias edges.
Half-square triangles contain bias edges, which can distort if they’re pulled or handled too aggressively. Starching your fabric before cutting can help tremendously with this.
And remember: finished is better than perfect. If one star point is a thread or two away from perfection, your quilt will still keep someone just as warm.
A Classic Quilt Block Worth Learning
The Friendship Star is one of those traditional quilt blocks that looks more complicated than it really is. With just squares and half-square triangles, it’s a great way to practice accurate piecing and block orientation.
Make a whole quilt of Friendship Stars, mix them with other blocks in a sampler, or use up some of your favorite fabric scraps. You can even change the look of the star simply by experimenting with fabric placement and color.
Whether you’re making one block or an entire quilt, just remember to double-check the direction of those half-square triangles before sewing.
Ask me how I know.