
Churn Dash Quilt Block Tutorial: A Classic Traditional Quilt Block
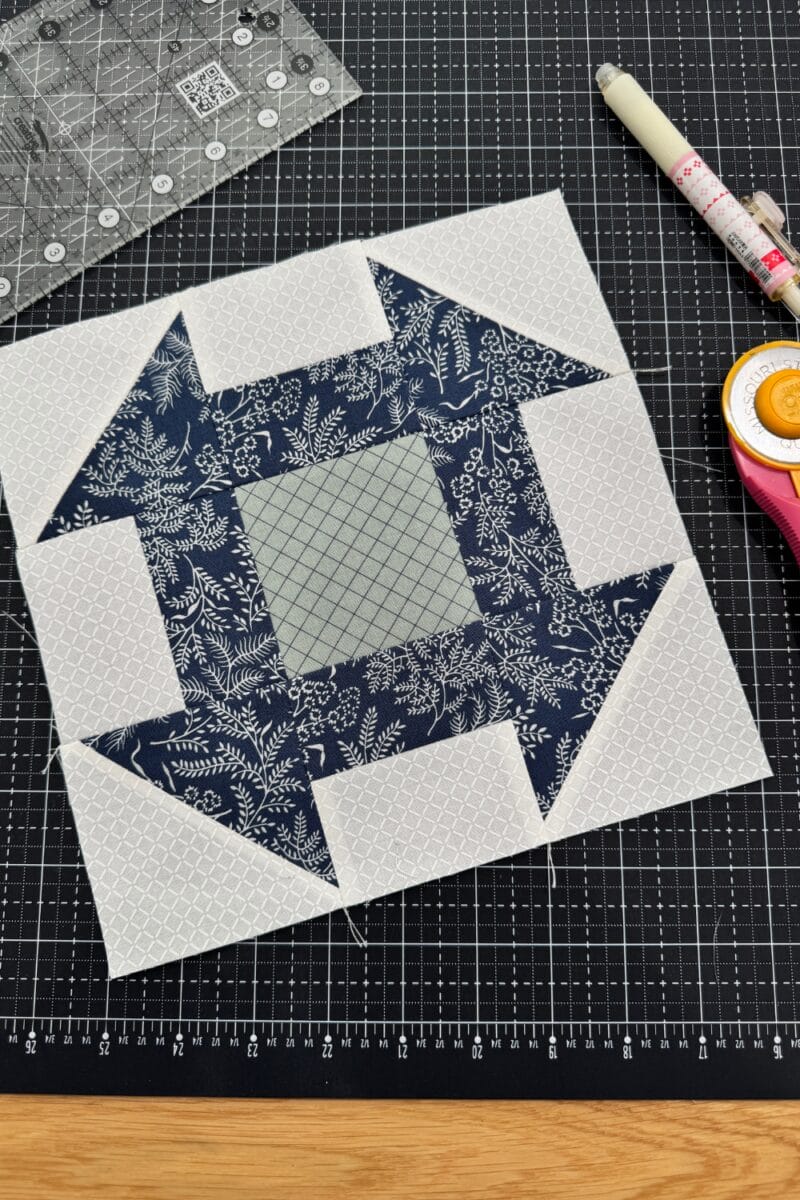
The Churn Dash quilt block is one of those traditional quilt blocks that has been around for generations, but still feels completely at home in modern quilts.
When purchasing through links on this site, I may earn an affiliate commission at no cost to you.
Made from half square triangles, simple rectangles, and a center square, the Churn Dash is a great example of how a few basic quilting units can come together to create something much more interesting.
If you’ve been following along with my quilt block tutorials, this is also where some of those foundational quilting skills really start to come together. Once you’re comfortable making accurate half square triangles and sewing a consistent 1/4″ seam, the Churn Dash is a surprisingly simple block to make.
What Is a Churn Dash Quilt Block?
The Churn Dash is a traditional nine-patch style quilt block. Instead of using nine simple squares, the sections of the block are made from a combination of half square triangles, rectangle units, and a center square.
The four half square triangles create the corners of the block, while the rectangular strip pieced side units form the distinctive shape around the center.
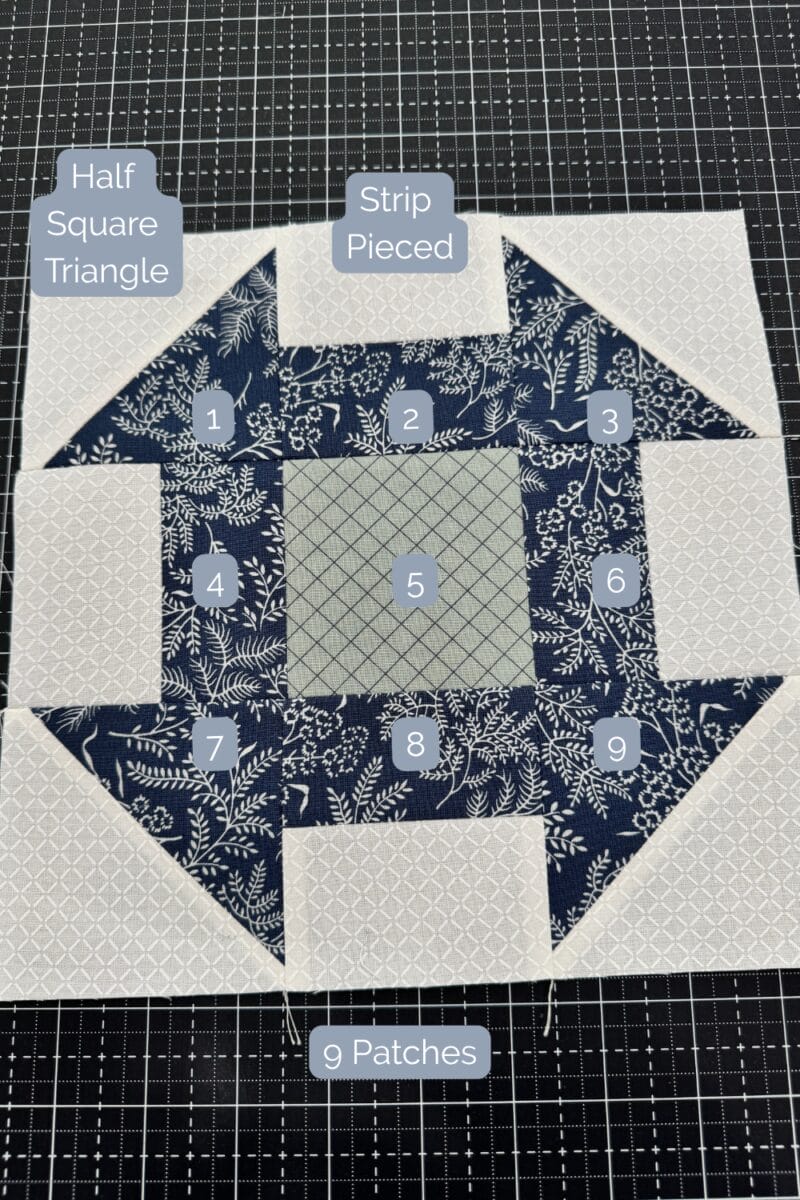
Despite its traditional appearance, the Churn Dash is really just another example of combining basic quilting units into a larger design.
That’s one of the things I love about learning traditional quilt blocks. Once you stop looking at the entire block and start breaking it into smaller sections, even complicated-looking blocks become much easier to understand.
Skills You’ll Use to Make a Churn Dash Block
To make a Churn Dash quilt block, you’ll use several basic quilting skills:
- Half square triangles
- Accurate 1/4″ seam allowances
- Simple piecing
- Pressing
- Matching seams and points
- Squaring your finished block
If any of those still feel a little intimidating, I’ve already covered them individually in my Quilting Foundations tutorials. Just click the linked text above!
You don’t have to master every skill before making more complicated blocks. Sometimes actually using those techniques inside a block is the best way to understand how they work together.
Fabric Requirements and Cutting
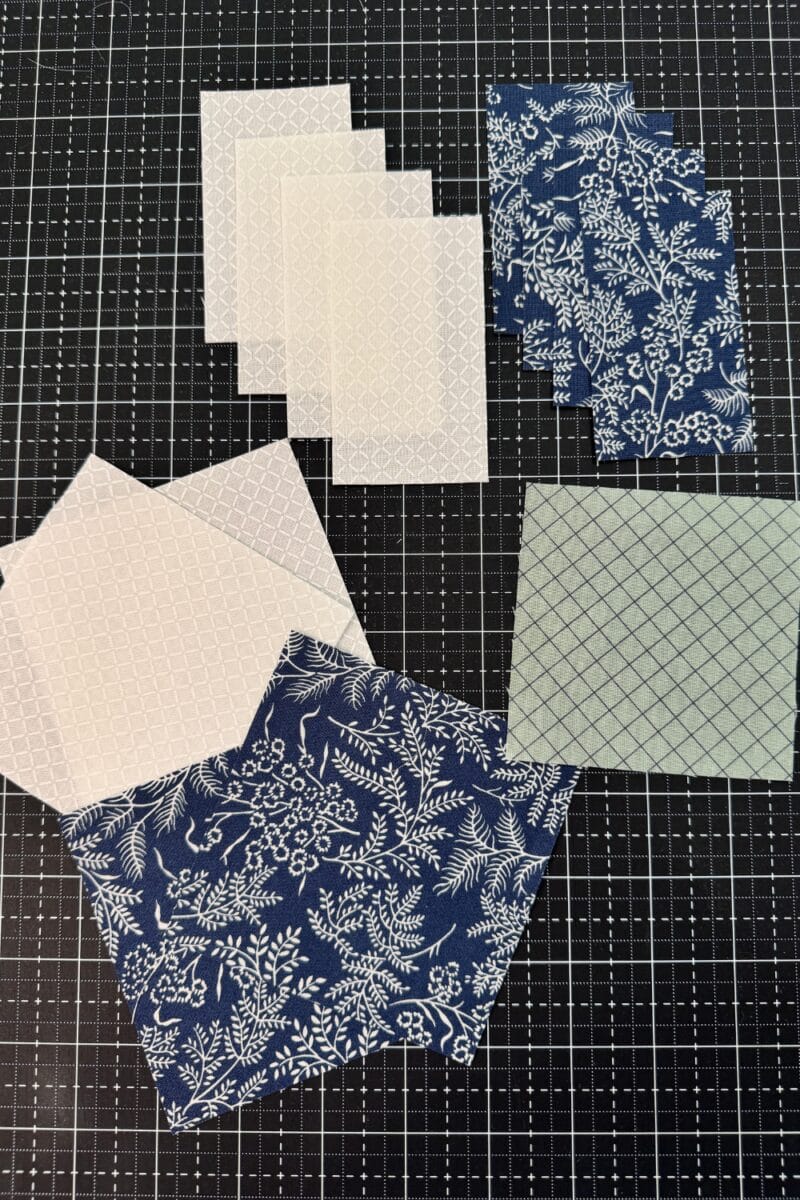
For this tutorial, I’m making a 9″ finished size Churn Dash block.
You’ll need the following fabrics:
| Finished Quilt Block Size | Unfinished Block Size | HST Squares* | Trim HSTs To | Center Square | Side Rectangles |
| 6″ | 6 ½” | (2) 3″ squares from Background + (2) 3″ squares from Print | 2½” × 2½” | 2½” × 2½” | 4) 1½” × 2½” Background + (4) 1½” × 2½” Print |
| 9″ | 9 ½” | (2) 4″ squares from Background + (2) 4″ squares from Print | 3½” × 3½” | 3½” × 3½” | 4) 2″ × 3½” Background + (4) 2″ × 3½” Print |
| 12″ | 12 ½” | (2) 5″ squares from Background + (2) 5″ squares from Print | 4½” × 4½” | 4½” × 4½” | (4) 2½” × 4½” Background + (4) 2½” × 4½” Print |
*The HST squares are intentionally oversized. Make the HSTs using the two-at-a-time method, then trim four HST units to the size shown.
You can make the center square from the same fabric as the rest of the Churn Dash or use a contrasting fabric to give the block a completely different look.
Want a printable version?
Sign up for my email and get a printable PDF cutting chart/cheat sheet on how to make the Churn Dash block in 3 sizes!
A Note About Cutting Accuracy
Because the Churn Dash is made from several individual units that eventually need to fit together, accurate cutting matters.
Even a small difference in your pieces can multiply as you sew the block together.
Take your time cutting and make sure you’re measuring with the lines on your ruler rather than the edge of the ruler itself.
Step 1: Make the Half Square Triangles
Begin by making four half square triangle units for the corners of the Churn Dash.
For this block, I’m using the two at a time Half Square Triangle method.
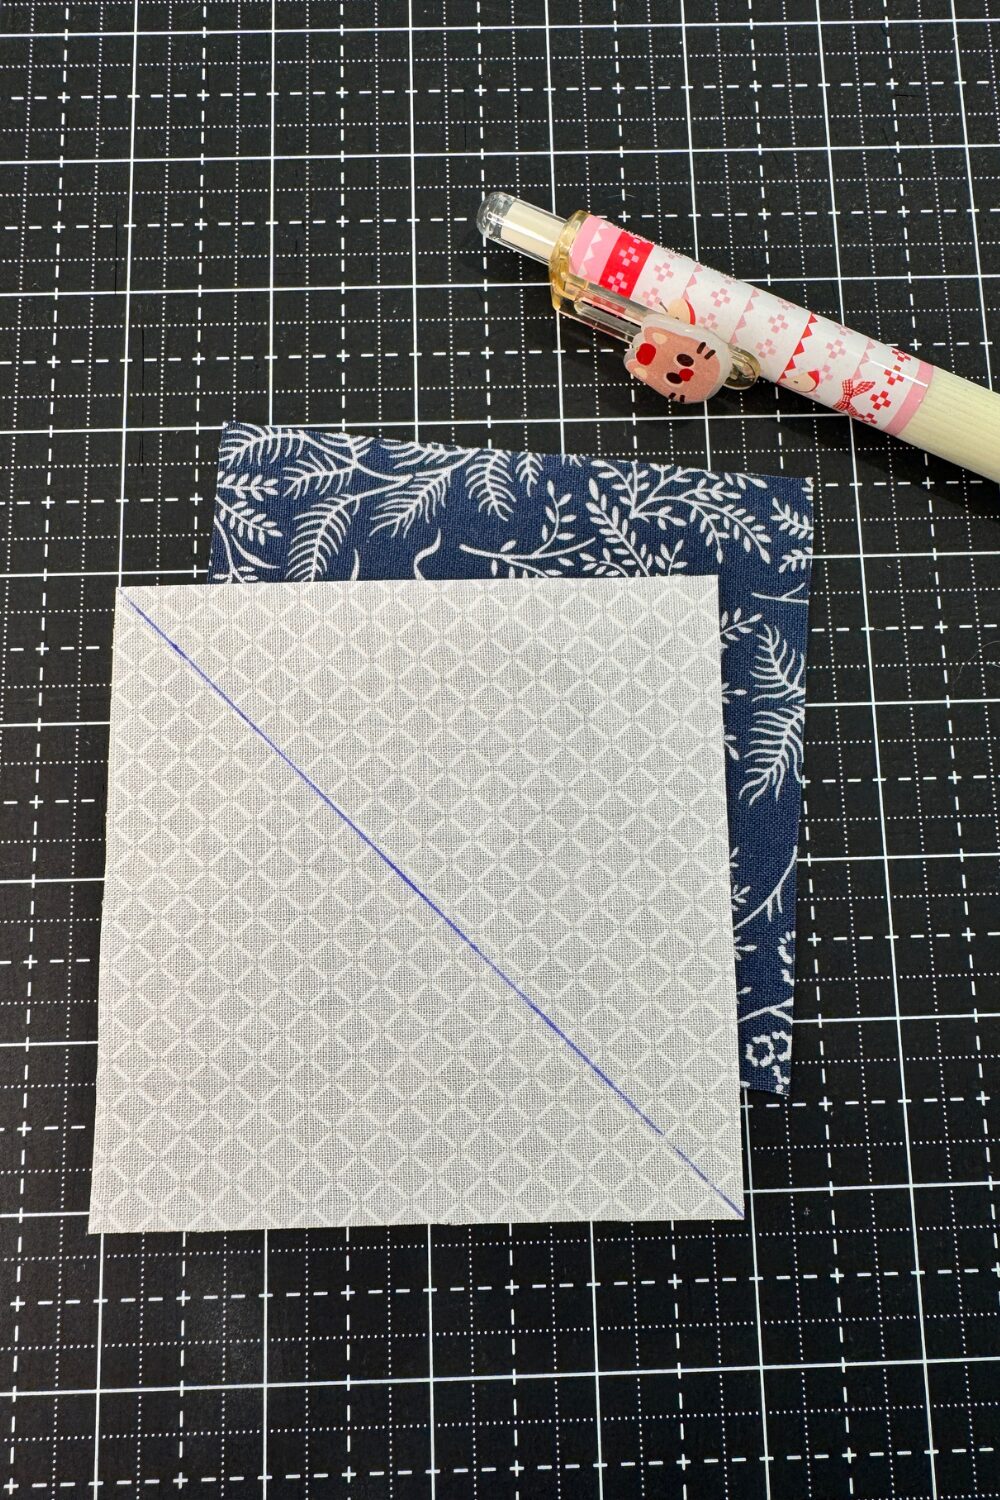
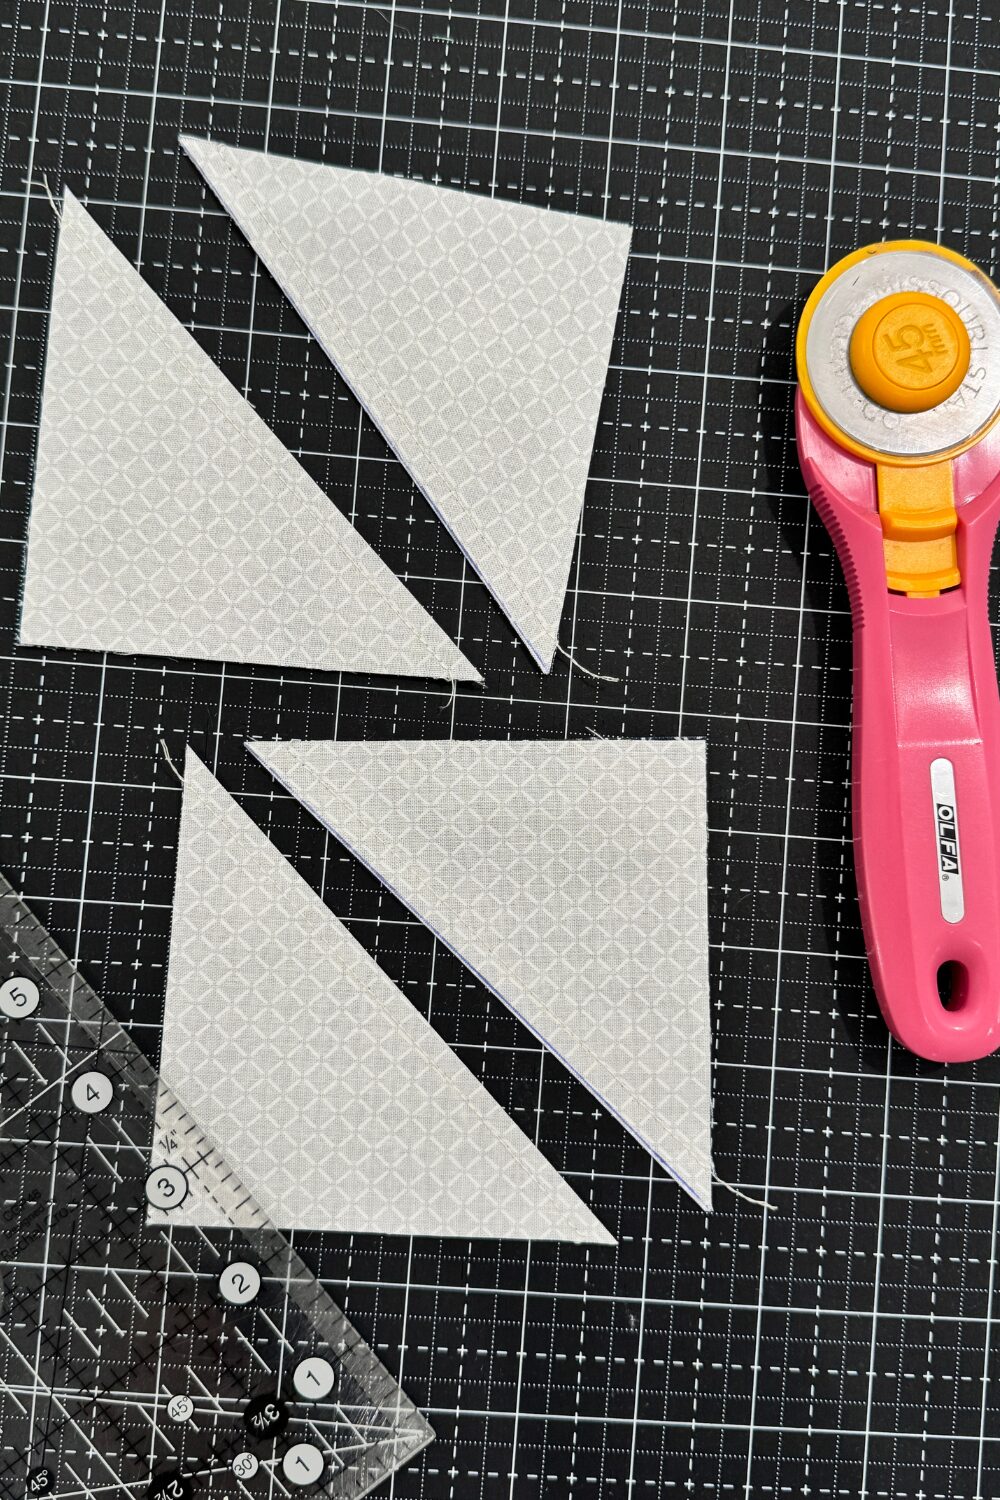
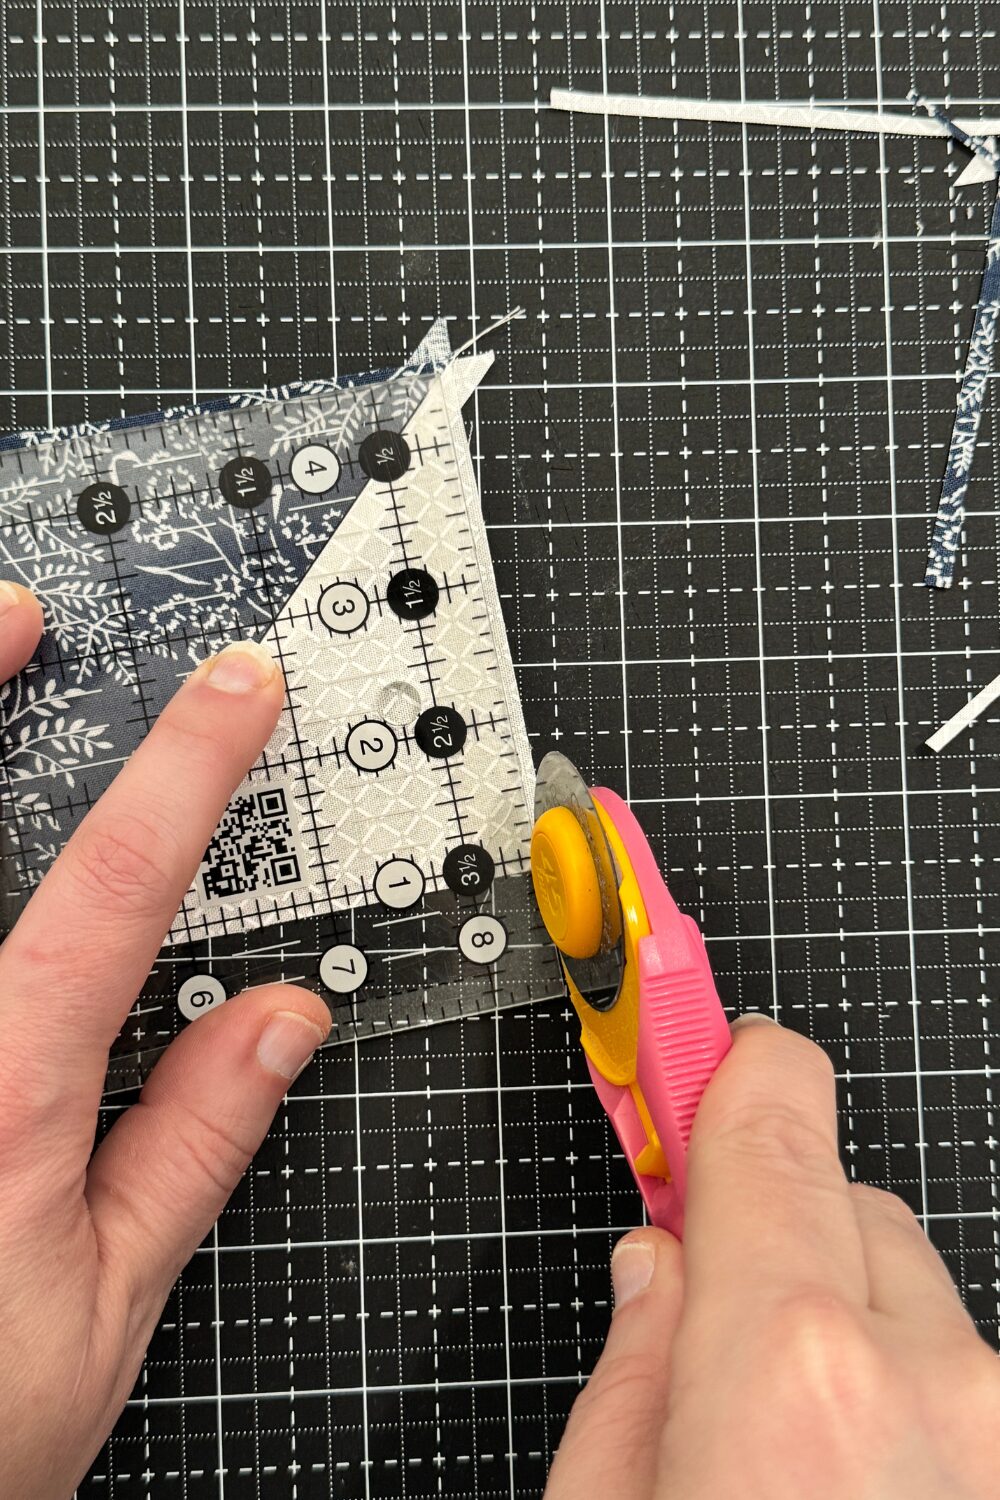
- Place one background square and one Churn Dash fabric square right sides together.
- Draw a diagonal line from corner to corner on the wrong side of one square.
- Sew 1/4″ away from each side of the drawn line.
- Cut directly on the drawn line to separate the units.
- Press the half square triangles open and trim each one to 3 ½”
Don’t Skip the Trimming
Even when your sewing is accurate, half square triangles can end up slightly oversized or distorted during construction. This method is intentionally oversized, so make sure you trim them to the exact size needed.
Trimming them before assembling the Churn Dash gives you four identical corner units and makes the final block much easier to assemble accurately.
Step 2: Make the Rectangle Units
Next we’ll make the four rectangular units that form the sides of the Churn Dash.
Place one background rectangle and one Churn Dash fabric rectangle right sides together.
Sew along the long edge using a 1/4″ seam allowance.
Press the seam to the darker fabric.
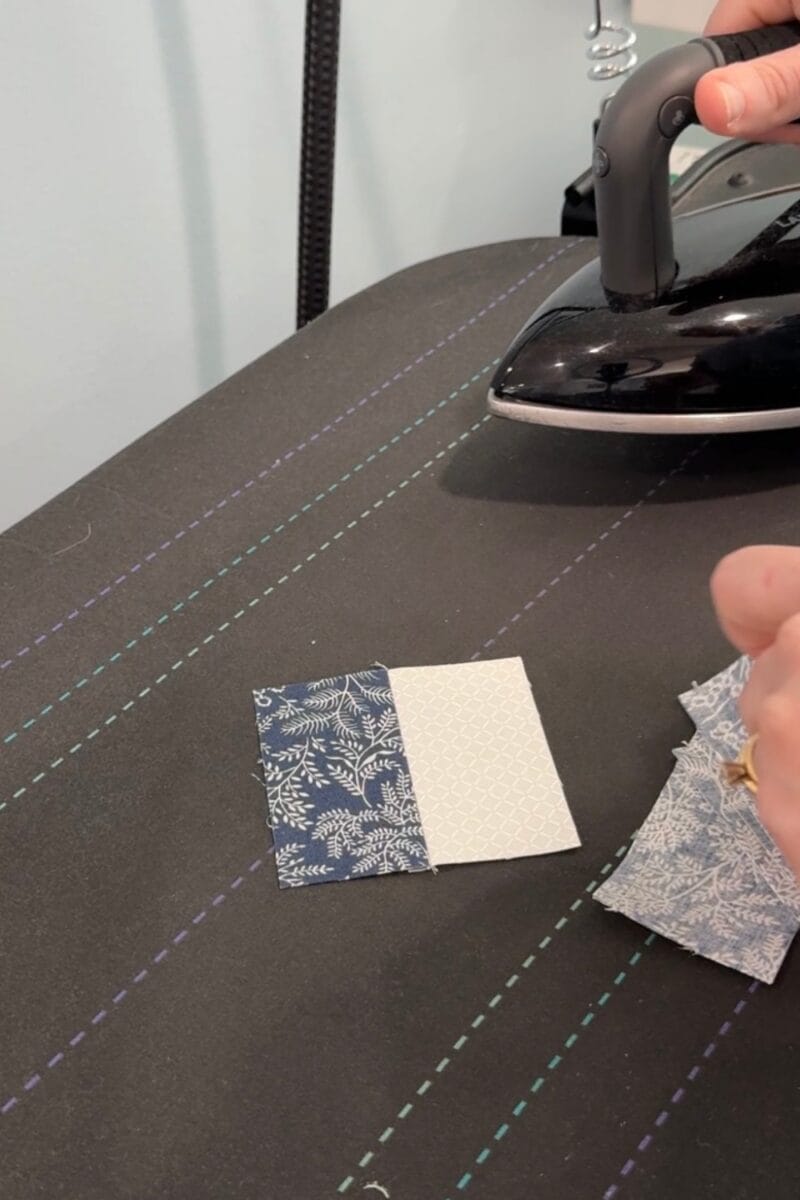
Repeat until you have four identical rectangle units.
Each completed unit should measure 3.5″ Square (for the 9″ churn dash block).
This is a good place to stop and measure before continuing. Catching a unit that’s slightly too large or too small now is much easier than discovering it after the entire block has been assembled.
Step 3: Lay Out the Churn Dash Block
Now comes my favorite part—laying everything out and finally seeing the block appear.
Arrange your nine units into three rows.
Make sure the half square triangles are rotated correctly so the Churn Dash design forms around the center square.
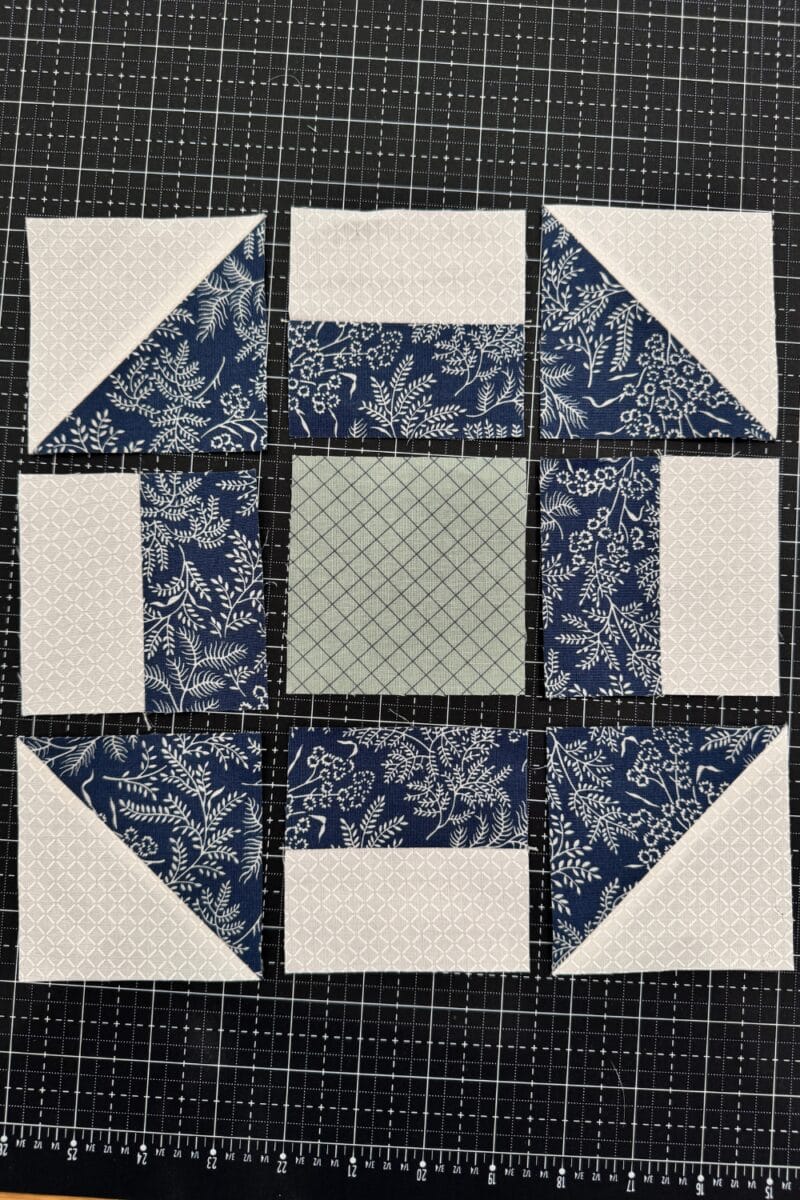
I almost always lay out my entire block before I start sewing the rows together. It only takes a few seconds and saves a surprising amount of seam ripping when a triangle gets turned the wrong direction.
And yes, I still occasionally sew something together backward.
Step 4: Sew the Churn Dash Into Rows
Sew the three units in each row together using an accurate 1/4″ seam allowance.
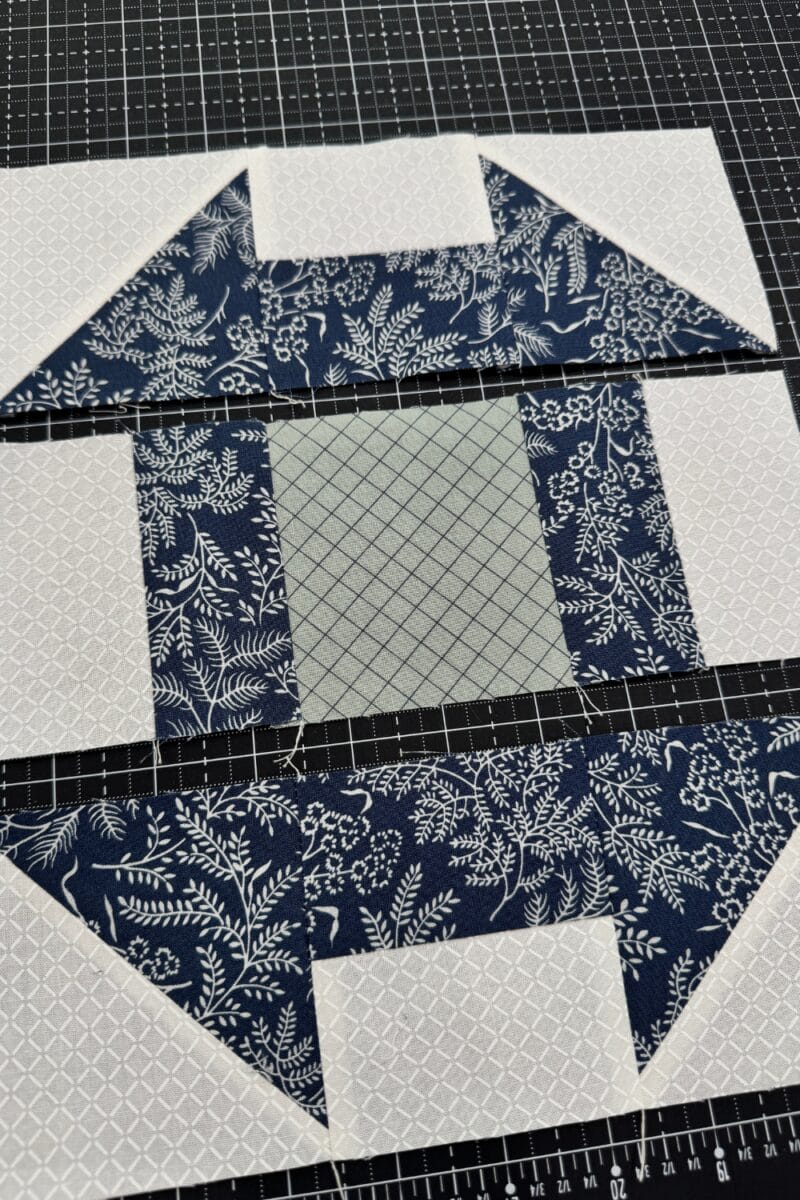
Pay attention to your seam intersections as you sew.
Depending on how you’ve pressed your individual units, you may be able to press neighboring seams in opposite directions so they nest together when the rows are joined.
Nested seams help the intersections almost lock into place.
If your raw edges aren’t absolutely perfect but your seam intersections are aligned, focus on the intersection rather than forcing the outer edges to match.
Step 5: Join the Rows
Place the top and middle rows right sides together.
Match the seam intersections and pin or clip them in place if needed.
Sew using a 1/4″ seam allowance.
Repeat to attach the bottom row.
Press the completed block flat.
Step 6: Square the Finished Churn Dash Block
Your completed block should measure 9 1/2″ (in this example)
Place your square ruler over the block and check that the block is square and the outer edges are straight.
At this point, I am looking for small threads, dog ears, or tiny inconsistencies—not trying to trim away enough fabric to correct a significantly undersized block.
If your block is substantially smaller than it should be, trimming won’t fix the underlying problem. That’s usually a sign that something earlier in the construction—cutting, seam allowance, pressing, or unit size—needs to be checked.
Changing the Look of a Churn Dash Block
One of the reasons the Churn Dash has remained popular for so long is how much the block changes depending on fabric placement.
A traditional two-color Churn Dash makes the shape of the block immediately recognizable.
Using a contrasting center square creates a stronger focal point.
Scrappy half square triangles and rectangle units can give the same block a completely different personality.
You can even reverse the traditional light and dark placement so the background becomes the dominant part of the design.
This is where traditional quilt blocks get really fun. The construction doesn’t change, but color and value can make the same block look completely different.
Final Thoughts
The Churn Dash quilt block has been made by generations of quilters, and it’s easy to see why it has stuck around.
It’s simple enough for a confident beginner, interesting enough for an experienced quilter, and endlessly adaptable depending on the fabrics you choose.
More importantly, it’s a great example of what happens when basic quilting skills start working together.
Once you’ve made one Churn Dash, try changing the center fabric, reversing the color placement, or digging through your scrap bin and making a completely scrappy version.
Same block. Same construction.
Completely different quilt.
Happy quilting!