
Ohio Star Quilt Block Tutorial: A Classic Traditional Star Block
The Ohio Star is one of those traditional quilt blocks that looks a little more complicated than it actually is.
When purchasing through links on this site, I may earn an affiliate commission at no cost to you.
With its crisp star points and strong geometric design, you might expect some complicated piecing. But once you break the block apart, an Ohio Star is simply a nine-patch arrangement made from squares and four Hourglass Blocks.
Hourglass Blocks are also commonly called quarter-square triangles, or QSTs. If you’ve already made my Hourglass Block tutorial, you already know the most important technique you’ll need to make an Ohio Star.
What Is an Ohio Star Quilt Block?
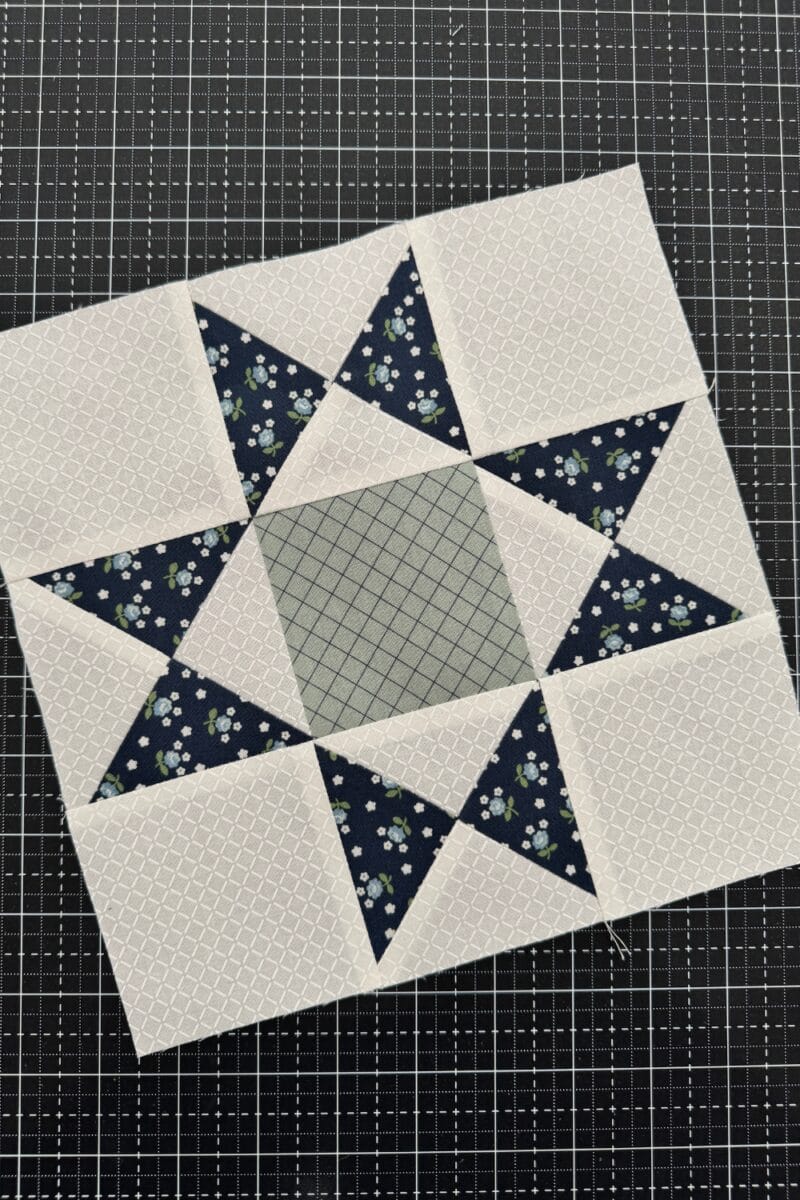
The Ohio Star is a classic nine-patch quilt block.
Four plain squares form the corners, one square sits in the center, and four Hourglass Blocks create the eight points of the star.
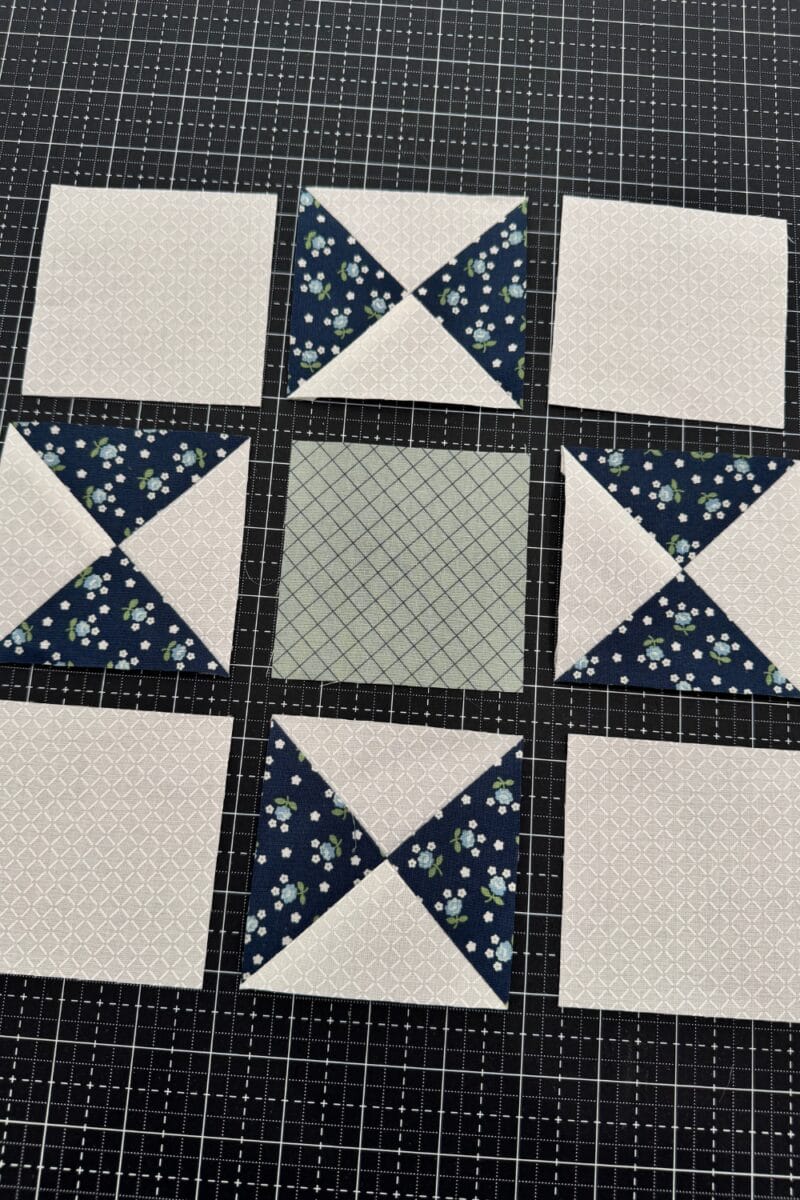
Those Hourglass Blocks—or quarter-square triangles—are what give the Ohio Star its distinctive shape.
That’s one of the things I love about traditional quilt blocks. A finished block can look fairly complicated, but when you start breaking it into smaller sections, you’ll usually find familiar quilting units hiding inside.
The Ohio Star is a perfect example.
If you can make an Hourglass Block and sew together a Nine Patch, you can make an Ohio Star.
Ohio Star vs. Sawtooth Star
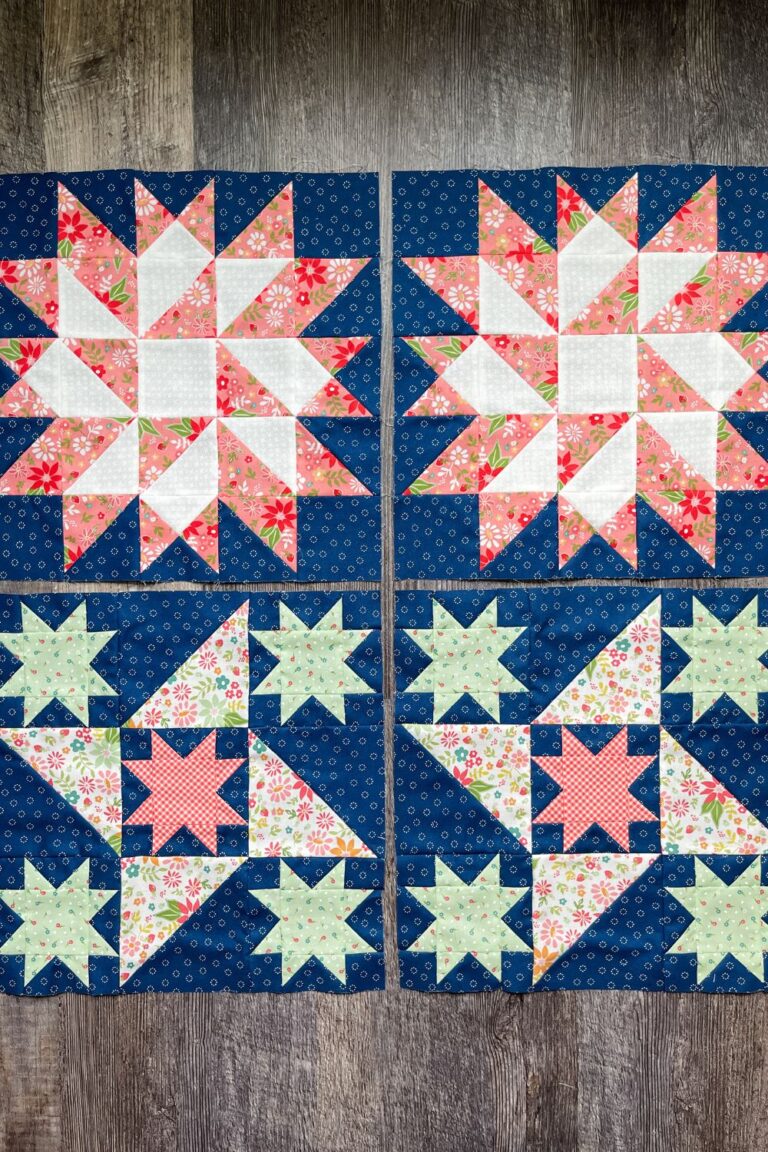
If you’ve already made my Sawtooth Star block, you might notice that the Ohio Star has a similar overall shape. Both create an eight-pointed star, but they’re constructed very differently.
The Sawtooth Star uses four Flying Geese units to create its star points.
The Ohio Star uses four Hourglass Blocks, also known as quarter-square triangles.
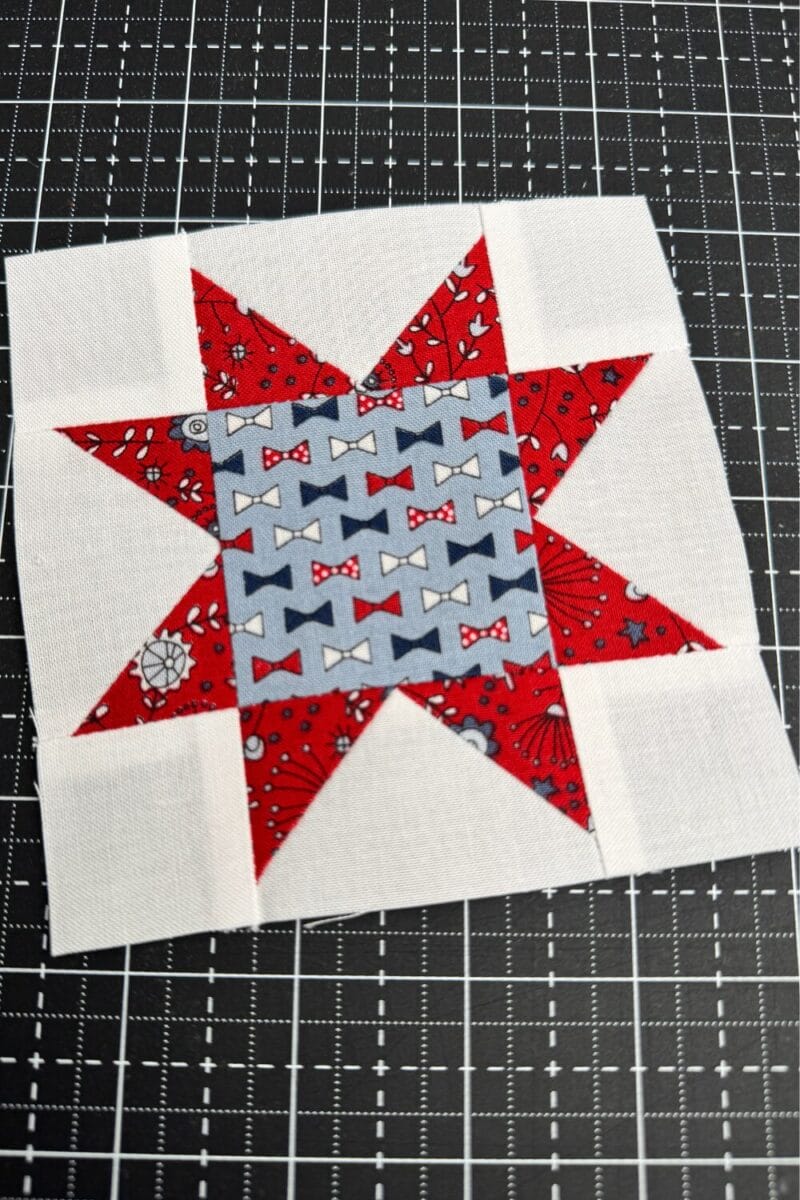
This is a great example of how different quilting units can create completely different versions of a traditional star block.
Skills You’ll Use to Make an Ohio Star
There really isn’t a complicated new technique hiding inside the Ohio Star. Instead, we’re going to combine several basic quilting skills:
- Making Hourglass Blocks/quarter-square triangles
- Sewing an accurate 1/4″ seam allowance
- Trimming units for accuracy
- Pressing
- Matching seams and points
- Nine-patch block construction
If any of those skills need a refresher, I’ve covered them individually in my Quilting Foundations tutorials.
Ohio Star Quilt Block Sizes
I’ve included cutting instructions for three finished Ohio Star sizes:
- 6″ finished
- 9″ finished
- 12″ finished
Remember that quilt block measurements usually refer to the finished size after the block has been sewn into a quilt.
Before it’s sewn into the quilt, your Ohio Star will measure 1/2″ larger to account for the seam allowances.
That means your blocks should measure:
- 6 1/2″ unfinished for a 6″ finished block
- 9 1/2″ unfinished for a 9″ finished block
- 12 1/2″ unfinished for a 12″ finished block
For the step-by-step photographs in this tutorial, I’m making the 9″ finished Ohio Star.
| Finished Ohio Star | Background Corner Squares | Center Square | Background for Hourglass Units | Main Fabric for Hourglass Units | Trim Hourglass Units To |
| 6″ | (4) 2½” × 2½” | (1) 2½” × 2½” | (2) 3½” × 3½” | (2) 3½” × 3½” | 2½” × 2½” |
| 9″ | (4) 3½” × 3½” | (1) 3½” × 3½” | (2) 4½” × 4½” | (2) 4½” × 4½” | 3½” × 3½” |
| 12″ | (4) 4½” × 4½” | (1) 4½” × 4½” | (2) 5½” × 5½” | (2) 5½” × 5½” | 4½” × 4½” |
Want a printable version?
Sign up for email list here and get a printable PDF Ohio Star chart and instructions.
A Note About the Hourglass Block Measurements
The squares used to make the Hourglass Blocks are intentionally oversized.
We’ll make the Hourglass Blocks slightly larger than we need and then trim them to the exact size listed in the chart.
I prefer this method because Hourglass Blocks have multiple bias edges and several seams meeting in the center. Giving yourself a little extra fabric makes it much easier to get an accurate finished unit.
I’d much rather trim away a little extra fabric than discover my star points are too small when I’m ready to assemble the block.
Step 1: Make Four Hourglass Blocks
Begin by making four Hourglass Blocks using your background fabric and star fabric.
Hourglass Blocks are also commonly called quarter-square triangles, or QSTs, so you may see either name used in quilt patterns. Throughout my tutorials, I call them Hourglass Blocks.
If you need more detailed instructions, I have a complete Hourglass Quilt Block Tutorial that walks you through the construction step by step.
For the method I use, begin with one square of background fabric and one square of star fabric for each Hourglass Block.
Cut each square diagonally from corner to corner in both directions. This divides each square into four triangles.
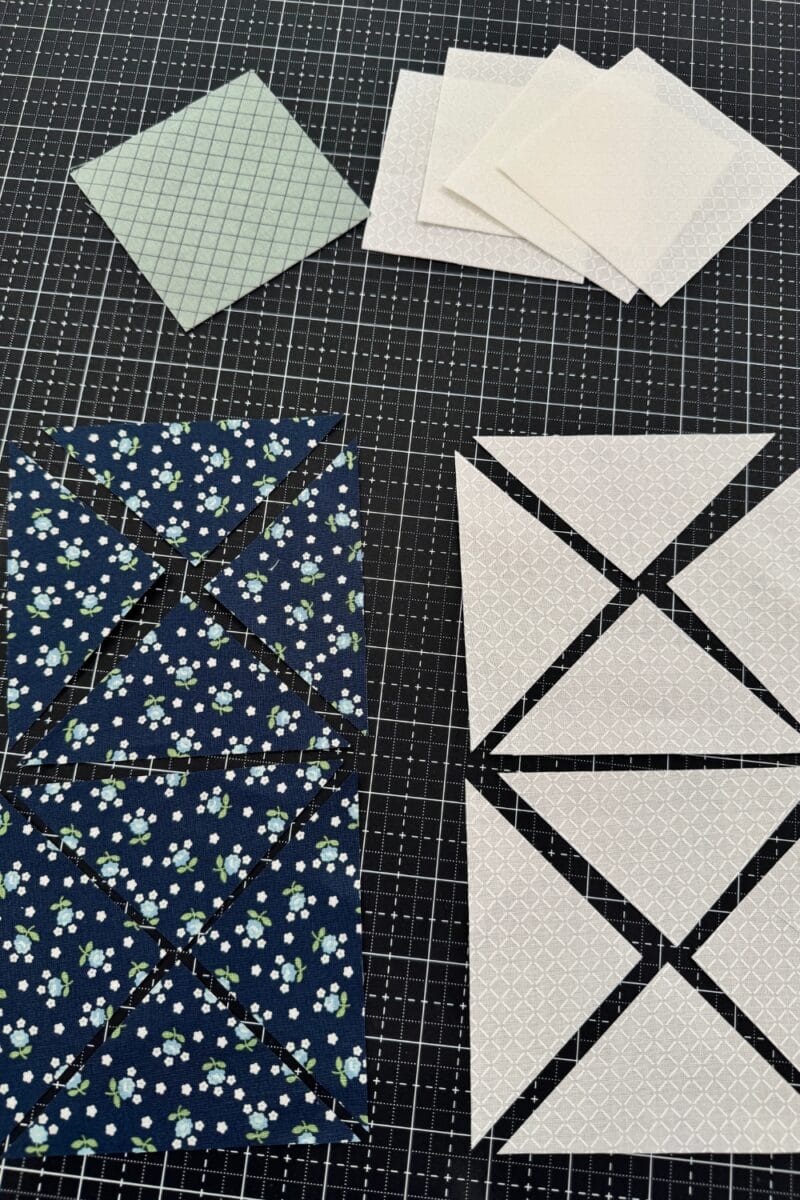
Arrange two background triangles and two star triangles into an Hourglass Block, alternating the fabrics around the center point.
Sew the triangles together according to the method in my Hourglass Block tutorial.
Because these triangles are cut on the bias, handle them gently as you sew and press. Avoid pulling or stretching the fabric, which can distort the finished unit.
Make a total of four identical Hourglass Blocks for your Ohio Star.
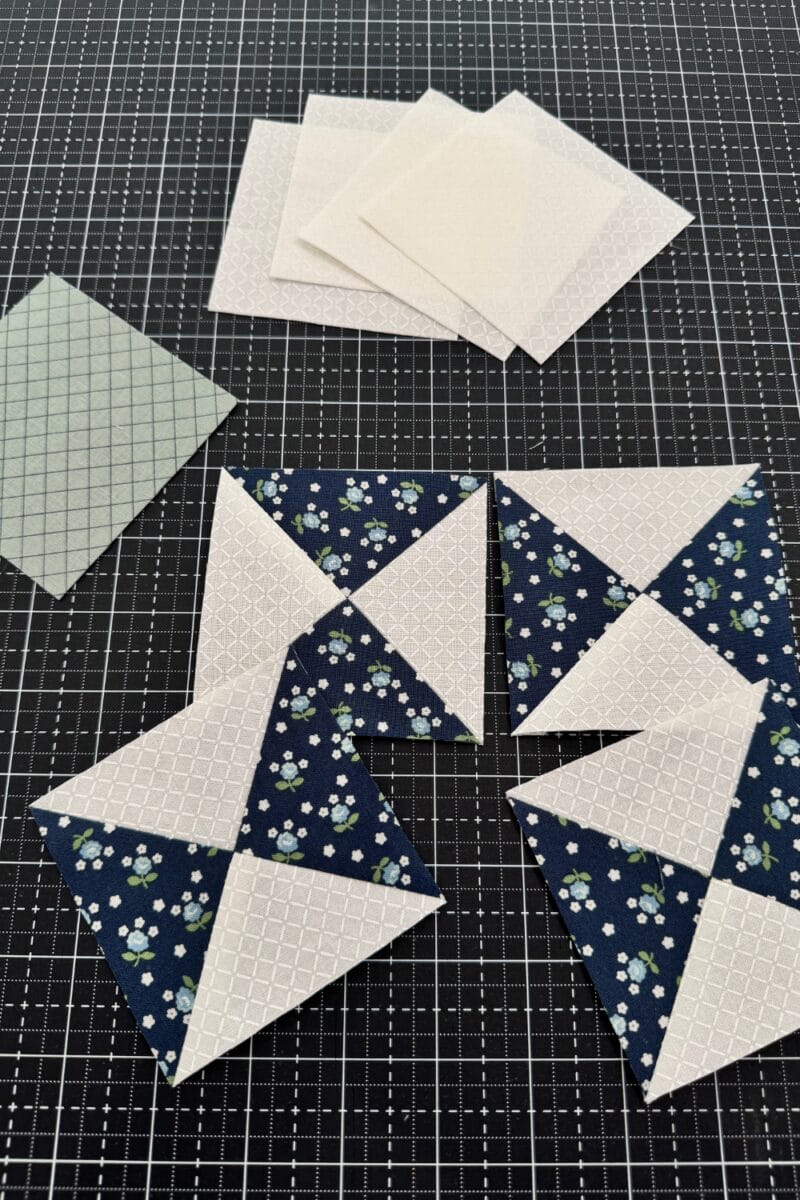
Trim each Hourglass Block to the size listed in the cutting chart.
For the 9″ Ohio Star I’m making here, each Hourglass Block should measure 3 1/2″ square.
Step 2: Lay Out the Ohio Star
Once your four Hourglass Blocks are finished, the Ohio Star comes together very quickly.
Arrange your nine units into three rows.
Place the four background squares in the corners.
Put your center square in the middle.
Position one Hourglass Block on each side of the center square, rotating them so the star fabric creates the points of the Ohio Star.
Take a second to look at the entire block before sewing anything together.
Make sure all four Hourglass Blocks are turned in the correct direction.
It’s surprisingly easy to rotate one.
And discovering that before you sew the block together is considerably more enjoyable than discovering it afterward.
Step 3: Sew the Ohio Star Into Rows
Sew the three units in each row together using an accurate 1/4″ seam allowance.
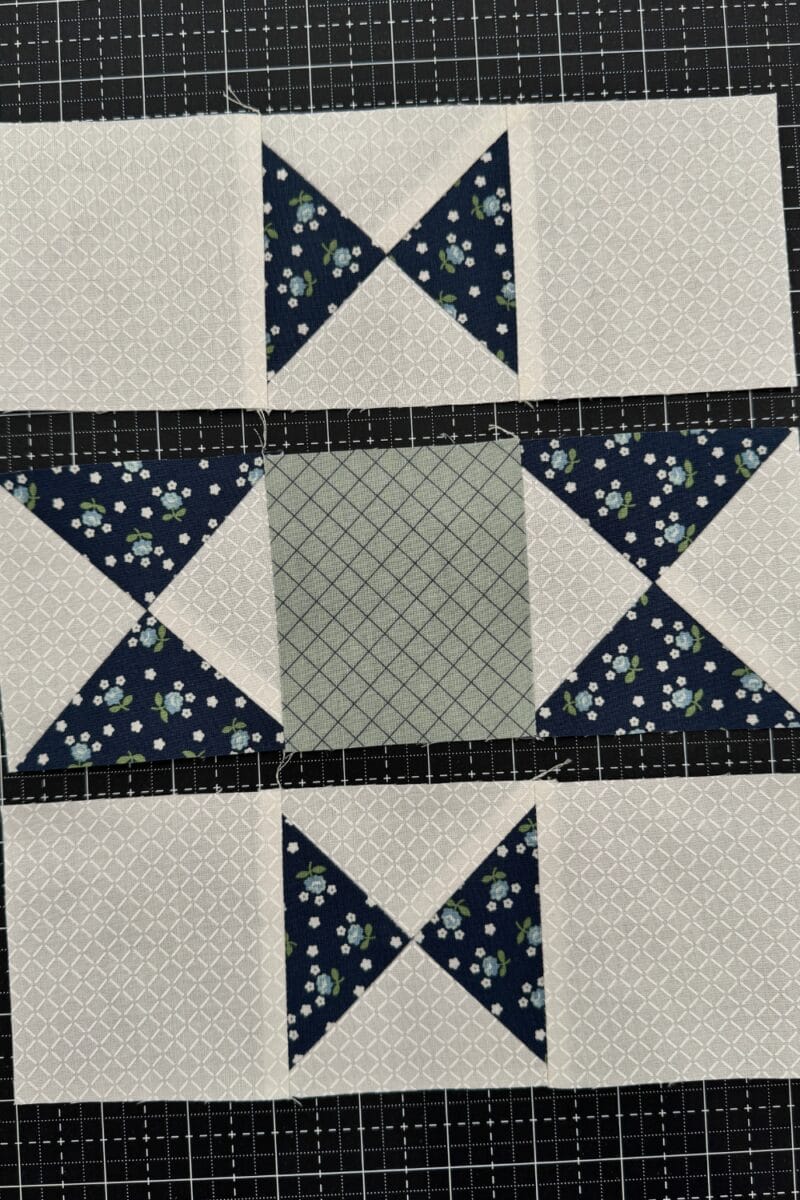
Press the seams.
Whenever possible, I like to press neighboring rows in opposite directions. That allows the seams to nest when the rows are joined.
Those nested seams help the intersections line up and almost lock into place.
If matching seams is something you struggle with, I have a complete tutorial that goes into more detail about getting those intersections to line up.
Step 4: Join the Rows
Place the top and middle rows right sides together.
Match the seam intersections and pin if needed.
Sew the rows together using a 1/4″ seam allowance.
Repeat to attach the bottom row.
Press the finished block.
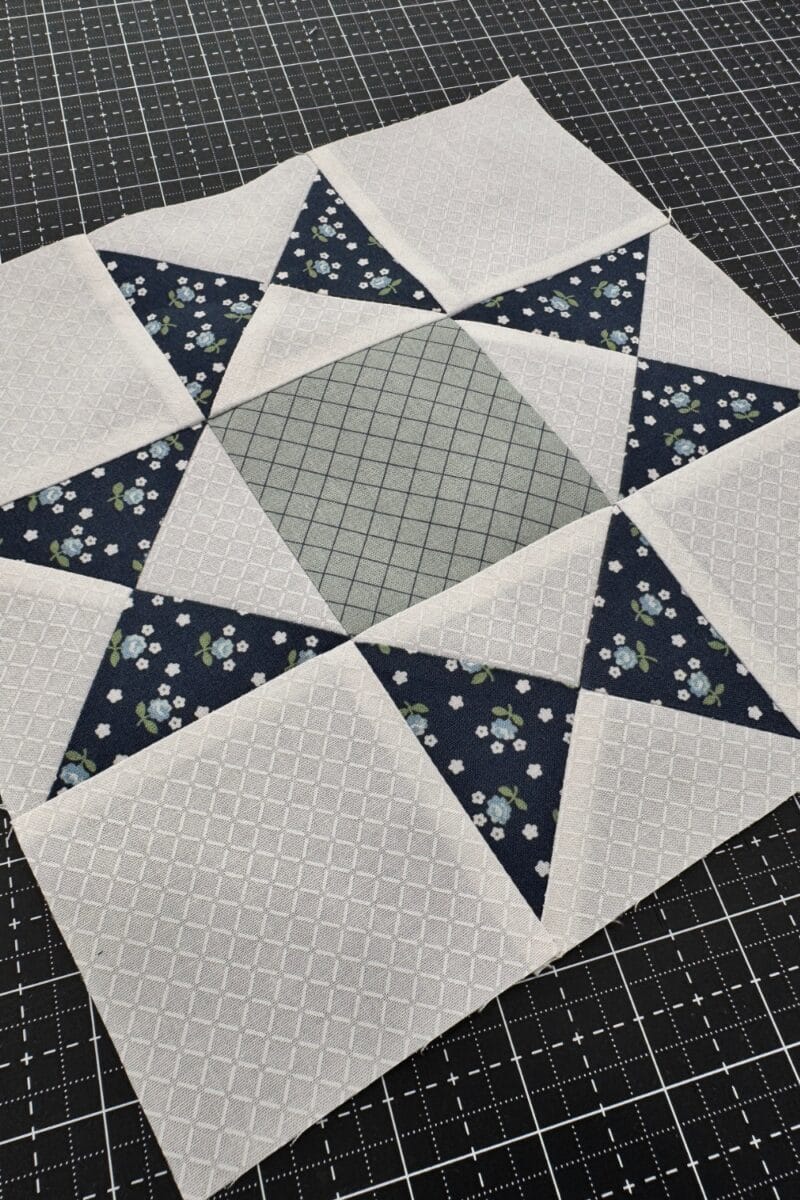
Step 5: Check Your Finished Ohio Star
Your unfinished Ohio Star should measure:
- 6 1/2″ for a 6″ finished block
- 9 1/2″ for a 9″ finished block
- 12 1/2″ for a 12″ finished block
While you’re checking the size of the block, look at the outside star points.
You should have approximately 1/4″ of background fabric beyond the tip of each star point.
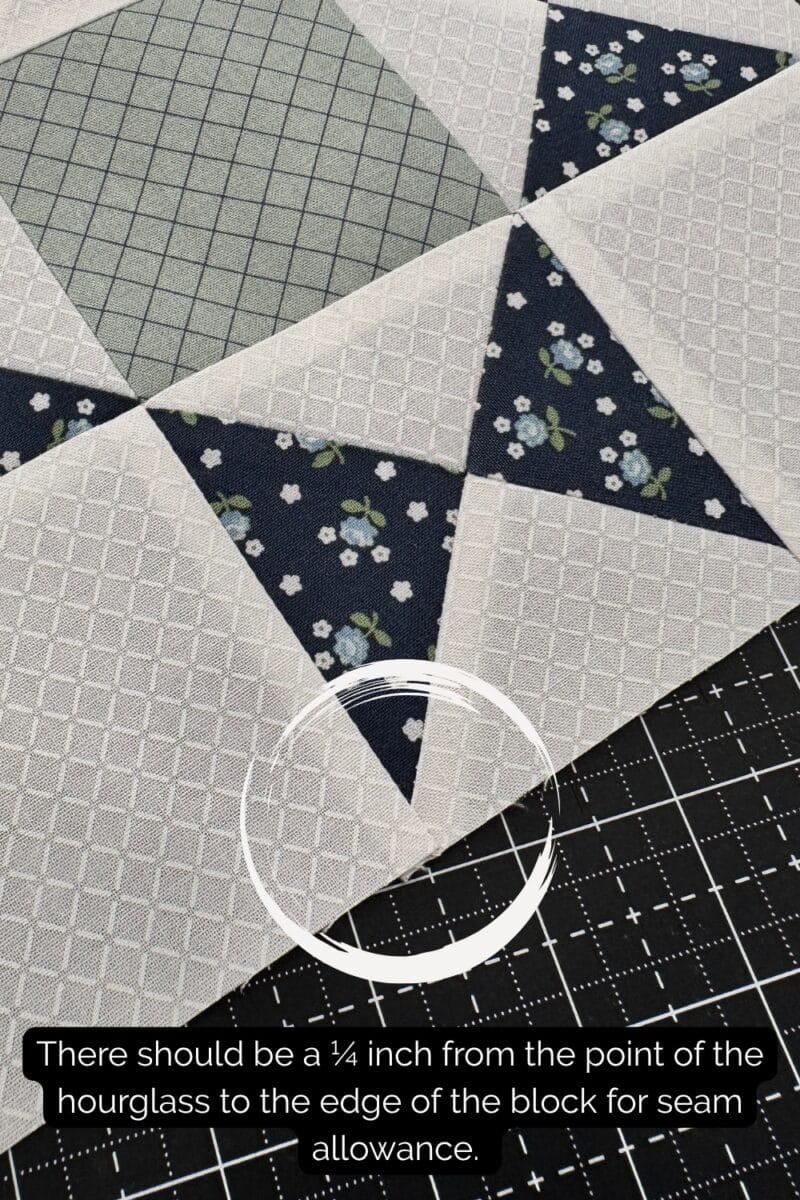
That little bit of fabric is important.
The star points aren’t supposed to extend all the way to the raw edge of the block. That 1/4″ becomes your seam allowance when the Ohio Star is eventually sewn into a quilt.
If the point already reaches the raw edge, there’s a good chance you’ll lose the tip when you sew the block to the next piece.
A few helpful tips
Changing the Look of an Ohio Star
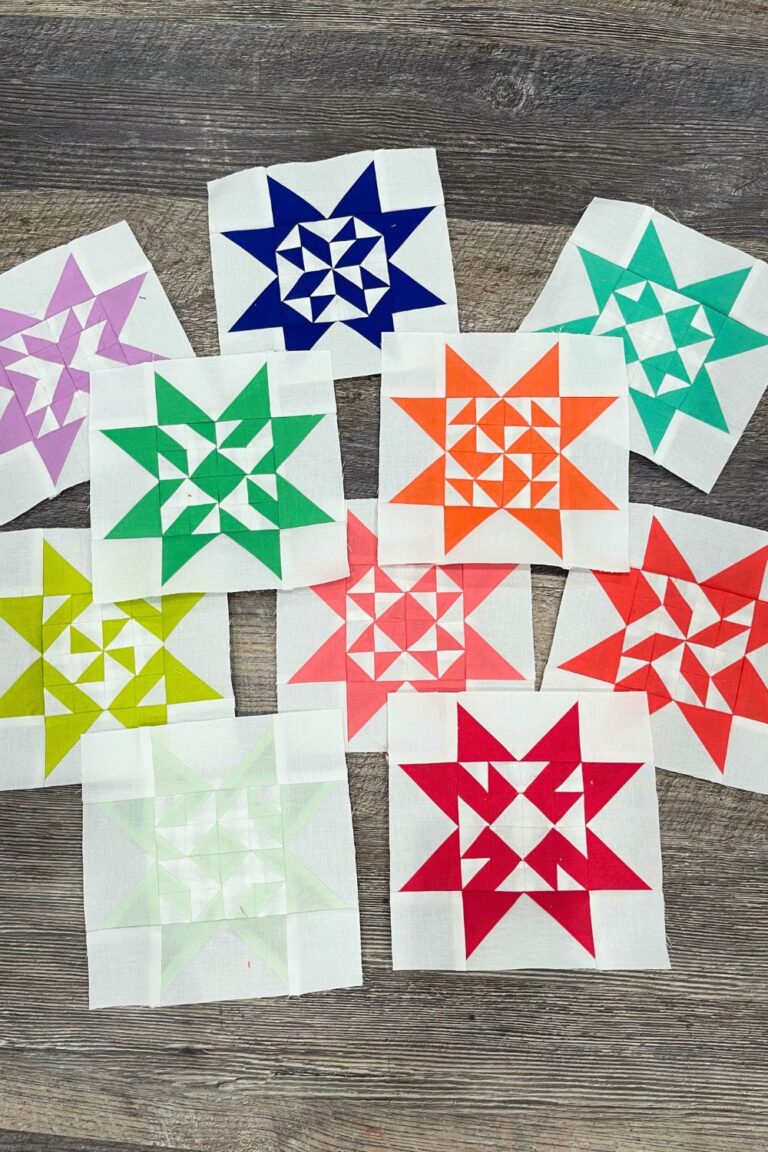
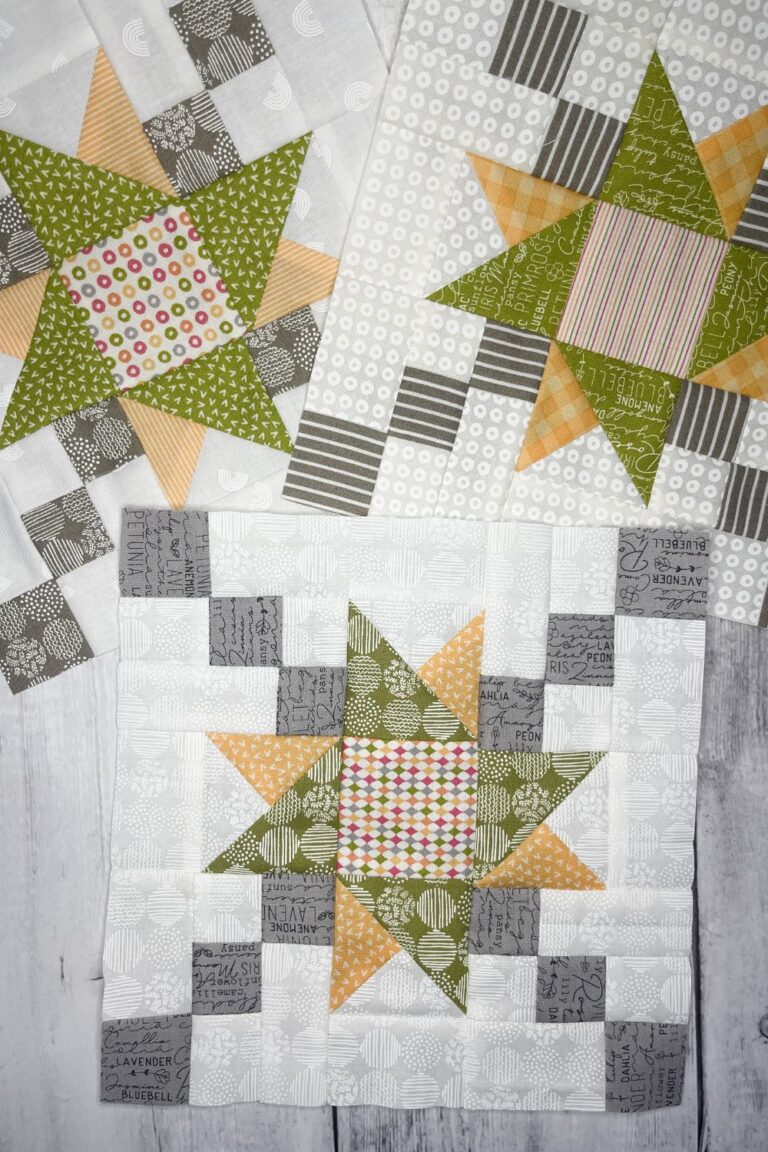
A traditional two-color Ohio Star makes the shape of the block easy to recognize, but changing the fabric placement can completely change its appearance.
Try using a third fabric for the center square.
Make each Hourglass Block from different scraps.
Reverse the values and make a light star against a dark background.
Use two different fabrics within the Hourglass Blocks.
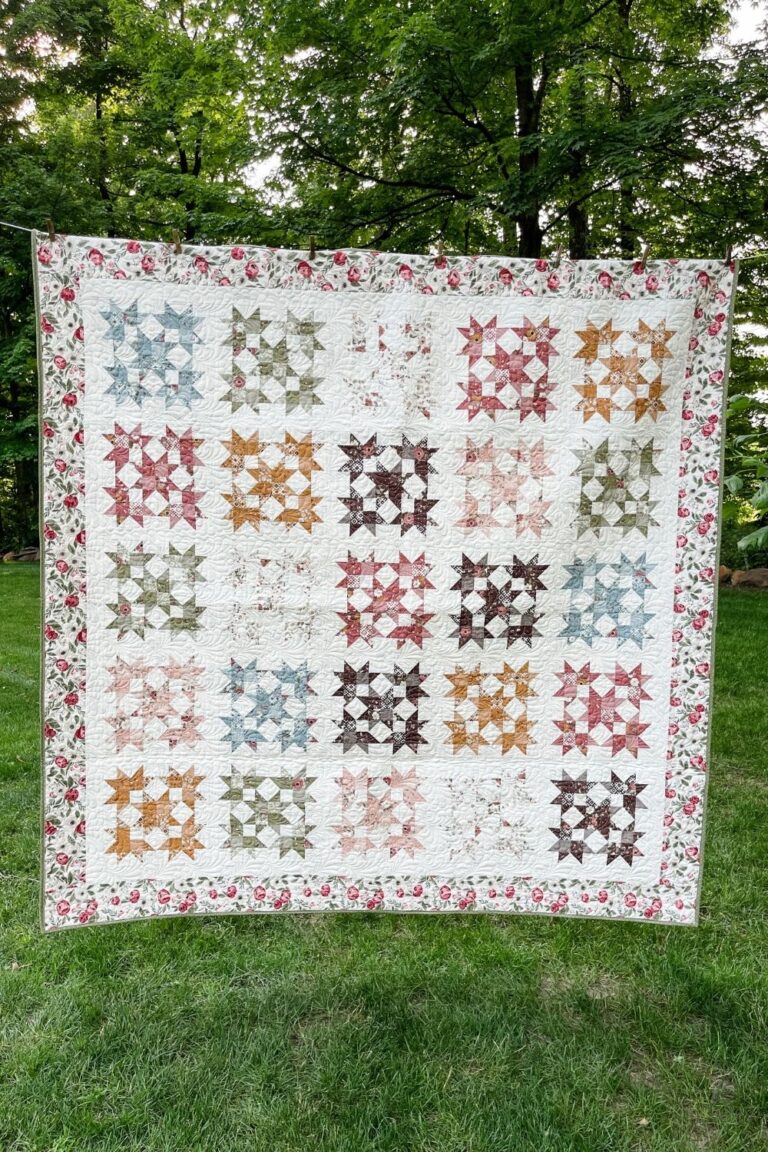
Or make an entire quilt from Ohio Stars using the same block construction but different fabric combinations.
That’s one of my favorite things about traditional quilt blocks.
The construction gives you a framework, but your fabric and color choices can make the exact same block feel traditional, modern, scrappy, bold, or completely different from the one sitting next to it.
Make Your Own Ohio Star Quilt Block
The Ohio Star is a great traditional block to add to your quilting toolbox, whether you’re making one for a sampler or an entire quilt filled with stars.
If you’re newer to making Hourglass Blocks, I’d start with the 12″ Ohio Star. The larger pieces are easy to handle and give you plenty of room to practice trimming and matching those intersections.
Once you’re comfortable with the construction, try the 9″ or 6″ version—or start changing the fabric placement and see just how different the same block can look.
And if those Hourglass Blocks don’t come out perfectly sized straight from the sewing machine?
That’s why we made them oversized.
Grab your ruler, trim them up, and keep going.
Happy quilting!